
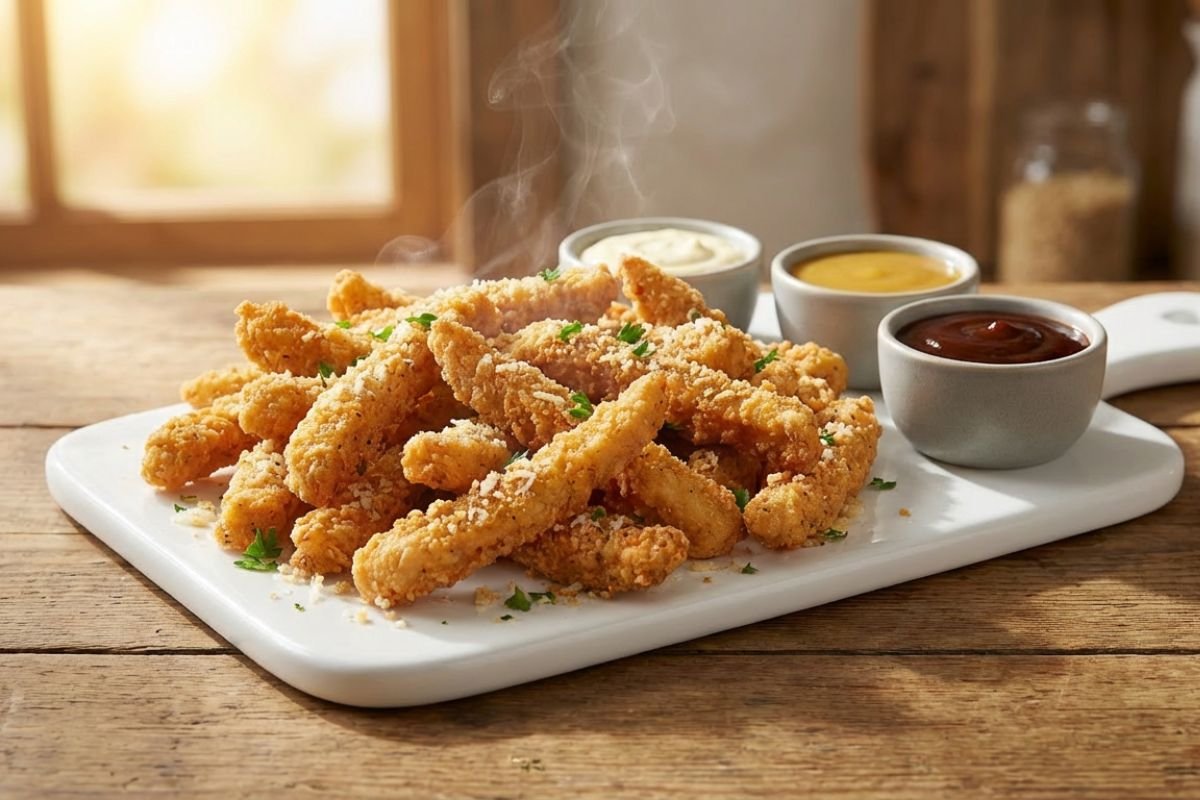
Best Fried Chicken Fries Recipe (Crispy & Better Than Burger King)
Table of Contents
Fried Chicken Fries Recipe (Crispy & Better Than BK!)
This fried chicken fries recipe is even better than Burger King! These crispy fried chicken fries are perfectly golden on the outside and juicy inside. This easy chicken fries recipe uses simple ingredients and is ready in just 30 minutes.
Whether you prefer air fryer, oven baking, or classic frying – this homemade fried chicken fries recipe delivers restaurant-quality results every time! Learn how to make the best chicken fries with this step-by-step guide, complete with pro tips and delicious dipping sauces.
Listen, I get it – you’ve had Burger King’s version and thought “I need these in my life.” Well, here’s the good news: you can make them at home, and honestly? They’re even better than the original.
These homemade crispy chicken fries are crispier, juicier, and you know exactly what’s in them. Plus, you can make them whenever the craving hits – no drive-thru required! I’ve tested this chicken fries recipe probably 50 times (not exaggerating), and I finally got it perfect.
Why This Fried Chicken Fries Recipe Works
This fried chicken fries recipe isn’t just another copycat attempt – it’s genuinely better than what you’d get at fast food restaurants. Here’s why this chicken fries recipe stands out:
The secret is in the coating. Unlike typical versions, we use a special three-step breading process with panko breadcrumbs. This creates those crispy chicken fries with that shatteringly crisp exterior everyone loves. I mean, when you bite into one, you should hear that satisfying crunch.
Restaurant quality at home. After making these for family gatherings, barbecues, and regular weeknight dinners, I can confidently say: these rival any restaurant version. The coating stays extra crispy for way longer than fast food versions, and the inside? So much juicier.
Three cooking methods that actually work. Whether you’re team deep-fry (maximum crispiness), team air fryer (healthier option), or team oven (easiest cleanup) – all three methods deliver amazing results. I’ve tested each one multiple times, and honestly, they’re all winners. Just pick what works for your kitchen!
Budget-friendly and customizable. Making them at home costs about $0.50 per serving versus $0.70+ at restaurants. Plus, you control the seasoning – want them spicier? Go for it! Prefer garlic parmesan? Easy! Your kitchen, your rules.
No weird ingredients. Just real chicken, real seasonings, and real breadcrumbs. No preservatives, no mystery ingredients, no nonsense. When I look at the ingredient list on store-bought versions, half the words I can’t even pronounce. Not with this fried chicken fries recipe.
Ready in 30-45 minutes total. From start to finish, including prep time, you’ll have hot, crispy chicken fries ready in under an hour. Most of that is hands-off time (freezing and cooking), so you can prep other things while they’re chilling.
Chicken Fries Recipe – Ingredients
Let’s talk ingredients – and here’s the cool part: you probably have most of these already for this chicken fries recipe!
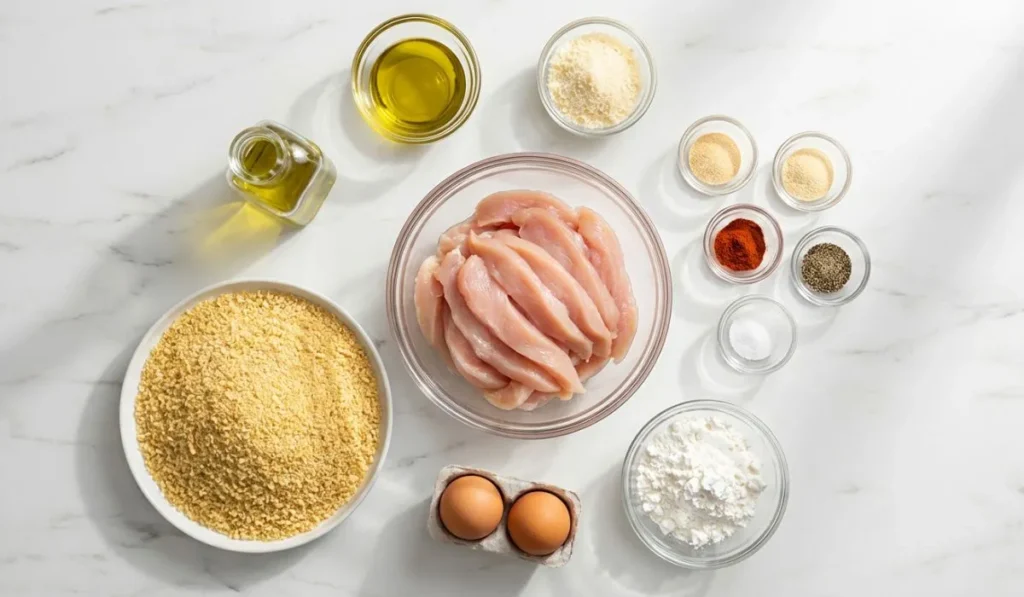
Main Ingredients
For the chicken:
- 1 lb ground chicken (or 2 large chicken breasts if you prefer strips – both work great!)
- 1 tablespoon olive oil – this keeps them moist inside
- 1/2 cup grated parmesan cheese – secret ingredient alert! This adds amazing flavor
- 1 teaspoon garlic powder
- 1 teaspoon onion powder
- 1/2 teaspoon paprika – adds a subtle smoky note
- 1/2 teaspoon salt
- 1/4 teaspoon black pepper
For the crispy coating:
- 1/3 cup cornstarch – creates that extra-crispy barrier
- 1/2 teaspoon paprika
- Salt and pepper to taste
- 2 large eggs (beaten until smooth)
- 1-1.5 cups panko breadcrumbs – don’t substitute regular breadcrumbs here
- Avocado oil or vegetable oil for frying (enough for 1-2 inches in your pan)
Pro tip: I always buy ground chicken breast instead of ground dark meat – it’s leaner and tastes cleaner. But if you love dark meat, go for it! Your kitchen, your rules.
Quick Substitutions
Don’t have something? Here are swaps that actually work:
Chicken: Ground chicken creates uniform shapes and is easier to work with for this chicken fries recipe. Chicken breast strips offer a more traditional texture. Both are delicious – I’ve made this chicken fries recipe both ways dozens of times.
Breadcrumbs: Panko is king for crispiness, but if you must substitute, use Italian-seasoned breadcrumbs (just reduce the other seasonings a bit). Crushed cornflakes also work in a pinch and add extra crunch!
Oil: Any high-smoke-point oil works – avocado, peanut, vegetable, or canola. Avoid olive oil for frying (smoke point too low). I prefer avocado oil for its neutral flavor and health benefits, but vegetable oil is the budget-friendly winner.
Cheese: No parmesan? Try pecorino romano (saltier, so reduce salt) or shredded cheddar (different flavor but still good). In a pinch, skip it – they’ll still be crispy, just less flavorful.
Gluten-free: Swap panko for gluten-free breadcrumbs or crushed gluten-free crackers. Replace cornstarch with rice flour. The texture is slightly different but still totally delicious.
Egg-free: Use buttermilk instead of eggs for the wet coating. Creates excellent adhesion and adds a tangy flavor. Aquafaba (chickpea liquid) also works surprisingly well!
How to Make Fried Chicken Fries – Step by Step
Alright, let’s make some amazing fried chicken fries using this fried chicken fries recipe! This is easier than you think. Total time: about 45 minutes, but most of that is hands-off.
Step 1: Prepare the Chicken (10 minutes + 20-30 minutes freezing)
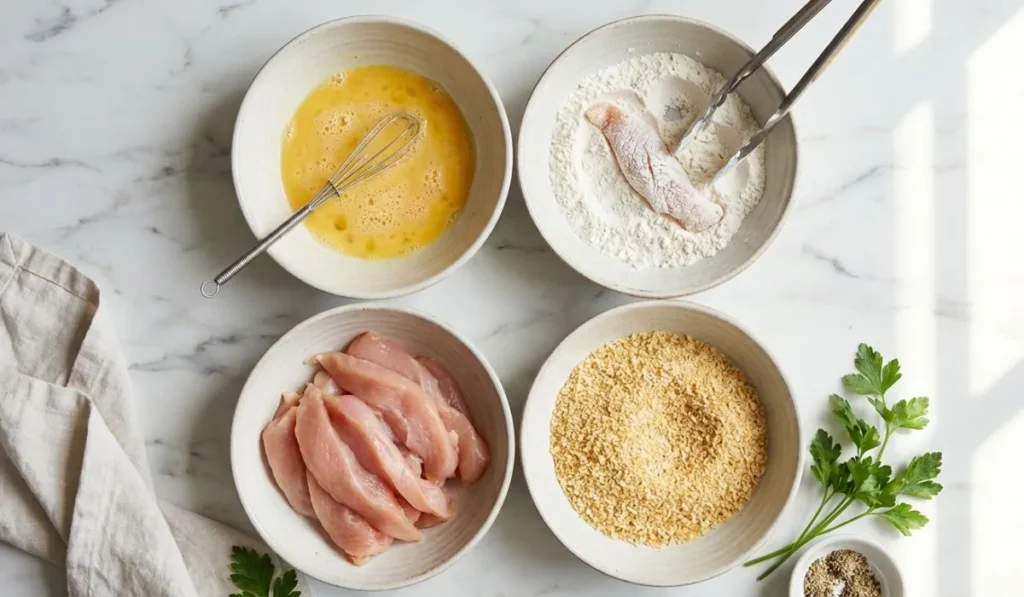
If using ground chicken:
Grab a large bowl and add your ground chicken. Toss in the garlic powder, onion powder, paprika, salt, and black pepper. Add that tablespoon of olive oil and the grated parmesan cheese.
Now here’s the trick: mix it with your hands (wet them first so nothing sticks). You want everything evenly distributed – no chunks of straight seasoning hiding in there!
Wet your hands again (seriously, this matters), then grab about 2 tablespoons of the mixture. Roll it between your palms into a log shape – about 4-5 inches long and as thick as your finger (roughly 1/4 to 1/2 inch diameter).
Don’t stress about perfect shapes – mine are never identical, and they still taste amazing! You should get about 15-16 pieces from this batch.
Line a baking sheet with parchment paper, lay out your pieces, and pop them in the freezer for 20-30 minutes.
“Do I really have to freeze them?”
YES! This is non-negotiable. When I first tested this fried chicken fries recipe, I skipped this step and they fell apart in the oil. Total disaster. The freezing firms them up so they hold their shape perfectly while frying. Trust me on this one.
If using chicken breast strips:
Cut your chicken breasts into strips about 1/2 inch thick and 4-5 inches long. Think thick fries or steak fries – not super thin.
Pat them completely dry with paper towels. This is crucial! Any moisture equals soggy coating. I usually press each strip between paper towels for a few seconds.
Season with salt, pepper, and garlic powder. Let them rest for 10 minutes while you set up your breading station. You can skip the freezing step with chicken breast strips since they hold their shape naturally.
Step 2: Setup Your Breading Station (5 minutes)
While those pieces are chilling in the freezer, let’s get our three-plate system ready. This is the assembly line that creates magic.
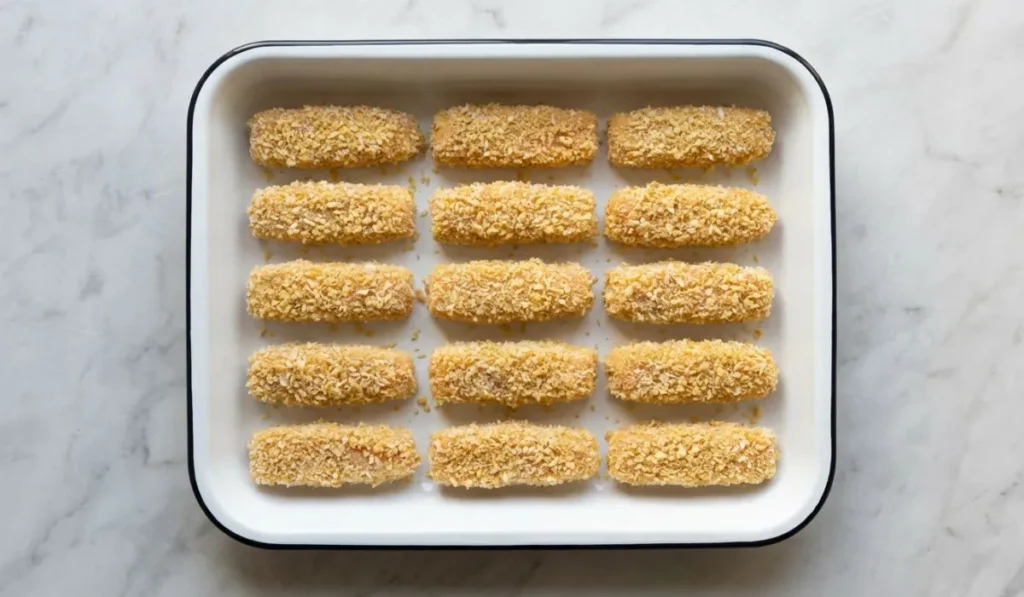
Plate 1 – The Dry Mix:
Mix cornstarch, paprika, salt, and black pepper. This is your first coat – it helps the egg stick and creates an extra-crispy base layer.
Plate 2 – The Egg Wash:
Beat 2 eggs until smooth. No lumps! This is the glue that makes everything stick together.
Plate 3 – The Panko:
Pour out those panko breadcrumbs. This is where the magic happens – panko creates those airy, crispy pockets that make restaurant-style results so addictive.
Pro tip: Line them up left to right – it makes the assembly line way smoother. Use one hand for dry ingredients, one for wet. Your future self will thank you when your hands aren’t completely gunked up!
Step 3: Bread the Chicken Fries (10 minutes)
Time to coat those beauties! Take your firm, frozen pieces (or your rested chicken strips) and let’s bread them.
The process:
- Roll in cornstarch mixture – coat all sides, then shake off any excess. You want a light dusting, not a flour snowstorm.
- Dip in beaten egg – let the excess drip off for a second or two. Too much egg equals gloppy coating.
- Press into panko breadcrumbs – and I mean really press. Use your palms to firmly pack that panko onto the chicken. This ensures it won’t fall off during frying.
- Place on a clean tray and repeat for all pieces.
Here’s what you want to see: a thick, even coating all around, no bare spots. If you see chicken peeking through, do another quick pass through the egg and panko. Better safe than sorry!
Let them rest for 10 minutes before frying. I know you’re excited (I always am too!), but this little wait makes the coating stick way better. The breading needs time to “set” and bond with the protein.
Quick test: Touch the coating gently – it should feel dry to the touch, not wet or sticky.
Step 4: Fry to Golden Perfection (15-20 minutes)
Okay, time to fry! This is where your fried chicken fries come to life.
Heat about 1-2 inches of oil in your largest, heaviest skillet. I use a cast-iron skillet – it holds heat like a champ and gives the most consistent results. But any large skillet works!
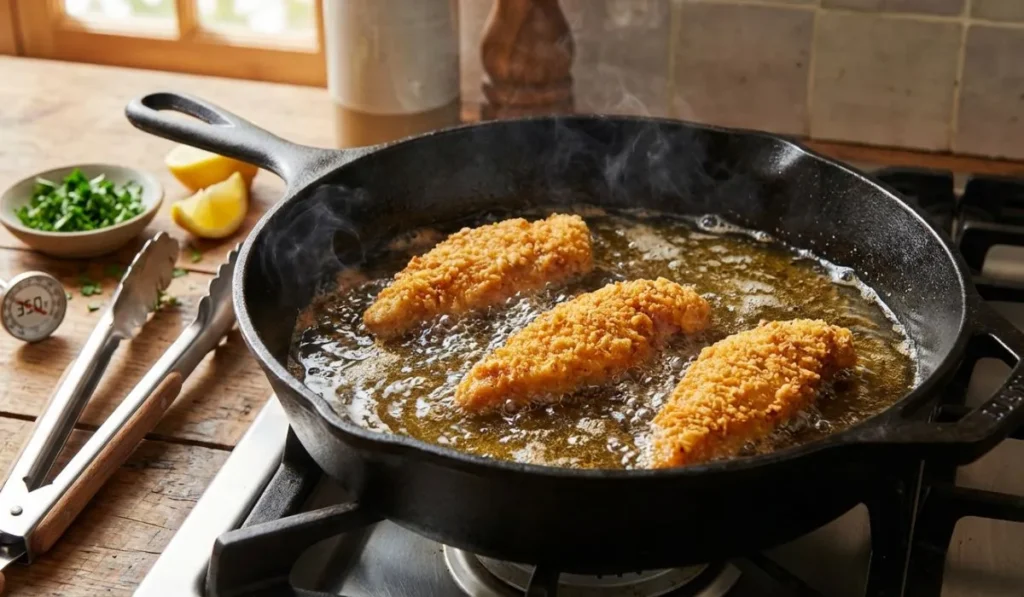
Turn the heat to medium-high and clip on your thermometer. Watch it climb to 350°F – this is crucial, so don’t skip the thermometer! Too hot (over 375°F) and the coating burns before the inside cooks. Too cold (under 325°F) and you get greasy, soggy results. Sweet spot: 350°F.
Now the fun part: Gently slide 2-3 pieces into that hot oil. You’ll hear an immediate sizzle – that’s exactly what you want! If you don’t hear sizzling, your oil isn’t hot enough.
Don’t touch them for at least a minute – I know you want to, but let that coating set! Resist the urge to poke or flip right away.
After a minute, use tongs to gently turn them. They should already have a light golden color on the bottom. That’s your cue that the oil temperature is perfect.
Cook for about 2-3 minutes total per side, watching for that beautiful deep golden color. They should look like perfectly cooked french fries, that gorgeous amber-gold. Not pale yellow (undercooked), not dark brown (overcooked), but that sweet spot in between.
Temperature check: If you want to be extra sure, use an instant-read thermometer – 165°F internal temperature is what you’re looking for. But honestly, once you’ve made these a few times, you’ll know by the color.
Once they’re done, use your tongs to lift them out and place them on a wire rack set over a baking sheet. Why not paper towels? Because that traps steam underneath and makes the bottom soggy. Wire rack equals maximum crispiness all around!
Season immediately with a little sprinkle of salt while they’re still hot. This is when the magic happens – that salt sticks to the hot oil residue and seasons them perfectly.
Repeat the process with remaining pieces, always making sure your oil temperature stays around 350°F between batches. If it drops too much, wait for it to come back up before adding more.
3 Cooking Methods – Which is Best?
Here’s the thing: all three methods make great results when following this chicken fries recipe. I’ve tested deep frying, air frying, and oven baking dozens of times each. Let me break down when to use each method for this chicken fries recipe.
Method 1: Deep Frying (Most Crispy)
This is the classic method that gives you maximum crispiness for your fried chicken fries.
The process:
Heat oil to 350°F in a large skillet. Add 2-3 pieces at a time – don’t overcrowd! Fry for 2-3 minutes per side until deep golden brown. Drain on a wire rack.
When I use it: When I want the absolute crispiest results and I’m not worried about oil usage. Birthday parties, game day, special occasions – this is my go-to method.
Results:
- Crispiness: Maximum (5 out of 5)
- Health: 2 out of 5 (it’s fried, let’s be honest)
- Ease: 3 out of 5 (requires attention)
- Time: 6-8 minutes per batch
- Best for: When you want the crispiest possible results and aren’t worried about calories
Method 2: Air Fryer (Healthiest)
This method gives you crispy chicken fries with 75% less oil than deep frying when using this chicken fries recipe.
The process:
Preheat air fryer to 380°F. Spray basket with cooking spray. Arrange pieces in a single layer (don’t overlap!). Spray lightly with oil. Cook for 10-12 minutes, flipping halfway through. Spray the second side after flipping.
When I use it: Weeknight dinners when I want that fried taste without the guilt. Also great for meal prep – I can make a big batch easily.
The results are honestly impressive. You get about 85-90% of the crispiness of deep-fried, but with way less oil. The texture is slightly different – still crunchy, just not quite as shattery as deep-fried. But for the health trade-off? Totally worth it.
Results:
- Crispiness: 4 out of 5 (surprisingly close to deep-fried!)
- Health: 5 out of 5 (minimal oil)
- Ease: 5 out of 5 (set it and forget it)
- Time: 10-12 minutes total
- Best for: Weeknight dinners when you want crispy results without the guilt
Method 3: Oven Baking (Easiest)
This is the hands-off method for this chicken fries recipe – perfect when you’re making large batches of fried chicken fries.
The process:
Preheat oven to 425°F. Line a baking sheet with parchment paper. Arrange breaded pieces in a single layer. Spray generously with cooking spray (don’t skip this!). Bake for 20-25 minutes, flipping at the 12-minute mark. Spray the second side. Optional: Broil for 1-2 minutes at the end for extra crisp.
When I use it: When I’m feeding a crowd or doing meal prep for the week. I can fit way more in the oven than I can fry at once.
The texture is good – crispy outside, tender inside – but it’s not quite as crunchy as fried or air-fried. Think “really good baked chicken” versus “fried perfection.” Still delicious, just different.
Results:
- Crispiness: 3 out of 5 (good, not amazing)
- Health: 5 out of 5 (minimal oil)
- Ease: 4 out of 5 (hands-off cooking)
- Time: 20-25 minutes total
- Best for: Making large batches with minimal effort
Quick Comparison Table
| Method | Time | Crispiness | Health | Best For |
| Deep Fry | 6-8 min | Maximum (5/5) | 2/5 | Maximum Crunch |
| Air Fryer | 10-12 min | 4/5 | 5/5 | Healthy & Crispy |
| Oven | 20-25 min | 3/5 | 5/5 | Large Batches |
My recommendation? If you’re new to this fried chicken fries recipe, start with deep frying to experience them at their absolute best. Then try air fryer for weeknight cooking. Save oven baking for when you’re feeding a group.
Love oven-baked chicken? Try our crispy oven-baked chicken wings recipe – they’re incredibly delicious!
5 Best Dipping Sauces
The right dipping sauce makes chicken fries even better. Here are my five favorites that I serve every single time with these crispy chicken fries:
1. Garlic Aioli (My personal favorite)
Mix 1/2 cup mayo with 2 cloves of roasted garlic (or 1 tsp garlic powder if you’re in a hurry), 1 tablespoon lemon juice, and a pinch of salt. The creamy, garlicky flavor is absolutely perfect with the crispy coating. I make a double batch because it disappears fast!
2. Honey Mustard
Whisk together 1/4 cup honey, 1/4 cup Dijon mustard, 2 tablespoons mayo, and 1 teaspoon lemon juice. Sweet, tangy, and ridiculously addictive. Kids especially love this one – it’s mildly flavored but so good.
3. Spicy Ranch
Combine 1/2 cup ranch dressing with 2 tablespoons sriracha sauce and 1 teaspoon garlic powder. Add fresh dill if you have it. The cooling ranch with that spicy kick? Chef’s kiss. Not too spicy, just enough heat to keep things interesting.
4. BBQ Sauce
You can use store-bought (no judgment!), but if you want to make it: mix 1 cup ketchup, 1/4 cup brown sugar, 2 tablespoons apple cider vinegar, 1 teaspoon liquid smoke, and 1 teaspoon paprika. Simmer for 5 minutes. Smoky, sweet, classic perfection for this chicken fries recipe.
5. Sweet Chili Mayo
Mix 1/2 cup mayo with 3 tablespoons sweet chili sauce, 1 teaspoon lime juice, and a pinch of red pepper flakes. This has that Asian-inspired sweet-heat thing going on. Completely different from the others and adds nice variety.
Pro tip: Make all five sauces and let everyone pick their favorite! I set them out in small bowls and it becomes this fun tasting experience. Your guests will love having options.
Flavor Variations
Once you’ve mastered the basic fried chicken fries recipe, try these three flavor twists. Each one is completely different and equally delicious.
Classic Seasoned
This is your baseline – salt, pepper, garlic powder, onion powder, and paprika. It’s what I described in the main recipe above. Perfect for first-timers or when you want that clean, simple chicken flavor. Great for picky eaters too! Pair it with any of the five sauces above.
Spicy Buffalo Style
Add 2 tablespoons of hot sauce to your egg wash, then mix 1 teaspoon cayenne pepper into the panko breadcrumbs. After frying, toss the hot pieces in buffalo sauce (Frank’s RedHot mixed with melted butter, 1:1 ratio). Serve with blue cheese dip and celery sticks.
This version is for heat lovers! The spice builds with each bite. I make these for game day and they’re always the first thing to disappear. Fair warning: have drinks ready – they pack some heat!
Garlic Parmesan
Double the parmesan in the chicken mixture (use 1 cup instead of 1/2 cup), add 2 teaspoons garlic powder, and toss the fried pieces in melted garlic butter right after cooking. Sprinkle with freshly grated parmesan on top.
This is my wife’s absolute favorite variation. The garlic-cheese combination is ridiculously good. It’s rich, savory, and has that Italian restaurant vibe. Serve these with marinara sauce for dipping – trust me on this unexpected combo!
Pro Tips for Extra Crispy Results
After making this fried chicken fries recipe countless times, here are my top five secrets for getting them extra crispy every single time.
1. Pat everything completely dry
Moisture is the enemy of crispiness. Whether you’re using ground chicken or strips, make sure there’s zero excess water. I use paper towels to really press and dry the chicken before seasoning. This one step makes a huge difference.
2. Use panko, not regular breadcrumbs
I cannot stress this enough! Regular breadcrumbs create a dense, compact coating. Panko creates those beautiful, airy pockets that shatter when you bite into them. It’s the difference between “good” and “restaurant-quality crazy crispy.” Don’t skip this!
3. Maintain that 350°F temperature
Get yourself a cheap fry thermometer – it’s like $10 and it’s a game changer. Too hot burns the outside before cooking the inside. Too cold makes them greasy and soggy. 350°F is the sweet spot where magic happens. Monitor it constantly and adjust your heat as needed.
4. Never overcrowd the pan
I know it’s tempting to speed things up by adding more pieces at once. Don’t do it! Overcrowding drops the oil temperature dramatically, and you end up with soggy, greasy results instead of crispy chicken fries. Be patient. Fry in small batches. The wait is worth it.
5. Use a wire rack, not paper towels
This is a chef secret that changed my fried food game forever. Paper towels trap steam underneath, making the bottom soggy. A wire rack lets air circulate all around, keeping every side crispy. I bought a cheap cooling rack just for this purpose and it’s one of my most-used tools now.
Storage & Reheating
You’ll probably have leftover results from this chicken fries recipe (or you might meal prep a big batch). Here’s how to store and reheat them while keeping them delicious.
Refrigerator storage (3-4 days):
Let them cool completely first – never stack hot pieces or they’ll steam and get soggy. Once cool, place them in an airtight container with parchment paper between layers if you’re stacking. They’ll keep in the fridge for 3-4 days. The coating might soften a bit, but reheating fixes that!
Freezer storage (up to 3 months):
You have two options here, and both work great:
Option 1 – Freeze cooked: Let them cool completely, then freeze on a baking sheet for an hour (flash freezing). Transfer to a freezer bag. They’ll keep for 1-2 months. Reheat from frozen using the methods below.
Option 2 – Freeze uncooked breaded: This is actually my preferred method! Bread them completely, freeze on a tray for an hour, then transfer to a freezer bag. They’ll keep for up to 3 months. When ready to cook, fry them straight from frozen – just add 2-3 minutes to the cooking time. The texture is basically identical to fresh!
Reheating methods:
Air fryer (best method): 350°F for 5-7 minutes. This brings back about 90% of the original crispiness. Honestly, reheated in the air fryer, they’re almost as good as fresh!
Oven: Preheat to 400°F. Place on a wire rack over a baking sheet. Bake for 8-10 minutes. Good results, though not quite as crispy as air fryer.
Never microwave! Seriously, just don’t. Microwaving makes them soggy and rubbery. Even eating them cold from the fridge is better than microwaving them!
Homemade vs Burger King – Honest Comparison
Let’s talk about the elephant in the room: how do homemade versions from this fried chicken fries recipe actually compare to Burger King? I’ve bought BK chicken fries specifically to do side-by-side comparisons (yes, I’m that dedicated to perfecting this chicken fries recipe), and here’s what I found.
Comparison Table
| Feature | Homemade | Burger King |
| Taste | Fresh, customizable, clean chicken flavor | Decent but standard, processed taste |
| Crispiness | Extra crispy, stays crisp longer | Crispy when fresh, softens quickly |
| Size | Thicker, meatier (more chicken) | Thinner, more breading-to-chicken ratio |
| Price | ~$0.50 per piece ($8-10 for 20 pieces) | ~$0.70 per piece ($5 for 9 pieces) |
| Time | 45 minutes total | 5 minutes (drive-thru) |
| Customization | Infinite! (seasonings, sauces) | One flavor only |
Homemade wins on:
- Taste and freshness (real chicken, no preservatives)
- Crispiness (panko coating is superior)
- Value (more chicken per dollar)
- Thickness (meatier, more satisfying)
- Customization (make them your way)
BK wins on:
- Convenience (no cooking required)
- Speed (5 minutes vs 45 minutes)
The honest verdict: If you have 30-45 minutes, homemade is absolutely worth it. You get better taste, more actual chicken, and significant savings. Plus, you can make them exactly how you like them. But BK is still king for convenience when you need food NOW and don’t want to cook.
I’d say: Make a big batch of this chicken fries recipe on Sunday, freeze half, and you’ve got that BK convenience whenever you want it!
Frequently Asked Questions
Can I use chicken breast instead of ground chicken?
Absolutely! Cut chicken breast into 1/2-inch thick strips, 4-5 inches long. Pat completely dry, season, and bread as directed. Cooking time stays the same. Ground chicken is easier to shape, chicken breast offers that traditional strip texture. I honestly love both – just depends on my mood!
How do I make them extra crispy?
Five key tips: (1) Pat chicken completely dry before starting, (2) Use panko breadcrumbs (never regular), (3) Maintain oil at exactly 350°F, (4) Don’t overcrowd your pan, and (5) Drain on a wire rack instead of paper towels. Follow all five and you’ll get restaurant-level crispy chicken fries every time.
Can I use an air fryer for this chicken fries recipe?
Yes! Preheat air fryer to 380°F, arrange breaded pieces in a single layer, spray with cooking spray, and cook for 10-12 minutes, flipping halfway through. The results are 85-90% as crispy as deep-fried but with 75% less oil. Honestly, for weeknight cooking, air fryer is my preferred method now.
What are the best dipping sauces?
My top five: Garlic Aioli (creamy and garlicky – my personal favorite), Honey Mustard (sweet and tangy), Spicy Ranch (cooling with a kick), BBQ Sauce (smoky and sweet), and Sweet Chili Mayo (Asian-inspired). All five recipes are included above! Make them all and let people choose their favorite.
How do I reheat leftover chicken fries?
Best method: Air fryer at 350°F for 5-7 minutes. Brings back about 90% of the original crispiness. Second best: Oven at 400°F for 8-10 minutes on a wire rack. Never microwave – it makes them soggy and rubbery. Seriously, even eating them cold from the fridge is better than microwaving!
Can I freeze this chicken fries recipe?
Yes! Two options: (1) Freeze cooked pieces for 1-2 months – reheat from frozen, or (2) My preferred method: freeze uncooked breaded pieces for up to 3 months. Fry them straight from frozen, just add 2-3 minutes to cooking time. The texture is basically identical to fresh! This is perfect for meal prep.
How do homemade chicken fries compare to Burger King?
Homemade wins on taste (fresher, real chicken), crispiness (panko is superior), size (thicker and meatier), and value ($0.50 vs $0.70 per piece). BK wins on convenience (5 minutes vs 45 minutes). Taste-wise, homemade is genuinely better – no preservatives, thicker coating, more actual chicken. See the comparison table above for full details!
Conclusion
This fried chicken fries recipe delivers crispy, delicious results every time you make it. Whether deep-fried, air-fried, or baked, these homemade crispy chicken fries beat fast food in both taste and value.
Try all three cooking methods to find your favorite, experiment with different sauces, and enjoy restaurant-quality chicken fries at home. The best part? You can customize them exactly how you like them – spicier, cheesier, or keep it classic.
Ready to get cooking? Grab your ingredients and let’s make some amazing fried chicken fries that’ll make you forget all about the drive-thru!
One last thing: When you make this fried chicken fries recipe, take a photo and share your results! I love seeing people’s creations, and your version might inspire someone else to try this recipe. Happy frying!