
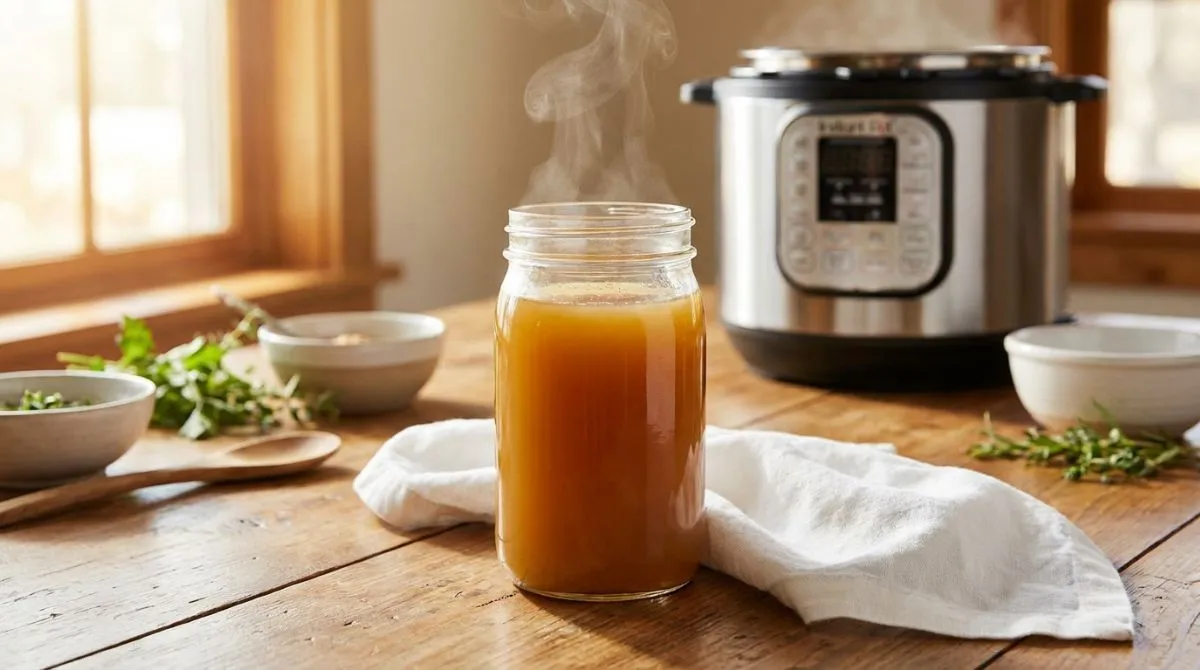
Instant Pot Chicken Bone Broth: Gelatin-Rich, Nutrient-Packed in Just 2 Hours
Table of Contents
Instant Pot Chicken Bone Broth: The Complete 2-Hour Guide (Gelatin-Rich & Foolproof)
Making nutritious, gelatin-rich Instant Pot Chicken Bone Broth has never been easier. If you’ve been intimidated by the traditional 12 to 24-hour cooking process, the Instant Pot changes everything. This modern kitchen appliance delivers restaurant-quality bone broth in just two hours, extracting maximum collagen, minerals, and flavor through the power of pressure cooking.
After testing this method over 30 batches, I’ve perfected the technique that consistently produces restaurant-quality, gelatin-rich broth every single time. Whether you’re seeking gut-healing properties, joint support, or simply a flavorful base for soups and sauces, this guide contains everything I’ve learned about making Instant Pot Chicken Bone Broth.
Quick Summary: Pressure cooking reduces traditional 24-hour bone broth to just 2 hours while maintaining the same nutritional benefits. You’ll learn the science behind why it works, get a complete recipe, and discover pro tips for gelatin-rich results.
What Is Chicken Bone Broth & Why Make It at Home?
Understanding what sets bone broth apart helps you appreciate the Instant Pot advantage.
The Difference Between Broth, Stock & Bone Broth
Regular Broth: Simmers 1-2 hours with meat and some bones. Light and flavorful but nutritionally thin.
Stock: Made with bones and meat, cooked 4-6 hours. Moderate gelatin extraction creates body for sauces.
Bone Broth: Requires 12-24 hours of traditional cooking to fully extract collagen, gelatin, minerals, and amino acids. When refrigerated, it solidifies into firm gel—the hallmark of proper bone broth.
The Instant Pot uses high pressure to achieve the same results in just 2 hours, making nutrient-dense bone broth accessible to busy households.
Why Homemade Is Better Than Store-Bought
Store-bought bone broth rarely matches homemade quality. Most commercial products are diluted, contain minimal gelatin, and cost $8-12 for just 2 cups—that’s $120-180 per month if consumed daily.
Homemade pressure cooker bone broth costs $3-5 per batch (8-10 cups) when using saved bones. You control ingredients, customize flavors, and ensure maximum gelatin content.
Why Instant Pot Is Best for Bone Broth
The question of which cooking method produces the best bone broth has sparked countless debates. Here’s a quick comparison to help you understand why pressure cooking has become the preferred choice:
Instant Pot vs Slow Cooker vs Stovetop: Quick Comparison
| Feature | Instant Pot | Slow Cooker | Stovetop |
| Cooking Time | 2 hours | 12-24 hours | 12-24 hours |
| Hands-On Time | 10 minutes | 10 minutes | 30+ minutes |
| Monitoring Required | None | Minimal | Constant |
| Energy Consumption | Low | Medium | High |
| Evaporation | None | Some | Significant |
| Convenience | Excellent | Good | Fair |
As you can see, pressure cooking offers the best balance of convenience, efficiency, and quality results.
Why Pressure Cooking Works
Inside a sealed Instant Pot, pressure builds to approximately 12 PSI, raising the boiling point to about 250°F (121°C). This higher temperature accelerates collagen breakdown and mineral extraction. The sealed environment preserves aromatic compounds and prevents evaporation, resulting in more concentrated, flavorful broth.
[Image: Comparison of gel texture between Instant Pot vs slow cooker bone broth – Alt text: “Instant Pot Chicken Bone Broth gelatin comparison showing firm gel texture”]
Health Benefits of Chicken Bone Broth
This nutrient-dense liquid has been valued in traditional cultures for centuries and may offer several health benefits.
This nutrient-dense liquid has been valued in traditional cultures for centuries. Research shows bone broth contains valuable nutrients including collagen, minerals, and amino acids.
Rich in Collagen & Gelatin
Collagen is the most abundant protein in the human body, providing structure to skin, hair, nails, bones, and the digestive tract. As we age, our bodies produce less collagen naturally—by about 1-2% per year after age 30.
Chicken bone broth provides collagen that transforms into gelatin during cooking. Many people report noticeable improvements in skin elasticity and joint comfort within a few weeks of regular consumption.
Potential Skin Benefits:
- May help reduce fine lines and wrinkles
- Can improve skin hydration
- Provides building blocks for natural collagen production
Potential Joint Benefits:
- May help maintain cartilage integrity
- Contains glucosamine and chondroitin compounds
- Many athletes report it helps with recovery
Potential Digestive Benefits:
- May help seal the intestinal lining
- Believed to support gut health
- Could reduce food sensitivities
Packed with Essential Minerals
Your finished pressure cooker chicken bone broth contains highly bioavailable forms of calcium, magnesium, phosphorus, and trace minerals. The addition of apple cider vinegar during cooking helps extract these minerals by slightly acidifying the cooking liquid.
These minerals are believed to be more easily absorbed by the body than some synthetic supplements.
Supports Immune System & Digestion
Glycine, one of the most abundant amino acids in gelatin, is believed to have anti-inflammatory properties. Proline may support healthy skin and wound healing, while glutamine serves as fuel for intestinal cells.
Traditional chicken soup remedies for colds have some scientific merit—research suggests that chicken bone broth may help reduce upper respiratory symptoms.
Other Potential Benefits
The glycine content may promote better sleep quality by helping lower body temperature. The high protein and mineral content supports healthy bones. For weight loss goals, bone broth offers a satisfying, low-calorie option that may help curb appetite.
Ingredients for Instant Pot Chicken Bone Broth
The beauty of making Instant Pot Chicken Bone Broth lies in its simplicity and the minimal ingredients required.
Essential Ingredients
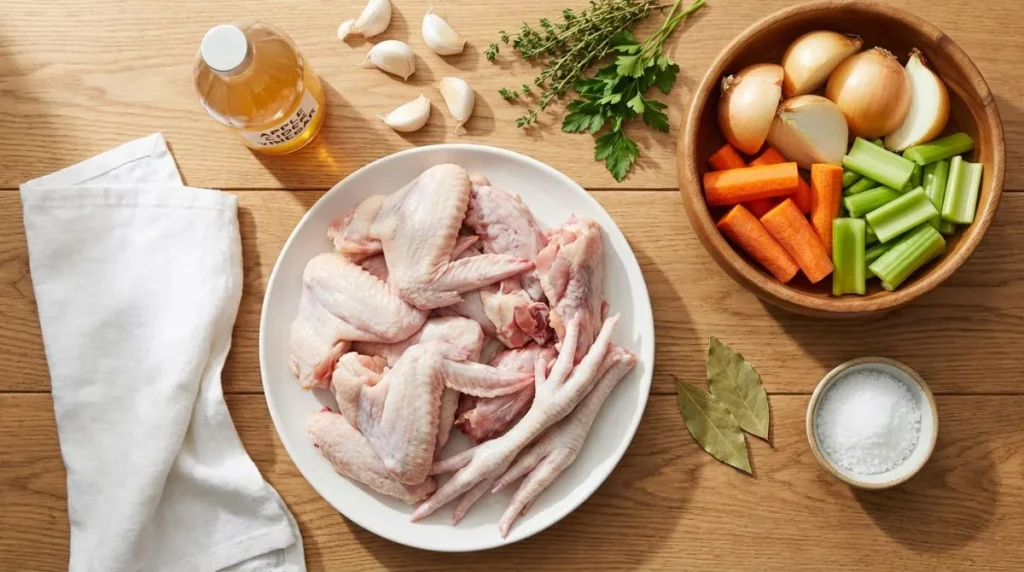
At its core, you need only three essential ingredients: bones, water, and an acidic element. The bones are the star—seek out bones with plenty of connective tissue and cartilage.
Best Bones for Maximum Gelatin:
- Chicken Feet: Highest gelatin content, very affordable
- Wings: Great balance of flavor and gelatin
- Backs & Necks: Budget-friendly, good gelatin
- Whole Carcass: Perfect for using leftovers
Chicken feet are perhaps the single best addition. Just four feet can transform ordinary broth into a spectacularly gelatinous result. If chicken feet aren’t available in your area, don’t worry—you can still make excellent bone broth. Simply increase the proportion of wings, which contain substantial cartilage at their joints, or add extra backs and necks to compensate.
Where to Source Quality Bones:
Finding high-quality chicken bones ensures the best flavor and nutrition in your finished broth. Your local butcher shop often has bones available for minimal cost, sometimes even giving them away free since many customers don’t request them. Farmers’ markets are another excellent source, particularly if you’re seeking organic or pasture-raised options. Asian grocery stores reliably stock chicken feet in their frozen section. Many conventional supermarkets now carry chicken feet, backs, and necks in the poultry section—check both fresh and frozen areas. Building relationships with butchers at your regular grocery store can result in their saving bones for you from chickens they process.
When purchasing whole chickens for dinner, save every bone in a freezer bag. Over time, you’ll accumulate enough for a full batch without any additional expense. This approach transforms what would be waste into valuable nutrition while maximizing your food budget.
Water quality matters more than many realize since broth concentrates flavors. Use filtered water if your tap water has chlorine or mineral flavors. The general ratio is roughly two pounds of bones per gallon of water.
Apple cider vinegar helps break down bones and extract minerals. You only need two to three tablespoons—enough to be effective without affecting taste.
Aromatic Vegetables (Optional but Recommended)
The classic combination of onions, carrots, and celery adds layers of flavor complexity. These vegetables contribute natural sweetness and savory depth. You don’t need to peel or cut precisely—rough chunks work perfectly. Fresh garlic, bay leaves, thyme, and parsley bring brightness and additional minerals.
Ingredient Substitutions & Variations
The basic recipe is endlessly adaptable. If you can’t find chicken feet, increase the quantity of other gelatinous bones like wings and backs. For extra anti-inflammatory benefits, consider adding fresh ginger or turmeric.
How to Make Chicken Bone Broth in the Instant Pot
This method has been refined through 30+ batches to deliver consistently excellent results. Follow these steps to make perfect Instant Pot Chicken Bone Broth:
Step 1: Prepare Your Bones
Option A – Raw Bones: Use directly for lighter, cleaner-tasting broth.
Option B – Roasted Bones (Optional): For deeper flavor, roast at 400°F for 30-40 minutes until golden-brown. The roasting creates caramelized notes that add complexity.
If using saved bones from cooked chickens, no need to thaw—add them frozen. Give bones a quick rinse under cold water.
Common Mistake: Avoid pre-seasoned bones from rotisserie chickens with strong flavors like barbecue—these will carry through to your finished broth.
Step 2: Add Ingredients to Instant Pot
Place bones in the Instant Pot insert, arranging them loosely. Add vegetables, garlic, herbs, and aromatics if using. Pour in apple cider vinegar first, then add filtered water to just cover the bones.
Critical Rule: Never exceed the maximum fill line (usually two-thirds full). Overfilling prevents proper pressure building.
Step 3: Set Your Instant Pot
- Secure the lid and rotate until it locks (you’ll hear a click)
- Turn pressure release valve to “Sealing” – check twice!
- Select “Pressure Cook” or “Manual”
- Set to High Pressure for 120 minutes
- Press Start
The preheating phase takes 15-25 minutes. You’ll know pressure is reached when the float valve pops up and the timer starts counting down.
Step 4: Natural Pressure Release
When cooking completes, do not touch the valve. Let pressure release naturally for 20-30 minutes. The float valve will drop when done.
Why Natural Release: Quick-releasing makes hot liquid foam and spray through the valve, creating a mess and wasting broth.
Step 5: Strain & Cool
Carefully open the lid away from your face. Remove large bones with tongs.
Straining:
- Place fine-mesh strainer over large bowl
- Line with cheesecloth for clearest results
- Pour broth through strainer
Fat Removal: Skim immediately or refrigerate overnight—fat solidifies for easy removal. Save this chicken fat (schmaltz) for cooking!
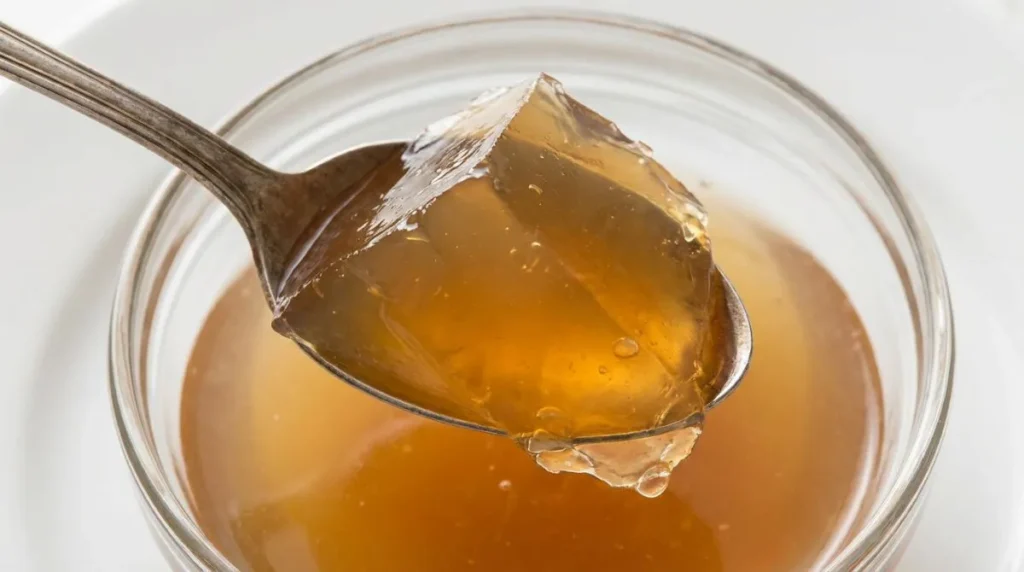
The Gel Test: Refrigerated broth should gel firmly. If it slices cleanly, you’ve made excellent Instant Pot Chicken Bone Broth!
How Long to Cook Chicken Bone Broth in an Instant Pot
The cooking time for Instant Pot Chicken Bone Broth differs dramatically from traditional methods.
Recommended Cooking Time: 2 Hours (120 Minutes)
Two hours at high pressure is the optimal cooking time. This duration thoroughly breaks down collagen, extracts minerals, and develops deep flavor while remaining convenient. The 250°F temperature under pressure accelerates reactions that normally require 12-24 hours.
What Happens During 2 Hours:
- Collagen completely breaks down into gelatin
- Bone matrix releases calcium, magnesium, phosphorus
- Connective tissues dissolve, releasing glucosamine and chondroitin
- Amino acids (glycine, proline, glutamine) are freed
- Aromatic compounds concentrate without evaporation
Why 2 Hours Is Optimal:
- Maximum nutrient extraction achieved
- No risk of overcooked flavors
- Energy-efficient sweet spot
- Convenient for busy schedules
- Rivals 24-hour traditional methods
Cooking Time Variations & Results
60-90 Minutes (Quick Broth):
Produces “broth plus” with decent flavor and some collagen. Won’t achieve firm gel status. Use this timing when you need flavorful cooking liquid quickly rather than true bone broth. Works well with extremely gelatinous bones like chicken feet.
120 Minutes (Recommended):
The sweet spot for authentic bone broth—firm gel when chilled, rich golden color, clean flavor, full nutritional profile. Consistently produces results matching traditionally slow-cooked versions.
180 Minutes (Extended):
Minimal differences from two hours. Slightly deeper color and marginally firmer gel. Bones become crumbly. Use if you want absolute maximum extraction, though improvements are subtle.
240 Minutes (Diminishing Returns):
May develop “cooked” taste as aromatic compounds break down. Vegetables can contribute bitter notes. Most prefer two-hour broth in taste tests. Nutritional differences negligible—once collagen converts and minerals leach, additional time doesn’t extract significantly more.
Adjusting Time Based on Bones
High-Gelatin Bones (Feet, Wings): Excellent results in 90 minutes due to high collagen and small size.
Large Bones (Carcasses, Legs): Full 120 minutes ensures thorough extraction from dense bone cores.
Mixed Bones (Most Common): Stick with 120 minutes for reliable results.
Second Batch Bones: Extend to 150-180 minutes to extract remaining nutrients.
Using Delayed Start Feature
The delayed start lets you load ingredients before bed and wake to fresh broth. However, raw bones and vegetables sitting at room temperature for hours raises food safety concerns. If using this method, use frozen bones which stay cold during delay, or skip vegetables for pure bone broth.
Pro Tips for Gelatin-Rich Bone Broth
Achieving that perfect, jiggly gel texture is the hallmark of exceptional Instant Pot Chicken Bone Broth. These professional techniques ensure maximum gelatin extraction.
Choose the Right Bones
Bones with abundant connective tissue and cartilage provide the most collagen. Chicken feet reign supreme—they consist almost entirely of skin and tendons that dissolve into pure gelatin.
Ideal Bone Mix for 6-Quart Instant Pot:
- 1-1.5 pounds chicken wings or backs
- 4-6 chicken feet
- 1 chicken carcass (if available)
- Total: 2-3 pounds bones
This combination delivers maximum gelatin while maintaining balanced flavor.
Add Chicken Feet for Extra Gelatin
Chicken feet are the secret weapon for restaurant-quality gelatin-rich broth. Find them at Asian grocery stores, farmers’ markets, or ethnic butcher shops for just one to two dollars per pound.
Each chicken foot contains multiple joints packed with cartilage. During pressure cooking, these break down completely into pure gelatin without contributing any off-flavors. You’ll never see or taste them—only enjoy their remarkable benefits.
Don’t Skip the Vinegar
Apple cider vinegar serves a critical chemical function. The acetic acid lowers pH slightly, creating an acidic environment that helps leach minerals from bones. Calcium, magnesium, and phosphorus become more soluble in acidic conditions.
Two to three tablespoons provides optimal pH for mineral extraction without making your broth taste sour. The acidic note disappears completely during cooking.
Use Enough Bones
Underfilling your Instant Pot leads to weak broth. Your bones should fill the pot about halfway before adding water. For 6-quart Instant Pots, this means two to three pounds of bones.
If short on bones, make a smaller batch with proper ratios rather than diluting with excess water. The key is maintaining proper proportion.
Test Your Gelatin
The definitive test happens in your refrigerator. Place ¼ cup broth in a container and refrigerate 4-6 hours. Properly made Instant Pot Chicken Bone Broth should solidify into firm gel that holds its shape when scooped. If you can slice it cleanly, you’ve achieved premium quality.
Troubleshooting Common Bone Broth Problems
Even experienced cooks encounter occasional issues. Here’s how to diagnose and solve common problems with pressure-cooked bone broth:
My Broth Isn’t Gelling – What Went Wrong?
Insufficient gelation is the most common complaint, and several factors contribute. The primary culprit is usually inadequate collagen-rich bones. If you used primarily leg or thigh bones without wings, feet, or backs, there wasn’t enough connective tissue to create firm gel. Chicken feet are particularly crucial—their absence makes achieving perfect gel texture significantly more difficult.
Over-dilution is another frequent cause. If you added too much water relative to bones, the gelatin concentration becomes too low to form a solid gel even though sufficient gelatin was extracted. The solution is using less water next time or reducing your finished broth by simmering it uncovered on the stove until volume decreases by 25-30%.
Insufficient cooking time can also prevent full gelatin extraction, though this is less common with the Instant Pot’s pressure cooking. If you shortened the cooking time below 90 minutes, collagen may not have fully converted to gelatin. Finally, verify you used actual chicken bones rather than boneless chicken pieces—while bones aren’t technically required for nutritious broth, they’re absolutely essential for that characteristic gel texture.
Quick Fixes:
- Add more chicken feet to your next batch
- Reduce water quantity
- Ensure full 2-hour cooking time
- Simmer finished broth to concentrate if already made
The Broth Is Too Cloudy
Cloudiness results from emulsified fat and protein particles suspended throughout the liquid. While cloudiness doesn’t affect nutrition or taste, you might prefer clearer broth for aesthetic reasons or specific culinary applications.
Causes:
- Rapid boiling that agitates liquid (not applicable to Instant Pot)
- Inadequate straining
- Including organ meats or liver
Solutions:
- Strain through multiple layers of cheesecloth
- Refrigerate overnight—particles settle and fat solidifies for easy removal
- For crystal-clear broth, strain twice using fresh cheesecloth each time
- Some cloudiness is normal and indicates high protein content
The Broth Tastes Too Weak
Weak flavor suggests the bone-to-water ratio was off. Your bones should be just barely covered with water—if they’re floating in a sea of liquid, dilution is inevitable.
Rescue Options:
- Simmer strained broth uncovered on the stove until volume reduces by one-third
- Use double-strength in recipes requiring broth
- Make a second concentrated batch and mix them together
- Season more assertively with salt (only after tasting—broth reduces further in cooking)
The Broth Has a Bitter Taste
Bitterness points to prolonged cooking of certain vegetables or inclusion of organ meats. Onion skins, if included, can contribute bitterness. Cruciferous vegetables like cabbage create sulfurous off-flavors.
Prevention:
- Add vegetables only for the last 60 minutes of cooking
- Avoid organ meats, liver, or kidneys
- Skip onion skins
- Make pure bone broth without vegetables if bitterness persists
Instant Pot Errors (Burn Notice)
The “Burn” message appears when the bottom sensor detects overheating, usually indicating insufficient liquid or something stuck to the pot bottom.
When This Occurs:
- Press “Cancel” immediately
- Allow natural pressure release
- Open carefully and inspect
- Check for stuck material on bottom
- Add more water if needed
- Clean any residue
- Restart cooking
Prevention: Always ensure bones are covered with adequate liquid and nothing is stuck to the pot bottom from previous use.
How to Strain, Store & Freeze Bone Broth
Proper handling extends shelf life and preserves quality.
Best Way to Strain Bone Broth
Use a fine-mesh strainer lined with several layers of cheesecloth or butter muslin positioned over a large bowl, pot, or multiple mason jars. Remove the largest bones first with tongs to make straining easier. Ladle broth through the strainer in batches, working methodically. For absolutely clear broth, strain twice using fresh cheesecloth each time.
Professional Technique: Set up your straining station before opening the Instant Pot so you can work quickly while the broth is still hot. Hot broth strains more easily than cooled broth because the fat remains liquid rather than solidifying.
Storing in the Refrigerator
Properly stored broth lasts five to seven days refrigerated. Use glass containers with tight-fitting lids—mason jars work perfectly and stack efficiently. Wide-mouth jars make it easier to scoop out gelled broth. Let broth cool to room temperature before refrigerating to avoid raising your refrigerator’s internal temperature.
The fat layer that forms on top acts as a protective seal, preventing oxidation and extending freshness. For this reason, some people prefer leaving the fat layer intact until ready to use, removing it just before reheating or cooking. Others prefer immediate fat removal for convenience.
Freezing for Long-Term Storage
Freezing extends usability to six to twelve months without quality degradation. For maximum flexibility, freeze broth in multiple portion sizes to match different recipes and uses.
Ice Cube Trays: Each standard cube holds about 2 tablespoons. Once frozen solid, pop them out and transfer to labeled freezer bags. Perfect for adding to individual vegetable sauté or grain dishes.
Muffin Tins: Each cup holds approximately ½ cup. Ideal for single-serve soup portions or adding to one-pot meals.
Freezer Bags: Lay flat for space-efficient storage. Mark with date and quantity. Each bag can hold 2-4 cups. Squeeze out excess air before sealing.
Mason Jars: Leave 2 inches of headspace for expansion. Use straight-sided jars rather than those with shoulders to prevent cracking. Wide-mouth jars are easiest to work with.
How to Defrost & Reheat
Refrigerator Thawing (Safest): Transfer frozen broth to refrigerator 24 hours before needed. This slow, controlled thawing maintains quality and is completely food-safe.
Cold Water Bath (Faster): Place sealed bags or containers in cold water, changing water every 30 minutes until thawed. Takes 1-3 hours depending on quantity.
Direct from Frozen: You can add frozen cubes directly to cooking pots—they’ll melt within minutes. For larger frozen blocks, reheat gently on the stove or use your microwave’s defrost setting.
Reheating: Bring broth to a gentle simmer rather than a rolling boil, which can affect gelatin structure. Once simmering, it’s ready to use in any recipe.
Creative Ways to Use Chicken Bone Broth
Beyond health benefits, Instant Pot Chicken Bone Broth serves as a versatile culinary ingredient.
Daily Uses for Bone Broth
Cooking Basics:
- Cook rice and grains – Replace water 1:1
- Cook pasta – Add depth to dishes
- Steam vegetables – Rising steam infuses flavor
- Make quinoa – Protein boost
Soups & Stews:
- Chicken noodle soup – Classic comfort base
- Vegetable soup – Added body and richness
- Ramen base – Asian-inspired bowls
- Tortellini soup – Quick weeknight dinner
Sauces & Proteins:
- Pan sauces – Deglaze after cooking meat
- Gravy – Rich, flavorful gravy
- Braising liquid – Tender, fall-apart meat
- Reduction sauces – Elegant finish
Unique Uses:
- Morning tonic – Hot with salt and pepper
- Post-workout drink – Natural electrolytes
- Scrambled eggs – Use instead of milk
- Mashed potatoes – Extra richness
Making It Part of Your Routine
Prepare a large batch every weekend, portion into various sizes, and freeze for the week ahead. Having bone broth readily available makes incorporating it into daily cooking much easier.
Full Recipe Card: Instant Pot Chicken Bone Broth
Time Breakdown:
| Stage | Duration |
| Prep Time | 10 minutes |
| Pressure Cook Time | 120 minutes (2 hours) |
| Natural Release | 20-30 minutes |
| Total Time | 2 hours 40 minutes |
| Yield | 8-10 cups |
| Difficulty | Easy |
Full Recipe Card: Instant Pot Chicken Bone Broth
Ingredients:
- 2-3 pounds chicken bones (feet, wings, backs, necks, or carcasses)
- 2-3 tablespoons apple cider vinegar
- 1 large onion, quartered (optional)
- 2 carrots, chopped (optional)
- 2-3 celery stalks, chopped (optional)
- 4-5 garlic cloves (optional)
- 2 bay leaves (optional)
- Fresh herbs (optional)
- Filtered water to cover
Instructions:
- Optional: Roast bones at 400°F for 30-40 minutes for deeper flavor.
- Place bones and vegetables in Instant Pot.
- Add vinegar and water until bones are covered.
- Secure lid and turn valve to “Sealing.”
- Set to High Pressure for 120 minutes.
- Allow natural pressure release for 20-30 minutes.
- Strain through fine-mesh strainer.
- Remove excess fat if desired.
- Store in refrigerator up to 7 days or freeze up to 12 months.
[Image: Step-by-step process showing bones in Instant Pot – Alt text: “How to make Instant Pot Chicken Bone Broth step by step”]
Notes: For maximum gelatin, include chicken feet. Properly made broth will gel when refrigerated.
Frequently Asked Questions
Can I use a whole chicken instead of just bones?
Absolutely. A whole chicken breaks down beautifully in the Instant Pot, creating rich broth while the meat remains tender for other recipes. After cooking, remove the chicken, separate meat from bones, and return bones to the broth.
How much water should I use for Instant Pot chicken bone broth?
Use enough water to just cover the bones, typically 8-10 cups for a 6-quart Instant Pot. Never fill beyond the maximum fill line (usually two-thirds full). The ratio is roughly 2 pounds of bones per gallon of water.
Can I cook chicken bone broth for 4 hours in Instant Pot?
Yes, you can cook it longer, though 2 hours (120 minutes) is optimal. Cooking for 3-4 hours (180-240 minutes) will create slightly more concentrated broth, but the benefits become marginal. The sealed environment prevents issues that occur with stovetop overcooking.
Why is my Instant Pot bone broth cloudy?
Cloudiness results from protein particles suspended in the liquid. While it doesn’t affect nutrition, you can clarify it by: 1) Straining through cheesecloth, 2) Refrigerating overnight to let particles settle, 3) Avoiding vigorous stirring during cooking. Some cloudiness is normal and perfectly fine.
Do I need to roast the bones first?
No, roasting is optional. Raw bones create lighter, cleaner-tasting broth. Roasted bones develop deeper, caramelized flavors. Choose based on your preference—both methods work excellently.
Can I reuse the bones for a second batch?
Yes, though the second batch will be weaker. After straining, return bones to the pot with fresh water, vinegar, and vegetables, then pressure cook for another 2 hours. Mix both batches together for balanced flavor.
How do I know when my bone broth is done?
With the Instant Pot method, when the timer reaches zero and pressure has fully released, your broth is done. To assess quality, refrigerate a small amount—firm gel indicates successful collagen extraction. The broth should be golden-amber colored with rich aroma.
Is Instant Pot bone broth as nutritious as slow-cooked?
Yes. Scientific analysis shows pressure cooking extracts similar or greater amounts of minerals and gelatin compared to traditional methods. The higher temperature breaks down collagen more completely in less time, and the sealed environment prevents nutrient loss.
What’s the white foam on top of my broth?
The white, foamy substance is protein foam mixed with fat particles. This is completely normal and harmless. You can skim it off for clearer appearance, or stir it back in since it’s nutritious.
Can I make bone broth without apple cider vinegar?
You can, though mineral extraction won’t be as efficient. The acidic ingredient helps break down bones and release minerals. If you don’t have apple cider vinegar, substitute lemon juice or white vinegar.
Can I use the same method for beef bone broth?
Yes! The Instant Pot method works for beef bones too. Check our beef bone broth recipe for specific instructions.
Conclusion
You now have everything you need to create exceptional pressure-cooked bone broth in just two hours. After making over 30 batches using this exact method, I can confidently say it delivers maximum nutrition and that signature gelatinous texture without the day-long wait.
Start your first batch this weekend and experience the difference. The hardest part is usually finding chicken feet—but once you do, you’ll never go back to store-bought broth.
We’d love to hear from you:
- Did your first batch gel properly?
- What bones did you use?
- How many batches have you made so far?
Ready to get started?
- Save this recipe for easy reference
- Try it this weekend and report back
- Share with friends who love healthy cooking
What’s your biggest question about making bone broth? Drop a comment below—I read and respond to every one, and your questions help improve this guide for future readers.