
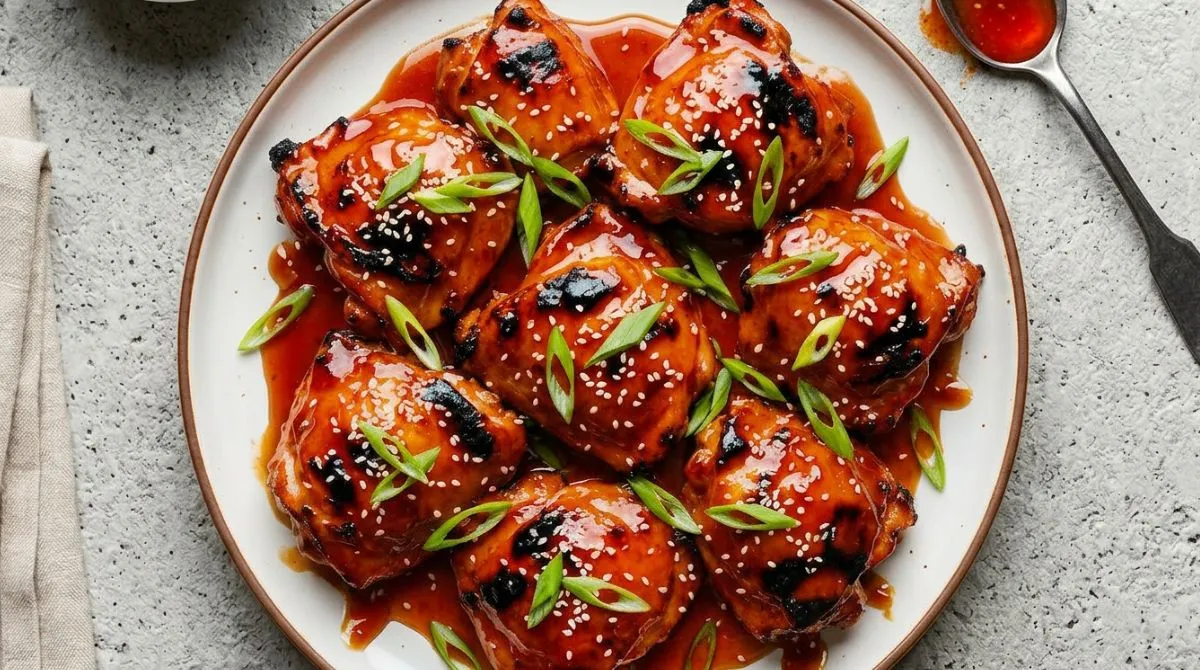
Baked Teriyaki Chicken (Better Than Takeout!)
Table of Contents
The Best Baked Teriyaki Chicken Recipe
If you are looking for the absolute best baked teriyaki chicken recipe, you have just found it. Have you ever pulled a tray of chicken out of the oven hoping for a sticky, glossy masterpiece, only to find dry meat in a watery puddle? As a chef, I’ve spent years perfecting the delicate balance of flavors to solve exactly that problem.
This isn’t just another recipe; it’s a masterclass in creating an easy weeknight dinner that genuinely tastes better than takeout. We are going to dive into the culinary science of achieving that iconic sticky glaze and guaranteeing juicy, tender meat every single time. Grab your apron, preheat your oven, and let’s get cooking.
Why This is the Ultimate Baked Teriyaki Chicken
Let’s talk about what makes a recipe truly “the ultimate.” In the culinary world, the word “Teriyaki” actually refers to a cooking technique. “Teri” means luster or shine (referring to the sugar in the marinade), and “yaki” means to grill or broil. While traditional teriyaki is grilled, adapting this method for the oven is a game-changer for the modern home cook.
So, why should you choose this specific recipe over the hundreds of others out there?
First, it is the quintessential easy weeknight dinner. From cutting board to dining table, you are looking at about 35 minutes. There is no standing over a hot stove dodging oil splatters, and no complicated multi-pan setups. The oven does the heavy lifting for you.
Second, the flavor profile is meticulously balanced. A great homemade teriyaki sauce requires a harmony of salty, sweet, sour, and umami. By making the sauce from scratch (which takes literally three minutes), you control the sodium and the sugar. You are avoiding the artificial preservatives and high-fructose corn syrup found in bottled sauces, resulting in a healthy chicken dinner that you can feel good about serving to your family.
Finally, this recipe is incredibly forgiving and versatile. It is a family-favorite meal because it appeals to both kids (who love the sweet, sticky glaze) and adults (who appreciate the complex notes of fresh ginger and garlic). It is also highly meal prep friendly, meaning you can double the batch on Sunday and enjoy gourmet lunches all week long.
Ingredients & Easy Substitutions
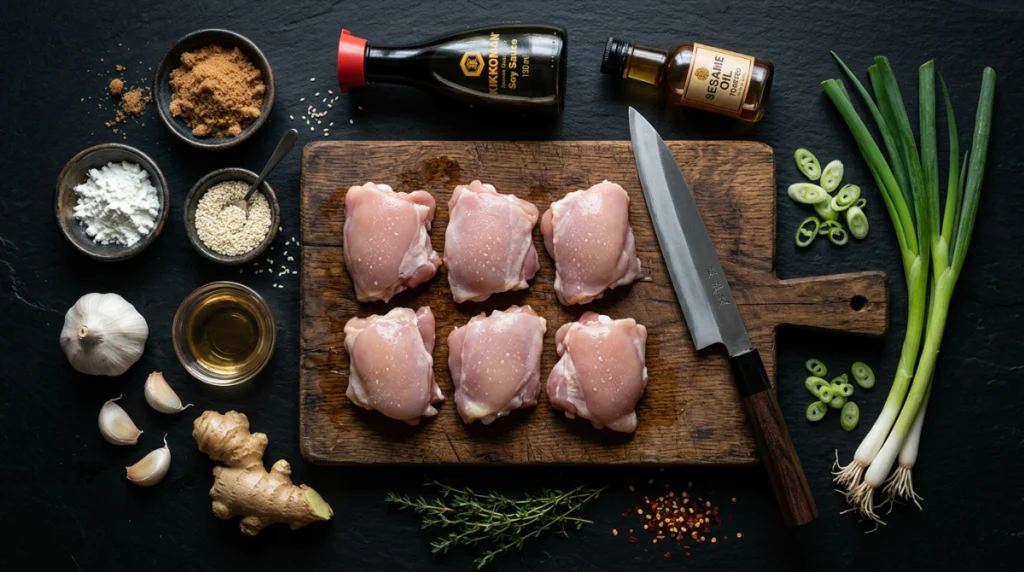
The secret to the perfect baked teriyaki chicken lies in using fresh, high-quality ingredients. To create restaurant-quality results at home, you need to understand your components. Cooking is chemistry, and every item in this recipe plays a specific role in building that final, mouth-watering result.
The Chicken
You have two main choices here, and both work beautifully, but they yield slightly different results.
- Boneless, Skinless Chicken Breasts: The leanest option. If you are specifically looking for a healthy teriyaki chicken breast recipe, this is the way to go. Because they have very little fat, they require careful monitoring of the internal temperature to prevent drying out. Cutting them into uniform, bite-sized pieces ensures they cook quickly and evenly.
- Boneless, Skinless Chicken Thighs: My personal chef recommendation. Thighs have a higher fat content, which means they are incredibly forgiving in the oven. They stay juicy and tender even if you accidentally leave them in a minute too long.
Making a Teriyaki Chicken Thighs Recipe
If you prefer dark meat, adapting this into a teriyaki chicken thighs recipe is a brilliant move. The rich, savory flavor of the dark meat pairs exceptionally well with the sweet and salty glaze. In fact, making teriyaki oven baked chicken using thighs is often more forgiving for beginners. Because thighs contain more connective tissue, the baking process actually helps break that tissue down, resulting in a melt-in-your-mouth texture. If you use thighs, you might notice a bit more natural chicken juice in the pan after baking—simply spoon the thickened sauce over the top before serving to marry the flavors.
The Homemade Teriyaki Sauce
Please, put down the store-bought bottle. Making your own sauce is the secret to the most authentic flavor. Here is what you need:
- Soy Sauce: This provides the salty, umami base. I highly recommend using low-sodium soy sauce. As the sauce reduces and thickens in the oven, the saltiness concentrates. Using low-sodium gives you control. If you are gluten-free, substitute this with Tamari or Coconut Aminos.
- Brown Sugar: This is what gives the chicken that beautiful “teri” (shine). The molasses in brown sugar adds a deep, caramel-like complexity that white sugar simply cannot provide. You can substitute with honey or maple syrup, but brown sugar yields the most authentic texture.
- Rice Vinegar: You need acidity to cut through the heavy salt and sugar. Rice vinegar is mild and slightly sweet. Apple cider vinegar is a decent substitute in a pinch.
- Fresh Ginger and Garlic: Do not use powdered spices here if you can avoid it. Freshly minced garlic and grated ginger release essential oils that completely transform the dish from “okay” to “restaurant-quality.”
- Sesame Oil: Just a few drops add a beautiful, nutty aroma. A little goes a long way.
- Water or Chicken Broth: To balance the intensity of the soy sauce.
The Thickener
- Cornstarch Slurry: This is a mixture of equal parts cold water and cornstarch. It is the culinary magic trick that turns a thin, watery liquid into a thick, sticky glaze that clings to every piece of chicken.
The Garnish
- Sesame Seeds and Green Onions: These aren’t just for aesthetics. The toasted sesame seeds add a necessary crunch, while the sharp, fresh bite of the green onions cuts through the richness of the sauce.
Time-Saving Shortcut: Look, we all have those days where even mixing a sauce feels like too much work. If you absolutely must use a store-bought sauce, look for a high-quality, thick Japanese BBQ or Teriyaki glaze. However, you will still want to bake it according to these instructions to get that caramelized finish.
Optional Add-ins: Want to turn this into a complete “Sheet Pan Meal”? Toss some broccoli florets, diced bell peppers, or snap peas in a little olive oil and roast them on the same baking dish / sheet pan during the last 15 minutes of cooking.
How to Bake Teriyaki Chicken (Step-by-Step)
Now that we understand our ingredients, let’s get into the technique. Follow these steps closely, and you will achieve perfection.
Step 1: Preheat and Prepare
Preheat your oven to 400°F (200°C). This high heat is crucial. We want to bake the chicken quickly to retain moisture while simultaneously caramelizing the sugars in the sauce. Lightly grease a 9×13 inch baking dish or a large rimmed sheet pan with non-stick spray or a drizzle of oil.
Step 2: Prepare the Chicken
Take your boneless, skinless chicken thighs and pat them dry with a paper towel. Keeping them whole and flat is the secret to a juicy interior and a beautifully caramelized exterior. Chef’s Tip: Using whole thighs instead of chopping them prevents the meat from drying out during the high-heat baking process.
Step 3: Whisk the Sauce
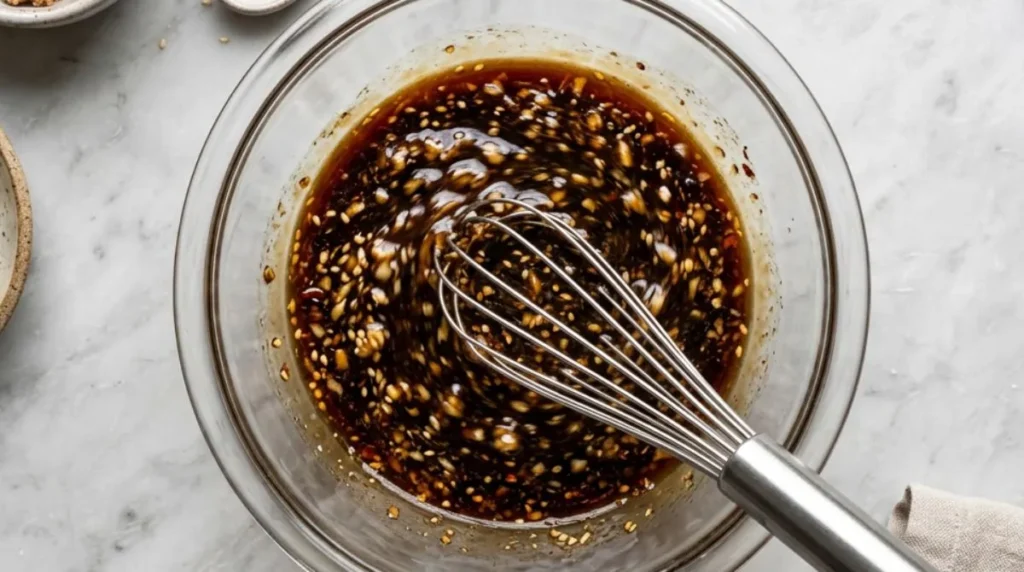
In a medium bowl, whisk together the soy sauce, water, brown sugar, rice vinegar, sesame oil, minced garlic, and grated ginger. Do not add the cornstarch yet!
Step 4: The Initial Bake
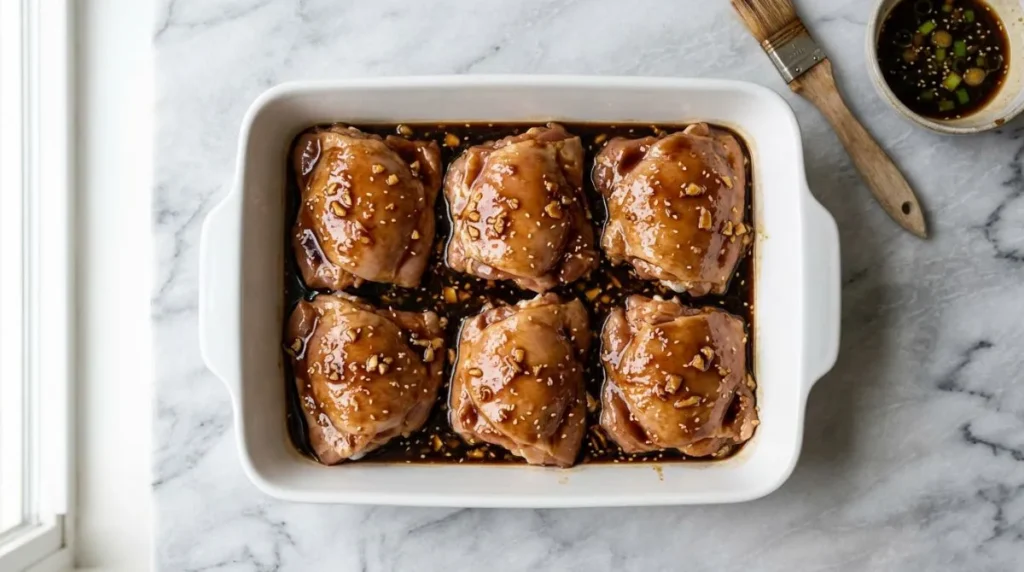
Place the chicken pieces in a single layer in your prepared baking dish. Pour about two-thirds of your liquid teriyaki mixture over the chicken. Toss to ensure every piece is coated. Bake uncovered in the preheated oven for 15 minutes.
Step 5: Create the Slurry and Thicken
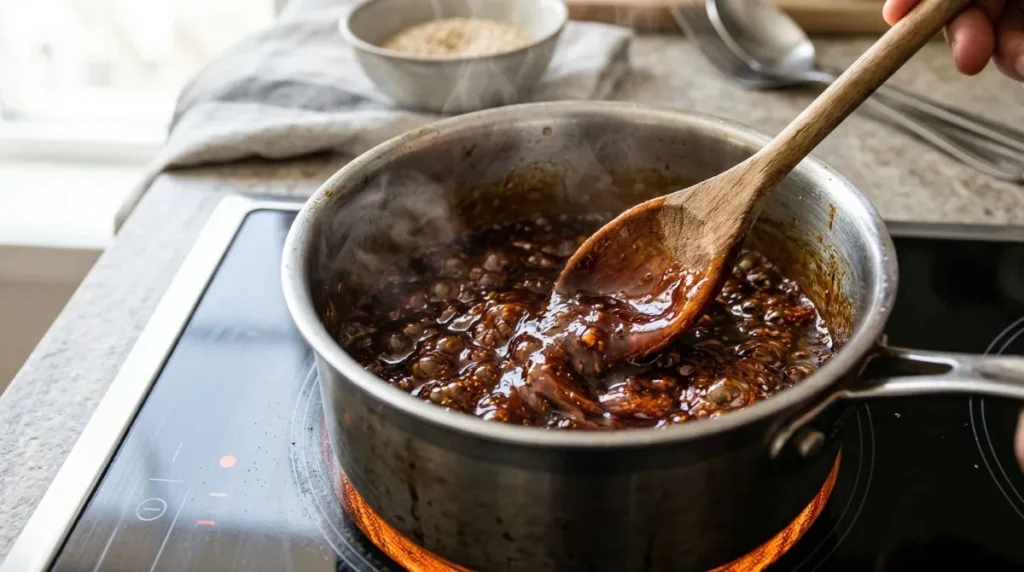
While the chicken is baking, take the remaining one-third of your sauce and pour it into a small saucepan. In a separate tiny bowl, mix 1 tablespoon of cornstarch with 1 tablespoon of cold water until completely smooth (this is your cornstarch slurry).
Bring the saucepan to a gentle simmer over medium heat. Whisk in the slurry. Within 60 seconds, the sauce will transform into a thick, glossy, beautiful glaze. Remove from heat immediately.
Step 6: Glaze and Finish
After the chicken has baked for 15 minutes, remove the dish from the oven. Carefully drain off about half of the watery liquid that has accumulated in the pan (chicken naturally releases water as it cooks). Pour your thickened, glossy glaze from the saucepan all over the meat. Toss well to coat, and just like that, you’ve created the perfect baked teriyaki chicken right in your own oven.
Return the dish to the oven for another 5 to 10 minutes, or until the chicken is fully cooked and the sauce is bubbling and sticky.
Step 7: Garnish and Serve
Remove from the oven. Let it rest for 3 minutes. Garnish generously with toasted sesame seeds and freshly chopped green onions. Serve immediately over hot rice.
Pro Tips for Perfectly Tender Chicken
As a chef, I see home cooks make the same mistakes repeatedly when cooking poultry. Here are my professional secrets to ensure your baked teriyaki chicken is tender, juicy, and packed with flavor.
1. The Magic of the Meat Thermometer
If you do not own a digital meat thermometer, I highly urge you to get one. It is the single most important tool for cooking meat. Chicken is safe to eat when it reaches an internal temperature of 165°F (74°C). Guessing by cutting into the meat lets all the precious juices escape. Check the largest piece of chicken in your pan; the moment it hits 165°F, pull it out of the oven.
2. Understand Carryover Cooking
Food does not stop cooking the second you take it out of the oven. The residual heat inside the meat will continue to cook it, raising the internal temperature by another 3 to 5 degrees while it rests. If you leave the chicken in the oven until it looks “overdone,” it will be dry by the time it hits your plate.
3. The Art of Marinating (Optional but Incredible)
While this recipe is designed to be fast, if you have an extra 30 minutes (or even overnight), marinate your raw chicken pieces in half of the un-thickened sauce mixture. The salt in the soy sauce acts as a brine, breaking down the muscle fibers and drawing moisture deep into the meat. If you do this, discard the used marinade and make a fresh batch of sauce for the glaze.
4. Do Not Crowd the Pan
Whether you use a baking dish or a sheet pan, ensure the chicken pieces are in a single layer with a little breathing room. If you pile them on top of each other, they will steam in their own juices rather than bake and caramelize. Steamed chicken is rubbery chicken.
Common Mistakes & How to Fix Them (Troubleshooting)
Even the best cooks run into issues. Here is how to troubleshoot the most common problems when making baked teriyaki chicken.
Mistake 1: The Sauce is Too Watery
The Problem: You pull the dish out of the oven, and instead of a sticky glaze, you have chicken floating in soup. This happens because modern supermarket chicken is often plumped with water, which releases during baking.
The Fix: Do not panic. Use a slotted spoon to remove the cooked chicken to a plate. Carefully pour all the watery liquid from the baking dish into a saucepan. Bring it to a boil on the stove, add a fresh cornstarch slurry (1 tsp cornstarch + 1 tsp cold water), and whisk until it reduces into a thick syrup. Toss the chicken back in. Fixed!
Mistake 2: Dry, Tough, Rubbery Chicken
The Problem: The chicken requires aggressive chewing and feels like sawdust.
The Fix: This is a classic case of overbaking. Ovens vary wildly in temperature accuracy. Next time, start checking the internal temperature at the 15-minute mark. Also, consider switching to a teriyaki chicken thighs recipe. When making baked teriyaki chicken, the higher fat content of dark meat provides a massive buffer against overcooking.
Mistake 3: The Sauce Burnt to the Pan
The Problem: The edges of your pan are black, and the chicken tastes bitter.
The Fix: Teriyaki sauce is packed with sugar (brown sugar and natural sugars from the ginger/garlic). Sugar burns quickly at high temperatures. Ensure your oven is exactly at 400°F. If you decide to use the broiler for the last 2 minutes to get extra caramelization, you must watch it like a hawk. Sugar goes from beautifully caramelized to bitter ash in about 30 seconds under a broiler.
Mistake 4: The Cornstarch Clumped
The Problem: You have weird, gelatinous white lumps in your sauce.
The Fix: You added dry cornstarch directly to hot liquid. Cornstarch must always be dissolved in a cold liquid (water or broth) to create a slurry before being introduced to heat. If you already have lumps, pour the sauce through a fine-mesh strainer before pouring it over the chicken.
Serving Suggestions for Baked Teriyaki Chicken
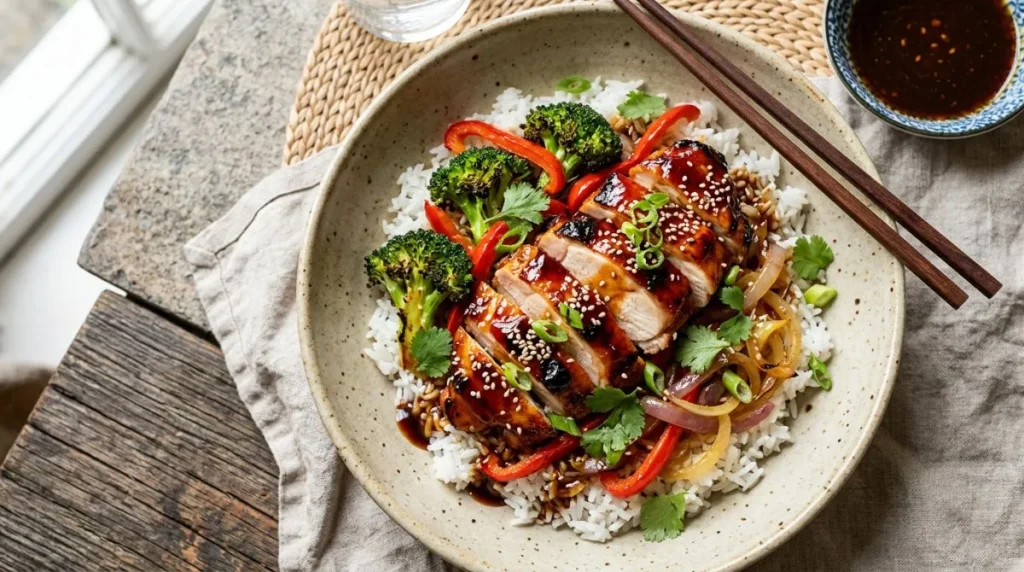
Baked teriyaki chicken is a star, but it needs the right supporting cast to make it a complete, satisfying meal.
- The Classic: Serve over a bed of steaming hot Jasmine or Basmati rice. The fluffy grains act as a sponge, soaking up all that extra sticky glaze.
- The Low-Carb Option: Pair it with garlic-sautéed cauliflower rice. The savory notes of the cauliflower complement the sweet teriyaki beautifully.
- Noodles: Toss the finished chicken and sauce with cooked udon, soba, or even standard spaghetti noodles for a quick chicken lo mein vibe.
- Veggies: Steamed broccoli is the traditional pairing, but roasted snap peas, bok choy, or thinly sliced carrots add a fantastic crunch and vibrant color to the plate.
Storage, Reheating & Meal Prep
This recipe is a champion for those who love to plan ahead. It is incredibly meal prep friendly and stores beautifully.
Fridge Storage
Allow the baked teriyaki chicken to cool completely to room temperature. Storing warm chicken creates condensation in the container, which dilutes the sauce and makes the meat soggy. Store in an airtight container in the refrigerator for up to 4 days.
Freezer Storage & Meal Prep
You have two fantastic options for freezing:
- Freezing Cooked Leftovers: Place the cooled, cooked chicken and sauce in a freezer-safe container. It will keep for up to 3 months. Thaw overnight in the fridge before reheating.
- The “Dump Bag” Method (Raw Meal Prep): This is a lifesaver. Place your raw, diced chicken into a heavy-duty Ziploc freezer bag. Pour the un-thickened sauce mixture over the raw chicken. Squeeze out all the air and freeze flat. When you need an easy dinner, thaw the bag in the fridge overnight, dump the entire contents into your baking dish, and bake as directed (you will still need to make a quick slurry at the end to thicken the pan juices).
The Secret to Reheating
Microwaving leftover chicken usually results in a dry, rubbery disaster. Here is the chef’s secret: Place your portion in a microwave-safe bowl. Add a splash of water or chicken broth (just a teaspoon or two). Cover the bowl loosely with a damp paper towel. Microwave on 70% power for 90 seconds. The added moisture creates steam, which gently reheats the chicken without drying it out, and it magically revives the sticky glaze to its original glory.
Frequently Asked Questions (FAQs)
Is chicken teriyaki fattening?
This is a very common question. Is chicken teriyaki fattening? The answer is: it depends entirely on how it is prepared. Traditional restaurant takeout teriyaki can be very high in calories and fat because the chicken is often deep-fried or pan-fried in heavy oil before being drenched in a sauce loaded with refined sugars and high-fructose corn syrup.
However, this homemade baked version is quite healthy! By baking the chicken instead of frying it, we eliminate unnecessary oils. By making the sauce from scratch, we control the sugar content. If you use chicken breasts, it is a fantastic high-protein, low-fat meal. To make it even healthier, serve it with cauliflower rice and double the vegetables.
Can I make this recipe gluten-free?
Absolutely. Traditional soy sauce contains wheat. To make this a 100% gluten-free baked teriyaki chicken, simply swap the soy sauce for an equal amount of high-quality Tamari or Coconut Aminos. Ensure your cornstarch is certified gluten-free (most are, but always check the label).
How long to bake teriyaki chicken thighs vs. breasts?
When cooking teriyaki chicken in oven, timing is everything. For bite-sized chicken breasts at 400°F, it takes about 20-25 minutes total. If you are using bite-sized chicken thighs, they can take slightly longer, around 25-30 minutes, due to their higher fat content. Always rely on a meat thermometer rather than the clock to ensure it reaches 165°F.
Can I use chicken wings or drumsticks instead?
Yes! The teriyaki flavor profile is amazing on bone-in, skin-on chicken. However, the cooking time will change drastically. Bone-in chicken takes much longer to cook. You will need to bake wings or drumsticks for about 40-45 minutes at 400°F. I recommend baking them plain first, and brushing them generously with the thickened teriyaki glaze during the last 10 minutes of baking so the sugars don’t burn.
Do I have to cover the chicken with foil while baking?
No. For this specific recipe, leave the baking dish uncovered. We want the dry heat of the oven to evaporate excess moisture and help the sauce reduce and caramelize. Covering it with foil will trap the steam, resulting in boiled chicken and a watery sauce.
The Nutritional Value of Teriyaki Chicken
Understanding what you are eating is important. When comparing homemade to takeout, the nutritional value of teriyaki chicken made in your own oven is vastly superior.
A standard serving of this baked teriyaki chicken (using chicken breasts and the homemade sauce, excluding rice) provides approximately:
- Calories: 280 – 320 kcal
- Protein: 35g (Excellent for muscle repair and satiety. According to Healthline’s guide on chicken nutrition, lean chicken is one of the best sources of high-quality protein for maintaining muscle mass).
- Carbohydrates: 18g (Primarily from the brown sugar and cornstarch)
- Fat: 6g (Very low, mostly healthy fats from the sesame oil)
- Sodium: While soy sauce is high in sodium, using a low-sodium variant keeps this dish within reasonable daily limits compared to restaurant versions which can contain over 2000mg of sodium per serving!
By cooking this at home, you are getting a powerhouse of lean protein without the hidden trans fats and excessive sugars found in commercial kitchens.
More Easy Chicken Recipes You’ll Love
If this baked teriyaki chicken becomes a staple in your home, you will definitely want to try these other quick, flavorful, and family-friendly chicken dinners:
- 15-Minute Garlic Butter Chicken Bites
- Sheet Pan Lemon Herb Chicken and Asparagus
- Healthy Baked Orange Chicken
- Spicy Honey Sriracha Chicken Thighs
- Cowboy Butter Chicken Wings
The Best Baked Teriyaki Chicken Recipe
Ingredients
For the Chicken
- 1.5 lbs boneless, skinless chicken thighs kept whole and flat
- 1 Tablespoon olive oil for greasing the pan
- 1 Tablespoon toasted sesame seeds for garnish
- 2 Green onions thinly sliced, for garnish
For the Homemade Teriyaki Sauce
- 1/2 cup low-sodium soy sauce use Tamari for gluten-free
- 1/3 cup water
- 1/4 cup brown sugar packed
- 1 Tablespoon rice vinegar
- 1 teaspoon sesame oil
- 1 Tablespoon fresh ginger finely grated
- 2 cloves fresh garlic minced
For the Slurry (Thickener)
- 1 Tablespoon cornstarch
- 1 Tablespoon cold water
Instructions
- Preheat the oven: Preheat your oven to 400°F (200°C). Lightly grease a 9×13 inch baking dish.
- Mix the Teriyaki Sauce: In a bowl, whisk together the soy sauce, 1/3 cup water, brown sugar, rice vinegar, sesame oil, grated ginger, and minced garlic.
- First Bake: Place the whole chicken thighs into the baking dish in a single layer. Pour two-thirds of the sauce mixture over the chicken. Toss to coat. Bake uncovered for 15 minutes.
- Make the Sticky Glaze: While the chicken bakes, pour the remaining one-third of the sauce into a small saucepan. In a tiny bowl, mix the cornstarch and cold water to create a slurry. Bring the saucepan to a gentle simmer over medium heat, whisk in the slurry, and stir constantly for 1 minute until the sauce is thick and glossy. Remove from heat.
- Second Bake: Remove the chicken from the oven. Carefully drain off about half of the watery juices from the pan. Pour the thickened glaze from the saucepan over the chicken and toss well.
- Finish Baking: Return to the oven for 5-10 minutes until the chicken reaches an internal temperature of 165°F and the sauce is bubbly and sticky.
- Garnish and Serve: Let rest for 3 minutes. Garnish with sesame seeds and green onions. Serve hot over rice.
Notes
• Meat Thermometer: For the juiciest chicken, always use a meat thermometer. Chicken is fully cooked and safe to eat when the internal temperature reaches 165°F (74°C).
• Gluten-Free Option: To make this recipe 100% gluten-free, simply substitute the soy sauce with an equal amount of Tamari or Coconut Aminos, and ensure your cornstarch is certified gluten-free.
• Storage: Store leftover baked teriyaki chicken in an airtight container in the refrigerator for up to 4 days.
• Reheating Tip: To prevent the chicken from drying out when reheating in the microwave, add a splash of water (about 1 teaspoon) to the bowl and cover loosely with a damp paper towel. Microwave on 70% power for 90 seconds.
• Make Ahead (Freezer): You can freeze the raw chicken and the un-thickened sauce together in a Ziploc bag for up to 3 months. Thaw overnight in the fridge before baking as directed.