
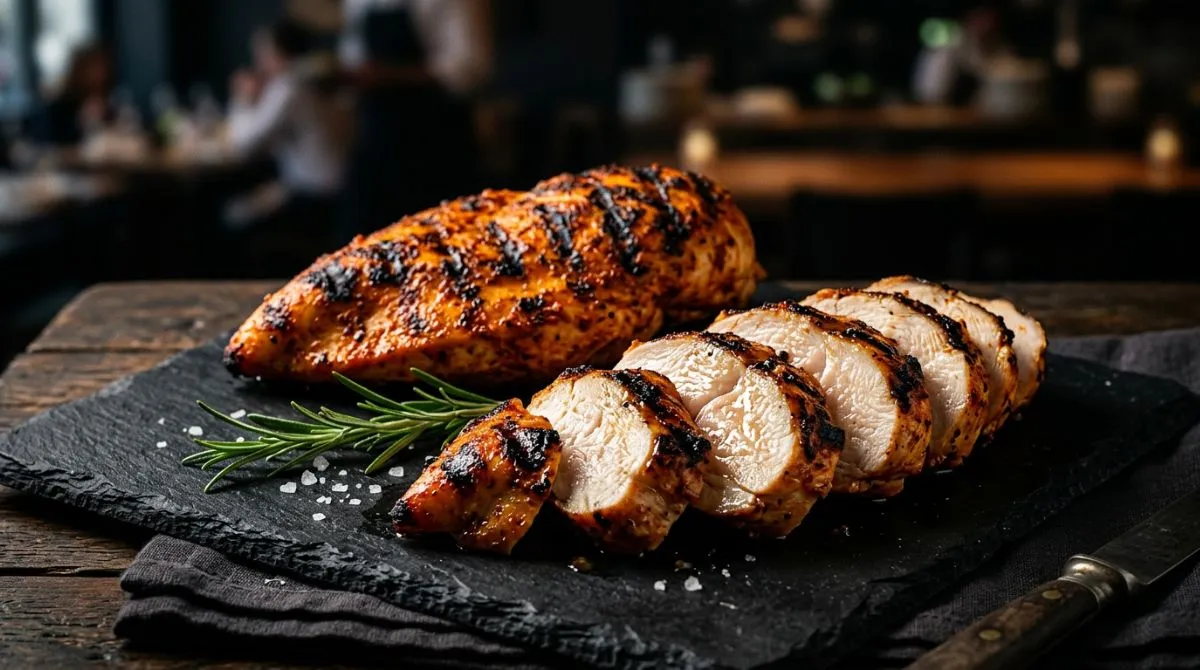
Juicy Pellet Grill Chicken Breast (Easy 30-Minute Smoked Recipe)
Table of Contents
Pellet Grill Chicken Breast (Juicy Smoked Chicken Recipe)
If you want to make the juiciest pellet grill chicken breast of your life, you are in the exact right place. Let’s be brutally honest: we have all suffered through dry, rubbery chicken because boneless, skinless breasts are incredibly lean and unforgiving. But today, that struggle ends.
Whether you are cooking on a Traeger, Pit Boss, or Camp Chef, this comprehensive guide will walk you through the exact science, prep work, and temperatures needed to achieve backyard glory. By the time you finish reading, you will know exactly how to smoke chicken breast like a true professional. Grab your tongs, fire up the hopper, and let’s get cooking!
Why Cooking Chicken Breast on Pellet Grill is a Game Changer
If you are used to cooking chicken on a standard gas grill or baking it in the oven, moving your chicken breast on pellet grill grates is going to completely change your culinary life.
Why? Because a pellet grill is essentially a high-tech convection oven that also produces hardwood smoke. The fan inside the grill circulates the heat evenly around the meat, which means you don’t have to deal with the aggressive, unpredictable flare-ups that often char the outside of the chicken while leaving the inside raw.
Furthermore, chicken breast is a very mild protein. It lacks the heavy fat marbling of a pork shoulder or a beef brisket. Because of this mild flavor profile, it acts like a sponge for wood smoke. Even a short 30-minute cook yields the most incredible smoked chicken on pellet grill setups, infusing the meat with a rich, authentic BBQ flavor that you simply cannot replicate indoors.
Another massive benefit? Meal Prep.
Smoking a large batch of chicken on a Sunday afternoon sets you up for a week of incredible meals. You can slice it cold over a Caesar salad, shred it for smoky chicken tacos, or layer it into a hearty club sandwich. It is the ultimate versatile protein. (And if you are looking to switch up your flavor profile later in the week with a rich, creamy stovetop dinner, you absolutely must try our Chicken Spinach Mushroom Recipe).
The Secret to Juicy Smoked Chicken: Essential Prep Work
Most amateur cooks take the chicken out of the package, throw some salt on it, and toss it on the fire. That is a one-way ticket to Dry-ville. If you want to know how to smoke chicken breast that drips with juices when you slice it, you cannot skip the prep work.
Why You Must Brine Your Chicken
Boneless, skinless chicken breasts have almost zero fat to protect them from the heat. To combat this, we use science. Brining is the process of submerging the meat in a saltwater solution (wet brine) or coating it heavily in salt (dry brine) before cooking.
When you soak chicken in a wet brine (water, kosher salt, and maybe a little brown sugar), the process of osmosis occurs. The meat actually absorbs the seasoned liquid, increasing its overall moisture content by up to 10%. When the chicken hits the heat of the pellet grill and inevitably loses some moisture, it has extra water weight to spare. The result? A pellet grill chicken breast that remains incredibly juicy.
Basic Wet Brine Formula:
- 4 cups of warm water
- 1/4 cup Kosher salt
- 1/4 cup brown sugar
- Mix until dissolved, add ice to cool it down, and submerge the chicken for 30 minutes to 2 hours.
Pounding or Slicing for Even Cooking
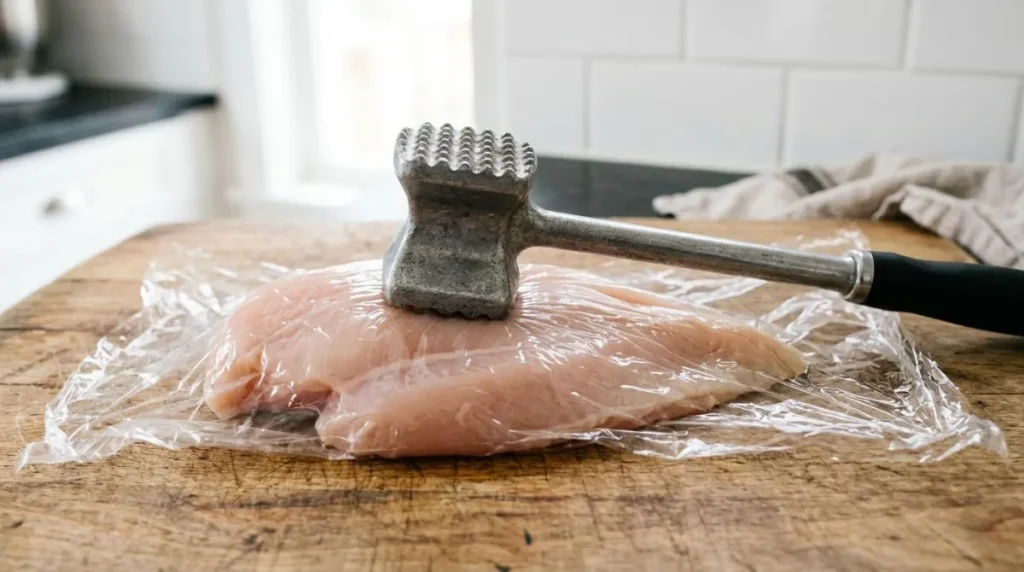
Take a look at a standard chicken breast. One end is thick and bulbous, while the other end tapers off into a thin tail. If you put that on the grill as-is, the thin tail will be overcooked and chalky long before the thick center reaches a safe internal temperature.
The Pitmaster Fix: You must even out the thickness.
You have two options here:
- The Pounding Method: Place a few drops of cooking oil on your cutting board, lay the chicken down, and add a few more drops of oil on top. Cover it with a heavy-duty zip-top plastic bag (the oil prevents the plastic from tearing the delicate meat). Use a meat mallet to gently pound the thick end until the entire breast is a uniform thickness of about 3/4 inch.
- The Slicing Method (Butterfly): Place your hand flat on top of the chicken breast and use a sharp boning knife to slice horizontally through the middle, creating two thinner, even cutlets.
Doing this ensures your chicken breast on pellet grill cooks at the exact same rate from edge to edge.
Best Wood Pellets for Smoking Chicken
Not all wood is created equal. If you use a heavy, aggressive wood like Mesquite on a delicate piece of poultry, it will taste like an ashtray. You want a wood profile that complements the meat rather than overpowering it.
Here are the best wood pellets for smoking chicken:
- Apple Wood: The absolute gold standard for poultry. Apple wood provides a mild, sweet, and fruity smoke that gives the chicken a beautiful mahogany color without being bitter.
- Cherry Wood: Similar to apple, cherry is sweet and mild, but it imparts a vibrant, dark red hue to the outside of the chicken. Mixing Apple and Cherry is a pro move.
- Pecan Wood: If you want a slightly richer, nuttier flavor that still respects the mild nature of the chicken, pecan is fantastic. It gives a classic BBQ taste.
- Competition Blend: Most pellet grill brands (like Traeger or Pit Boss) sell a “Competition Blend” or “Signature Blend” which is usually a mix of Hickory, Cherry, and Maple. This is a fantastic, balanced option for pellet grill chicken breast.
Avoid: 100% Mesquite or heavy Oak, unless you are mixing them sparingly with fruitwoods.
Ingredients for Pellet Grill Chicken Breast
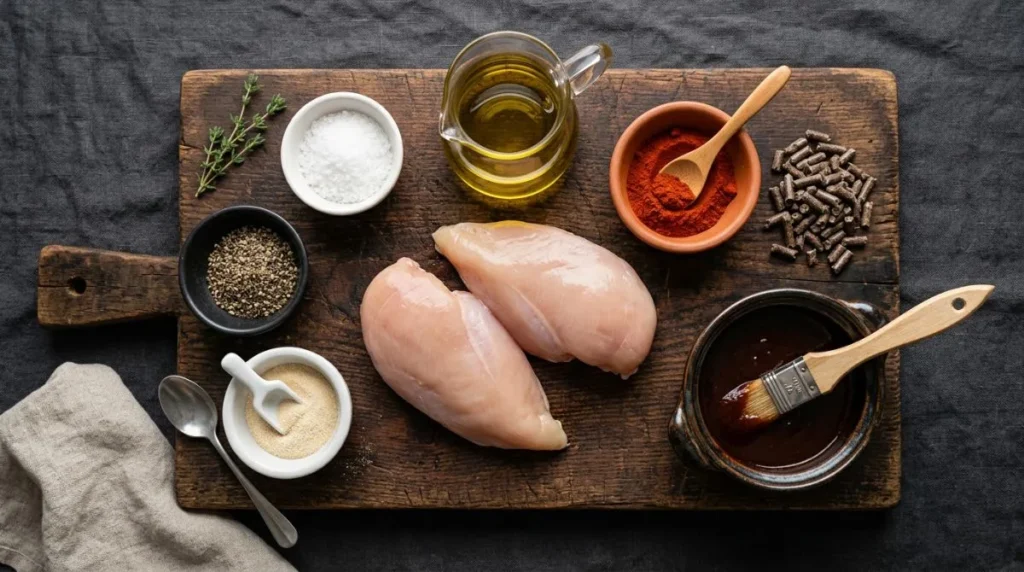
The beauty of this recipe is its absolute simplicity. You don’t need a massive pantry to make incredible BBQ; in fact, if you go with our Classic BBQ style, it only requires 4 simple ingredients!
Using Oil as a Binder
Before we talk about spices, we need to talk about the binder. A “binder” is a liquid applied to the meat to help the dry rub stick to the surface. For chicken breasts, olive oil or avocado oil is the best choice. Not only does it hold the seasoning in place, but the fat in the oil helps conduct heat, promoting a better sear and a more flavorful crust (bark) on the outside of the meat.
Style 1: The Simple Smoked (Dry Rub Only)
If you are making chicken breast on a pellet grill for weekly meal prep, keep it simple. You want a flavor that can adapt to salads, pastas, or wraps.
- 4 Boneless, Skinless Chicken Breasts
- 1 Tablespoon Olive Oil
- 1 Tablespoon Kosher Salt
- 1/2 Tablespoon Coarse Black Pepper
- 1/2 Tablespoon Garlic Powder
- 1/2 teaspoon Smoked Paprika (for color)
Style 2: The Classic BBQ (With Sauce)
If you are hosting a backyard cookout and want that sticky, caramelized, finger-licking BBQ chicken, this 4-ingredient method is all you need.
- 4 Boneless, Skinless Chicken Breasts
- 1 Tablespoon Olive Oil
- 2 Tablespoons of your favorite Sweet BBQ Rub (Look for any high-quality store-bought rub that features brown sugar, paprika, and a hint of chili).
- 1/2 Cup of your favorite BBQ Sauce (applied only at the very end of the cook).
Style 2: The Classic BBQ (With Sauce)
If you are hosting a backyard cookout and want that sticky, caramelized, finger-licking BBQ chicken, you will want a sweet rub and a great sauce.
- 1 Tablespoon Olive Oil
- 2 Tablespoons of your favorite Sweet BBQ Rub (look for one with brown sugar, paprika, and chili powder).
- 1/2 Cup of your favorite BBQ Sauce (applied only at the very end of the cook).
Chicken Breast on Pellet Grill: Time and Temperature Guide
One of the most common questions I get is: “What temperature should I set my grill to?”
The answer depends entirely on the texture and smoke level you want. Here is the ultimate time and temperature guide for your pellet grill chicken breast.
Method 1: Low and Slow (225°F)
- Best for: Maximum smoke flavor.
- Estimated Time: 45 to 60 minutes.
- The Result: Because the grill is running at a low temperature, the meat spends more time in the smoke. The chicken will be incredibly tender and have a pronounced smoky taste. However, the outside will not have a crispy sear or grill marks. It will be soft.
Method 2: Hot and Fast (325°F – 350°F)
- Best for: The perfect balance of smoke, speed, and texture. (This is my highly recommended method).
- Estimated Time: 25 to 30 minutes.
- The Result: At 325°F, the fan is blowing enough hot air to give the chicken a nice, firm bite on the outside while keeping the inside juicy. It cooks fast enough for a weeknight dinner but still absorbs a great wood-fired flavor.
Method 3: Direct Flame Sear (450°F)
- Best for: Steakhouse-style grill marks and a charred crust.
- Estimated Time: 15 to 20 minutes.
- The Result: If your pellet grill has a sliding heat baffle (like a Pit Boss or Yoder) that allows for direct flame access, you can use this method. You will get beautiful crosshatch grill marks. The smoke flavor will be minimal because the cook time is so short, but the texture will be phenomenal.
How to Smoke Chicken Breast (Pellet Grill Step-by-Step)
Now that we understand the science, the wood, and the temperatures, let’s put it all together. Here is exactly how to smoke chicken breast to perfection.
Step 1: Preheat the Grill
Fill your hopper with your chosen wood pellets (Apple or a Blend). Turn your pellet grill on and set the temperature to 325°F. Allow it to preheat for at least 15 minutes with the lid closed so the heavy white startup smoke clears out, leaving you with thin, clean blue smoke.
Step 2: Prep, Bind, and Season
While the grill is heating, take your brined and pounded chicken breasts and pat them completely dry with a paper towel. Moisture on the surface creates steam, which prevents a good crust from forming.
Drizzle the chicken with olive oil, massaging it over all sides. Generously apply your dry rub, pressing it gently into the meat. Let the chicken sit on the counter for 5-10 minutes until the rub looks “wet” and adheres to the meat.
Step 3: Grill and Monitor
Place the chicken breasts directly on the grill grates. Close the lid. Let them cook for about 12-15 minutes, then flip them over.
Pro Move: If you want crosshatch grill marks, rotate the chicken 45 degrees halfway through the cook on each side. This is a crucial step for a picture-perfect pellet grill chicken breast.
Step 4: The Sauce (Optional)
If you are making BBQ glazed chicken, wait until the internal temperature of the chicken reaches 150°F. At this point, brush your BBQ sauce over the top of the breasts. Close the lid for 5 minutes to let the sauce tack up and caramelize. Do not put the sauce on too early, or the sugars in the sauce will burn and turn bitter!
Step 5: Pull at the Perfect Temperature
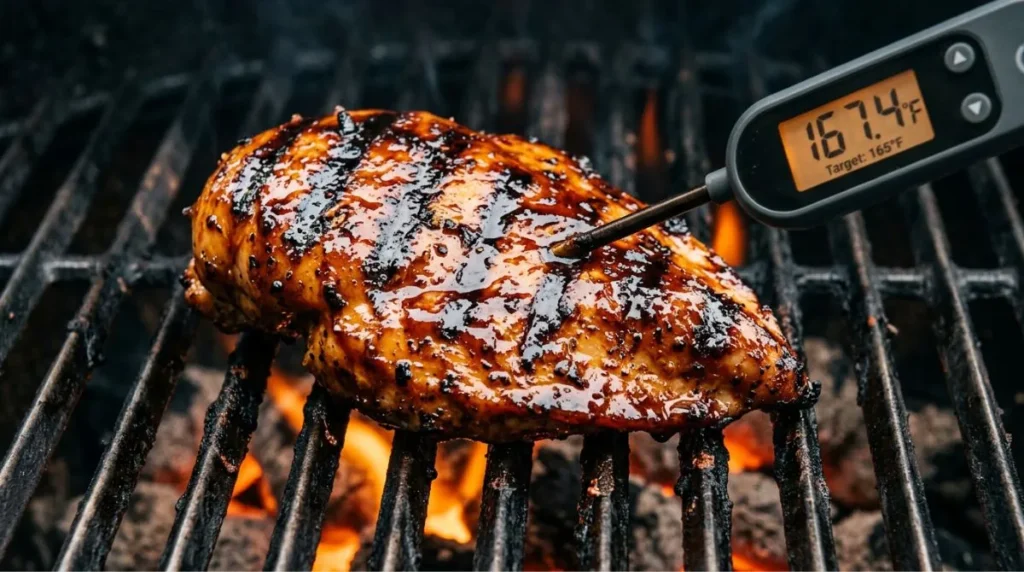
Insert your instant-read meat thermometer into the thickest part of the breast. Pull the chicken off the grill when it hits 155°F to 160°F. (We will explain exactly why in the Pro Tips section below).
Step 6: Rest and Slice
Transfer the chicken to a cutting board or platter. Tent it loosely with aluminum foil and let it rest for 5 to 10 minutes before you even think about taking a knife to your pellet grill chicken breast. Slice against the grain and serve!
Pro Tips for Perfectly Smoked Chicken Breasts
To elevate your BBQ game from amateur to neighborhood legend, you need to understand a few core rules of meat chemistry.
- The Magic of Carryover Cooking: The USDA recommends cooking all poultry to a safe minimum internal temperature of 165°F for safety. However, if you leave your chicken on the grill until the thermometer reads 165°F, it is already ruined. Why? Because of carryover cooking. When you remove a hot piece of meat from the grill, the residual heat trapped inside continues to cook the center. If you pull your pellet grill chicken breast off at 155°F – 160°F and tent it with foil, the internal temperature will safely rise to the FDA-approved 165°F while it rests on the counter. This guarantees maximum juiciness.
- Invest in a Good Meat Thermometer: You cannot cook good BBQ by guessing or looking at the clock. Every chicken breast is a different size, and every grill has hot spots. An instant-read digital meat thermometer is the most important tool in your arsenal. Cook to temperature, never to time.
- Keep the Lid Closed: “If you’re lookin’, you ain’t cookin’.” Every time you open the lid of your pellet grill, you lose heat and smoke. The grill then has to dump more pellets into the firepot to recover, which can cause temperature swings. Trust the process and keep the lid shut as much as possible.
Common Mistakes to Avoid (No More Dry Chicken!)
Even with a great recipe, things can go wrong. Here are the most common pitfalls people face when learning how to smoke chicken breast, and how you can avoid them:
Mistake 1: Cooking by Time Instead of Temperature
“The recipe said 30 minutes, so I took it off at 30 minutes.” This is the number one reason people eat dry chicken. If your chicken breasts were slightly thinner than the recipe author’s, they might have been done in 20 minutes. Always use your thermometer.
Mistake 2: Skipping the Resting Phase
When chicken is cooking, the heat forces the moisture toward the center of the meat. If you slice the chicken the second it comes off the grill, all that boiling hot juice will spill out onto your cutting board, leaving the meat dry. Resting the meat for 5-10 minutes allows the muscle fibers to relax and the juices to redistribute evenly throughout the breast.
Mistake 3: Wrapping Chicken in Foil While Smoking
Some people wrap their chicken in aluminum foil thinking it will trap moisture. Do not do this! Wrapping the chicken completely blocks the wood smoke from reaching the meat, defeating the entire purpose of using a pellet smoker. It also steams the chicken, resulting in a mushy, unappetizing texture.
Mistake 4: Using Cold Chicken Straight from the Fridge
Throwing ice-cold chicken onto a hot grill shocks the meat and causes the muscle fibers to seize up and become tough. Let your seasoned chicken sit at room temperature for about 15-20 minutes before grilling to take the chill off.
How to Store, Freeze, and Reheat Leftover BBQ Chicken
If you were smart and cooked a large batch of pellet grill chicken breast for meal prep, you need to know how to store and reheat it properly so it doesn’t taste like cardboard the next day.
- To Store: Let the chicken cool completely. Place it in an airtight container and store it in the refrigerator for up to 4 days.
- To Freeze: Wrap individual chicken breasts tightly in plastic wrap, then place them in a heavy-duty freezer bag. Squeeze out as much air as possible. They will keep in the freezer for up to 3 months. Thaw safely in the fridge overnight before using.
- To Reheat (The Secret Method): Never microwave leftover chicken breast on high power; it will turn to rubber. The best way to reheat it is to slice it, place it in a skillet over medium-low heat, and add a splash of chicken broth or water. Cover the skillet with a lid. The steam from the broth will gently warm the chicken while injecting moisture back into the meat.
Frequently Asked Questions (FAQs)
How long does it take to smoke chicken breast at 225°F vs 325°F?
At 225°F (low and slow), it will take approximately 45 to 60 minutes to reach an internal temperature of 160°F. At 325°F (hot and fast), it will take about 25 to 30 minutes. Always rely on your meat thermometer rather than the clock.
Should you wrap chicken in foil to smoke?
No. Wrapping chicken breasts in foil prevents the smoke flavor from penetrating the meat and ruins the texture of the outside crust. You should only use foil to loosely “tent” the chicken after it comes off the grill while it is resting.
Do I need to flip chicken breast on pellet grill smokers?
Technically, pellet grills act like convection ovens, so the heat circulates all around the meat. You don’t have to flip it. However, flipping the chicken halfway through the cook ensures a more even color, prevents the bottom from drying out on the hot grates, and gives you beautiful grill marks on both sides.
Why did my smoked chicken turn out rubbery?
Rubbery chicken is almost always the result of overcooking. If the internal temperature of the chicken exceeds 165°F while on the grill, the proteins tighten up and squeeze out all the moisture, leaving behind a tough, rubbery texture. Pull your chicken at 155°F-160°F and let carryover cooking do the rest.
Can I cook chicken breast on pellet smoker if it is frozen?
Absolutely not. Smoking frozen chicken is a massive food safety hazard. Because pellet grills often cook at lower temperatures, the frozen chicken will spend too much time in the “Danger Zone” (40°F – 140°F), allowing harmful bacteria to multiply rapidly. Furthermore, the outside will overcook before the inside thaws. Always thaw your chicken completely in the refrigerator before grilling.
You are now fully equipped to make the best pellet grill chicken breast of your life. Follow the steps, trust your thermometer, and enjoy the incredible flavor!
Recipe Card: Pellet Grill Chicken Breast
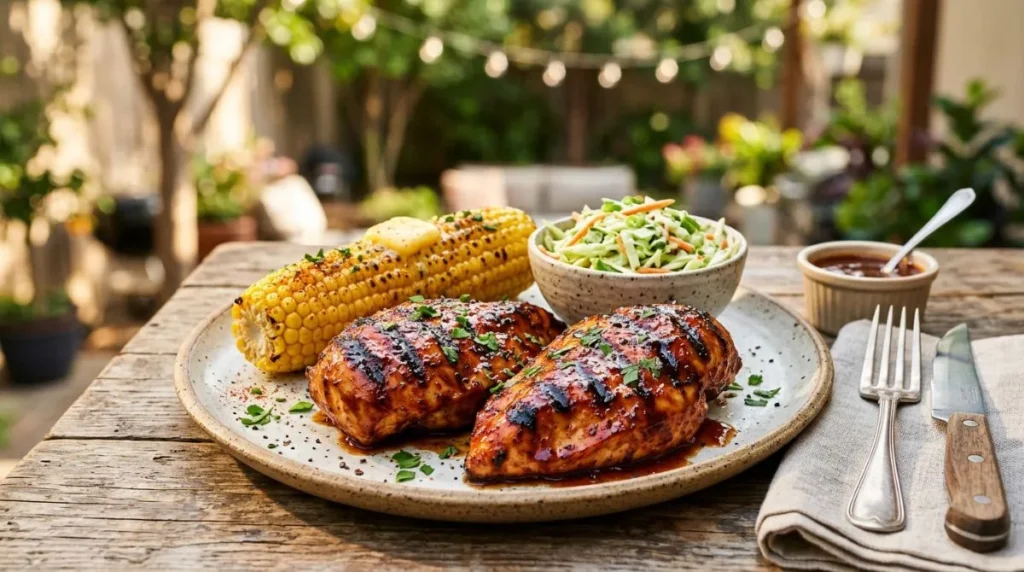
This foolproof pellet grill chicken breast recipe guarantees juicy, tender, and smoky results every single time. Perfect for a quick weeknight dinner or weekly meal prep!
Prep Time: 15 minutes
Cook Time: 30 minutes
Resting Time: 10 minutes
Total Time: 55 minutes
Yield: 4 Servings
Equipment Needed
- Pellet Grill (Traeger, Pit Boss, Camp Chef, etc.)
- Hardwood Pellets (Apple, Cherry, or Competition Blend)
- Instant-Read Digital Meat Thermometer
- Meat Mallet (for pounding)
Ingredients
- 4 Boneless, Skinless Chicken Breasts (about 2 lbs total)
- 1 Tablespoon Olive Oil or Avocado Oil
- 2 Tablespoons of your favorite BBQ Sweet Rub (or a mix of salt, pepper, garlic powder, and paprika)
- 1/2 Cup BBQ Sauce (Optional, for glazing)
Instructions
- Prep the Meat: Place the chicken breasts on a cutting board. Cover with plastic wrap and gently pound the thick ends with a meat mallet until the breasts are an even 3/4-inch thickness.
- Preheat the Grill: Fill your hopper with pellets and preheat your pellet grill to 325°F. Allow the grill to heat up for 15 minutes until the smoke runs clear.
- Season: Pat the chicken breasts completely dry with a paper towel. Drizzle with olive oil and rub to coat evenly. Sprinkle your BBQ rub generously over both sides of the chicken. Let sit for 10 minutes.
- Grill: Place the chicken directly on the grill grates. Close the lid and cook for 15 minutes.
- Flip and Monitor: Flip the chicken breasts over. Insert your meat thermometer into the thickest part of the largest breast. Continue cooking for another 10-15 minutes.
- Baste (Optional): If using BBQ sauce, brush it onto the chicken when the internal temperature reaches 150°F. Close the lid and let the sauce caramelize for the last few minutes.
- Pull and Rest: Remove the chicken from the grill the exact moment the internal temperature reads 155°F – 160°F. Place on a platter, tent loosely with foil, and let rest for 5 to 10 minutes. The temperature will rise to a safe 165°F while resting.
- Serve: Slice against the grain and serve immediately!
Recipe Notes from the Pitmaster
- The Brine Upgrade: If you have an extra hour, soak your chicken in a simple brine (4 cups water, 1/4 cup salt) before pounding. It guarantees the juiciest results.
- Cook Mode: Keep your phone screen on while cooking! Don’t walk away from the grill during the last 10 minutes; the temperature jumps quickly from 140°F to 160°F.
Nutrition Information (Per Serving – without sauce)
Calories: 210 kcal | Protein: 45g | Fat: 5g | Carbohydrates: 2g | Sodium: 450mg | Cholesterol: 110mg
(Nutrition information is an estimate and varies based on the exact rub and sauce used).
Happy Grilling! If you loved this recipe, be sure to leave a 5-star rating and share your backyard BBQ photos with us!
Method
- Place the chicken breasts on a cutting board. Cover with plastic wrap and gently pound the thick ends with a meat mallet until the breasts are an even 3/4-inch thickness.
- Place the chicken breasts on a cutting board. Cover with plastic wrap and gently pound the thick ends with a meat mallet until the breasts are an even 3/4-inch thickness.
- Place the chicken breasts on a cutting board. Cover with plastic wrap and gently pound the thick ends with a meat mallet until the breasts are an even 3/4-inch thickness.
- Place the chicken breasts on a cutting board. Cover with plastic wrap and gently pound the thick ends with a meat mallet until the breasts are an even 3/4-inch thickness.