
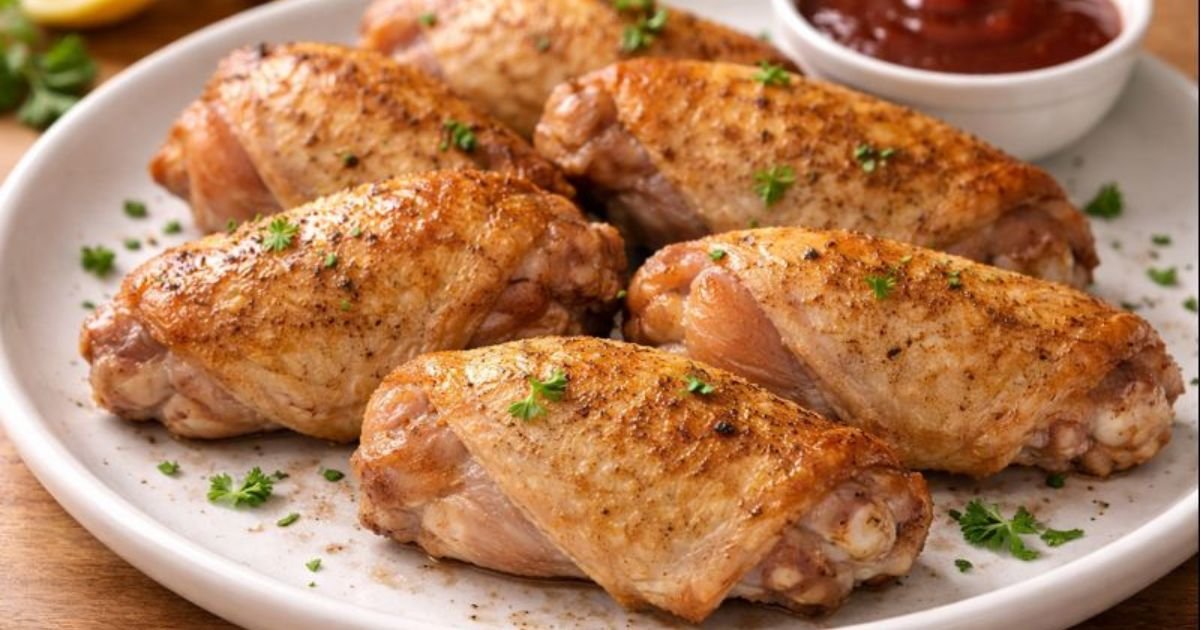
Baked Chicken Wings That Turn Crispy in the Oven
Baked Chicken Wings That Turn Crispy in the Oven
Baked chicken wings should be simple, reliable, and satisfying — yet for many home cooks, they’re anything but. One batch comes out pale, another too dry, and sometimes the timing just never feels right. If you’ve ever wondered why oven-baked wings can feel unpredictable, you’re not alone. The truth is, great wings aren’t about secret ingredients or complicated techniques. They’re about understanding a few key fundamentals and applying them with confidence.
This guide was created to take the guesswork out of making oven baked chicken wings at home. You don’t need special equipment, advanced skills, or chef-level precision — just a clear process that actually works in a real kitchen. Instead of throwing numbers at you and hoping for the best, this article walks you through the logic behind crispiness, proper baking, timing, and finishing in a way that feels practical and approachable.
Whether you’re cooking wings for the first time or trying to improve inconsistent results, you’ll learn how to recognize what works, avoid common mistakes, and trust the process. By the end, you won’t just have a recipe — you’ll have a method you can rely on every time.
How to Make Crispy Baked Chicken Wings in the Oven
If you’ve ever baked chicken wings in the oven only to pull them out soft and pale instead of golden and crunchy, you’re not alone. This is one of the most common frustrations home cooks face when trying to make crispy baked chicken wings without deep frying. The good news? The problem isn’t your oven — it’s usually a few small details that make a big difference.
Crispiness in baked wings isn’t about adding more oil or cooking them longer. It’s about understanding what’s actually stopping the skin from crisping up in the first place.
Why baked chicken wings often fail to get crispy
The biggest enemy of crispy wings is moisture. Chicken skin naturally holds water, and when that moisture heats up in the oven, it turns into steam. Steam softens the skin instead of crisping it, no matter how long you bake the wings.
Other common reasons wings don’t crisp properly include:
- Baking at a temperature that’s too low
- Placing wings directly on a flat baking sheet
- Crowding the wings too close together
- Letting rendered fat pool underneath the skin
Once you understand these problems, fixing them becomes surprisingly simple.
The core principles behind crispy baked chicken wings
Getting crispy results in the oven comes down to four key principles. You don’t need special equipment or complicated ingredients — just the right setup.
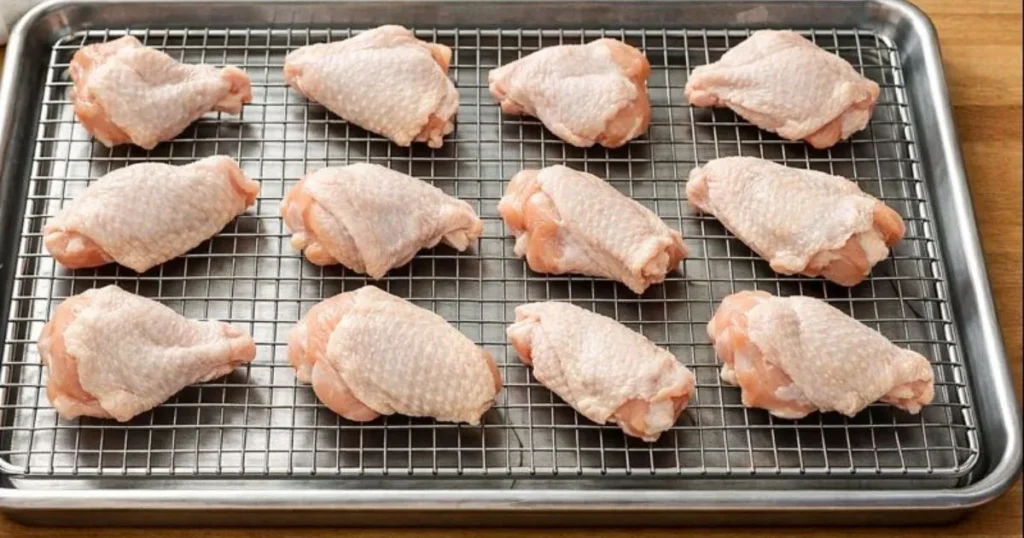
First, the surface of the wings must be dry. Even a thin layer of moisture prevents proper browning. Second, hot air needs to circulate around the wings, not just hit them from above. Third, the fat under the skin needs enough heat to slowly render out. Finally, the skin must be exposed directly to dry oven heat, not trapped against metal or sitting in grease.
When these elements work together, crispy baked chicken wings become completely achievable — even without frying.
What actually makes wings crispy (quick reference)
| Factor | Why it matters | Result |
| Drying the wings | Removes surface moisture | Skin browns instead of steaming |
| Baking powder (optional) | Changes skin surface chemistry | Stronger, faster crisping |
| Wire rack | Allows air circulation | Even crisping on all sides |
| High oven heat | Renders fat efficiently | Golden, crunchy skin |
This combination matters far more than adding extra oil or cooking time.
Practical steps to improve crispiness in the oven
Once the theory is clear, the execution becomes straightforward. Always pat the wings dry thoroughly before seasoning. Arrange them in a single layer with space between each piece, ideally elevated on a wire rack so heat can circulate underneath.
A hot oven is essential. Moderate heat cooks the meat, but higher heat is what transforms the skin. As the wings bake, fat slowly renders out, leaving the skin thinner and capable of crisping naturally. Halfway through baking, flipping the wings helps expose both sides evenly to dry heat.

Common mistakes that ruin crispy baked chicken wings
Many people unknowingly undo all their effort with a few small mistakes. The most frequent issue happens before the wings even reach the oven, when excess moisture is left on the surface. Another problem is overcrowding the pan — wings that touch trap steam between them. Baking on parchment-lined trays without airflow underneath also prevents proper crisping.
Lowering the oven temperature too early can stop the skin from finishing properly, while covering the wings at any point will immediately reintroduce steam.
Avoiding these errors alone can dramatically improve your results.
Final note before moving on
Crispy wings in the oven aren’t a trick — they’re the result of understanding moisture, heat, and airflow. Once you get these fundamentals right, baking wings becomes predictable instead of frustrating.
Now that you know why crispiness works, the next step is learning how to bake chicken wings correctly from start to finish, using this knowledge as the foundation.
How to Bake Chicken Wings Step by Step
If you’re baking chicken wings for the first time, it’s normal to feel unsure about where to start. Many people assume baking wings is just about seasoning them and putting them in the oven, but small details in preparation and setup make a huge difference. Learning how to bake chicken wings properly is less about following a strict recipe and more about understanding the process from start to finish.
Preparing the chicken wings before baking
The moment you take the chicken wings out of the package, preparation begins. Skip rinsing them with water, as this only adds unnecessary moisture. Instead, focus on drying them thoroughly using paper towels. This step is essential because excess moisture interferes with browning once the wings hit the oven.
Before you even think about seasoning, make sure your oven and baking tools are ready. Having everything set up ahead of time prevents rushing later, which often leads to uneven cooking.
Seasoning and arranging the wings correctly
When seasoning chicken wings, less is more at this stage. A light coating of oil helps spices adhere, but too much oil will prevent proper baking. Season evenly, making sure each wing is coated without being drenched.
Arrangement matters just as much as seasoning. Give each wing enough room so hot air can move freely around it. When wings touch or overlap, they trap steam, which affects both texture and doneness. Proper spacing allows heat to reach all sides evenly. When wings touch or overlap, they trap steam, which affects texture and doneness. Proper spacing allows heat to reach all sides evenly.
Choosing the right pan and oven setup
One of the most overlooked parts of baking wings is the pan choice. Elevating the wings on a wire rack allows hot air to circulate underneath, helping them cook evenly from all sides. If you place wings directly on a flat tray, the bottom tends to cook differently than the top.
Position the oven rack in the middle or upper-middle area to ensure balanced heat exposure. This setup creates a steady environment where the wings can bake evenly without scorching.
What happens while chicken wings bake
As the wings bake, several changes take place. The skin gradually tightens, fat begins to render out, and the surface starts to develop color. You may notice sizzling sounds as fat drips away — this is a good sign and part of the normal process.
About halfway through baking, gently turning the wings helps expose all sides to dry heat. This step improves even cooking and prevents one side from browning too quickly.
How to tell when baked chicken wings are done
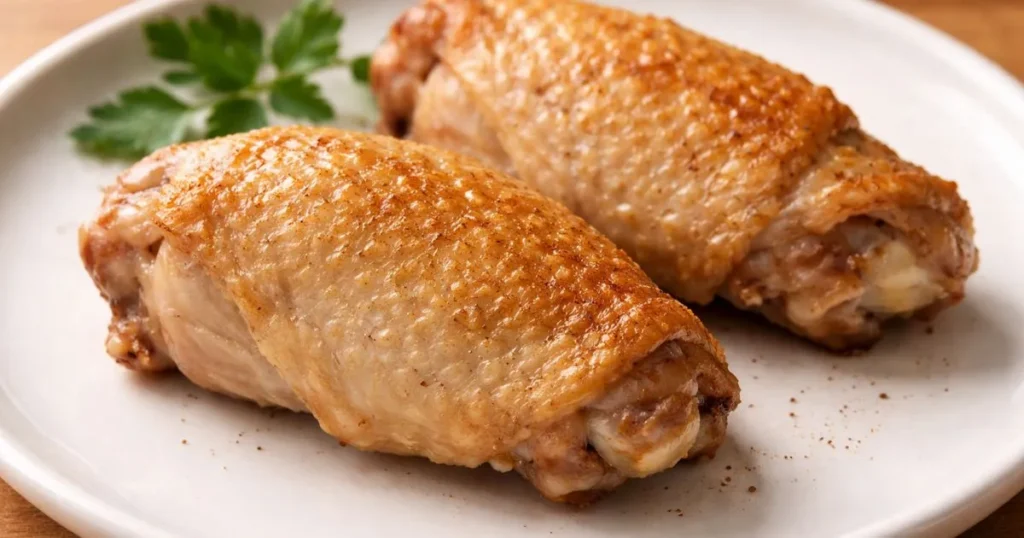
Knowing when wings are fully cooked doesn’t require guesswork. Visually, the skin should appear golden and slightly firm. When touched, the surface should feel dry rather than soft. Fully baked wings also release easily from the rack or pan without sticking.
Avoid removing the wings too early, as undercooked wings lack both texture and flavor. On the other hand, overbaking can dry out the meat if you’re not paying attention to these visual cues.
After baking: finishing and serving
Once the wings come out of the oven, give them a brief rest before adding any sauces. This allows the surface to stay intact instead of becoming soggy. Tossing wings in sauce while they’re piping hot can soften the skin, so timing matters.
Serve immediately for the best texture, or move on to flavoring and glazing depending on your preference.
Final thoughts before moving on
Understanding how to bake chicken wings is about building good habits: proper drying, smart arrangement, and controlled baking. Once you master these basics, everything else — timing, temperature, and flavor variations — becomes much easier.
Next, we’ll break down exactly how long to bake chicken wings, so you can combine technique with precise timing for consistent results.
How Long to Bake Chicken Wings for Perfect Results
One of the most common questions people ask once their wings are in the oven is how much longer they should stay there. The truth is, learning how long to bake chicken wings isn’t about memorizing a single number. It’s about understanding what’s happening inside the oven and knowing how to read the signs that tell you the wings are ready.
A realistic baking time (and why it’s only a guideline)
In most home ovens, chicken wings typically take somewhere in the middle range of baking times to cook through properly. This range exists because no two setups are exactly the same. The size of the wings, how they’re arranged, and even how your oven distributes heat all influence the final result.
Instead of focusing on an exact minute count, think of baking time as a window. Your goal is to reach the point where the meat is fully cooked while the skin has had enough time to tighten and render fat naturally.
Why chicken wing baking time varies
Several factors explain why two people can follow the same method and still end up with different results. Larger wings naturally take longer because heat needs more time to reach the center. Wings placed close together trap heat and moisture, slowing down cooking, while well-spaced wings bake more evenly.
The surface the wings sit on also matters. Elevated wings allow heat to circulate underneath, while wings baked directly on a flat pan tend to cook differently on the bottom. Even the way your oven cycles heat can slightly shorten or extend baking time.
Baking time differences at a glance
| Setup factor | Wing size | What to expect |
| Wings on a wire rack | Medium | Even cooking within the normal time range |
| Wings on a flat tray | Medium | Slightly longer baking needed |
| Larger wings | Thick | Extra time required to cook through |
| Smaller wings | Thin | Faster cooking, watch closely |
This table isn’t about precision — it’s about setting expectations before you open the oven door.
What happens if you remove wings too early
Pulling wings out too soon often leads to disappointing results. The meat may still be pale and undercooked near the bone, and the skin will feel soft instead of firm. This happens because the fat hasn’t had enough time to render, and moisture remains trapped under the skin.
Underbaked wings don’t improve much once removed from the oven, which is why patience is essential during this stage.
What happens if wings stay in the oven too long
Leaving wings in the oven well past the ideal point can dry them out. Once most of the fat has rendered, the meat starts losing moisture instead of gaining flavor. The skin may become overly hard, and the interior can turn stringy.
Understanding this balance is key to mastering how long to bake chicken wings without second-guessing yourself.
[Image placeholder: chicken wings halfway through baking inside the oven]
How to tell when baked chicken wings are ready
Instead of relying on the clock alone, use your senses. Properly baked wings develop a golden surface and feel dry to the touch. They should lift easily from the rack or pan without sticking, and the joints should move freely when nudged.
When you notice these signs together, it’s a strong indicator that the wings have baked long enough — regardless of the exact minute count.
Final takeaway before adjusting temperature
Baking time works best when combined with observation. Once you understand how long wings generally take and what visual cues to look for, the process becomes far more predictable.
Next, we’ll look at how long to bake chicken wings at 400, where temperature plays an even more direct role in timing and texture.
How Long to Bake Chicken Wings at 400°F
Choosing 400°F is one of the most popular options when baking wings in the oven, and for good reason. This temperature sits right in the sweet spot where the meat cooks through without rushing, while the skin has enough heat to tighten, render fat, and develop color. Understanding how long to bake chicken wings at 400 helps you avoid the two most common problems: undercooked meat or dried-out wings.
The typical baking window at 400°F
At 400°F, chicken wings usually need a moderate amount of time in the oven to reach the right balance. This temperature isn’t aggressive enough to burn the skin quickly, but it’s hot enough to steadily cook the meat all the way to the bone. Think of the timing here as a controlled process rather than a race against the clock.
Instead of watching minutes obsessively, focus on letting the wings move through stages: initial cooking, fat rendering, and final browning. Each stage matters at this temperature.
Why 400°F works so well for baking wings
At lower temperatures, chicken skin tends to soften before it ever crisps. At much higher temperatures, the outside can brown too fast while the inside struggles to catch up. Baking at 400°F allows fat beneath the skin to melt gradually, which naturally bastes the meat while drying out the surface.
This balance is why many cooks find 400°F more forgiving than higher heat settings when learning oven-baked wings.
Baking time differences at 400°F
| Baking setup | Wing size | What to expect |
| Wire rack | Medium | Even cooking with steady browning |
| Flat baking tray | Medium | Slightly longer bake needed |
| Large wings | Thick | Extra time for center doneness |
| Small wings | Thin | Faster finish, monitor closely |
This table isn’t meant to lock you into exact numbers. It’s a way to anticipate how your setup influences timing before problems appear.
Should you turn wings when baking at 400°F?
Flipping wings halfway through baking at 400°F can improve even browning, especially if you’re using a flat tray. Turning them exposes both sides to dry heat and prevents one surface from staying too moist for too long. When wings are elevated on a rack, flipping becomes less critical, but it can still help achieve uniform color.
This question deserves its own deeper explanation, which we’ll cover next.
How to tell wings are done at 400°F
Rather than relying only on time, pay attention to physical cues. Properly baked wings at 400°F develop a golden exterior and feel dry and firm when touched. The joints should move easily, and the wings should lift cleanly from the surface without sticking.
If the skin still feels soft or pale, the wings need more time — even if the clock suggests otherwise.
Final takeaway before flipping decisions
Baking wings at 400°F is about patience and observation. Once you understand how this temperature behaves and how to read visual signals, timing becomes intuitive instead of stressful.
Next, we’ll answer a very common follow-up question: should you flip chicken wings when baking, and when flipping actually makes a difference.
Baked Chicken Wings Recipe (Simple, Reliable, and Full of Flavor)
This is the kind of baked chicken wings recipe you make when you want results you can trust. No tricks, no unnecessary steps — just a calm, well-paced approach that lets the ingredients and the oven do their job. Think of this as a method refined through repetition, the kind a professional cook relies on during a busy service.
Ingredients you’ll need
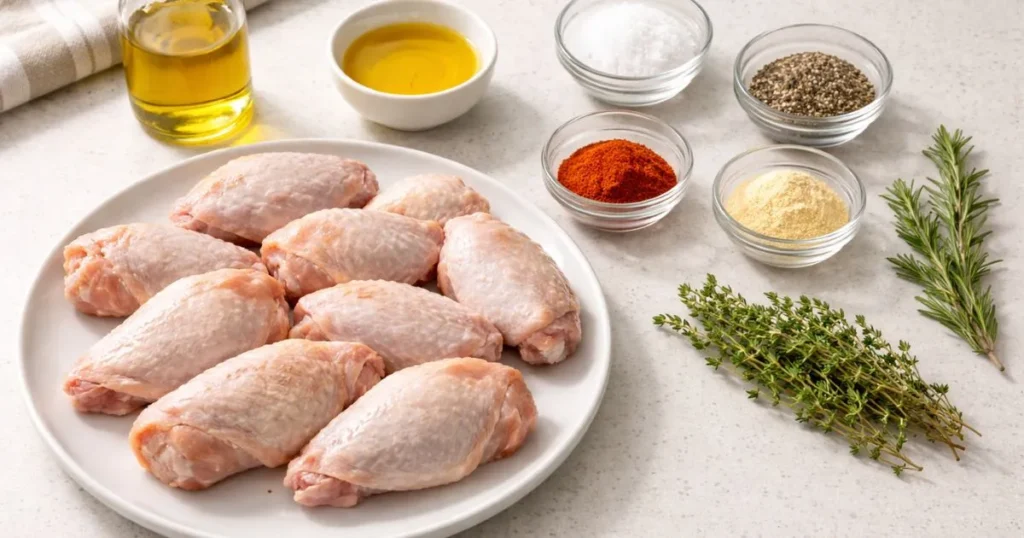
- Chicken wings (separated, if whole)
- A neutral oil (just enough to lightly coat)
- Salt
- Black pepper
Optional flavor additions (choose one direction, don’t mix everything):
- Smoked paprika or chili powder
- Garlic powder
- A touch of dried herbs
The goal here isn’t to overwhelm the wings — it’s to season them with intention.
Step 1: Prepare the wings with care
Start by patting the wings dry thoroughly. Take your time here — rushing this part often shows in the final texture. Once dry, place them in a bowl and drizzle just enough oil to help the seasoning cling, no more than that.
Season evenly with salt and pepper first. Taste and restraint matter more than complexity. If you’re adding extra spices, sprinkle lightly and toss gently until the wings are evenly coated.
Step 2: Arrange them properly before baking
Lay the wings out in a single layer, giving each piece a bit of breathing room. Avoid stacking or crowding — wings need space to cook evenly. If you’re using a rack, great. If not, make sure the wings aren’t sitting in their own juices.
At this stage, pause for a second and check your setup. Calm preparation always shows in the final result.
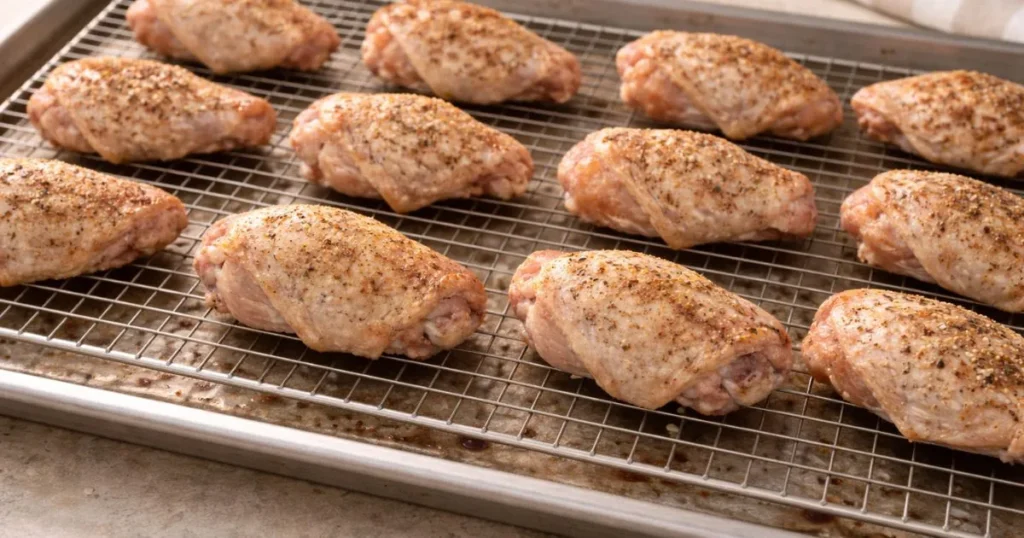
Step 3: Bake and let the oven work
Slide the tray into the oven and let the process unfold. Halfway through, gently turn the wings to encourage even cooking. Don’t rush this moment — flipping too early or too often only disrupts the rhythm.
As they bake, you’ll notice the wings changing gradually: the skin tightens, the surface deepens in color, and the aroma becomes richer. These are all good signs.
Step 4: Finish with confidence
When the wings are done, remove them from the oven and let them rest briefly. This short pause allows everything to settle. If you plan to add sauce, do it now — lightly and evenly. If you prefer them as-is, serve immediately while the texture is at its best.
A good baked chicken wings recipe doesn’t shout. It delivers quietly, confidently, and consistently.
Final note from the kitchen
This recipe works because it respects the process. It doesn’t fight the oven or rush the outcome. Once you’ve made these wings a few times, you’ll start adjusting naturally — seasoning a bit differently, timing by feel rather than habit.
That’s when a recipe stops being instructions and starts becoming yours.
Final Thoughts
At this point, you’ve seen the full picture — not just a recipe, but the logic behind it. From understanding what makes wings crisp, to learning how to bake them properly, judge their doneness, and finish them with confidence, you now have everything you need to make oven baked chicken wings that actually work in a real home kitchen.
The beauty of baked wings is that they reward attention, not perfection. Once you understand the rhythm of the oven and trust visual cues instead of chasing exact numbers, baking wings becomes simple and repeatable. Whether you’re making them for a casual dinner or a weekend gathering, baked wings in the oven can be just as satisfying as fried ones — without the mess or guesswork.
If this is your first time, don’t overthink it. Follow the process, stay patient, and let experience guide your next batch. Cooking improves the moment you stop memorizing and start noticing. With this guide, easy baked chicken wings are no longer a hit-or-miss experiment, but a skill you can rely on.
Now it’s your turn to put everything into practice — and make the recipe your own.
Frequently Asked Questions
Should I cover chicken wings when baking?
No. Covering chicken wings traps steam, which prevents the skin from drying out and crisping properly. For best results, bake them uncovered so heat can circulate freely and moisture can escape.
Can you bake frozen chicken wings in the oven?
Yes, but it’s not ideal. Frozen wings release extra moisture as they cook, which affects texture and timing. If you bake them from frozen, expect a longer cooking time and less consistent crispiness compared to thawed wings.
Why are my baked chicken wings not crispy?
The most common reasons are excess moisture, overcrowding, or insufficient airflow. Wings need to be thoroughly dried, spaced apart, and exposed to dry oven heat to crisp properly.
Do baked chicken wings need to rest before serving?
A short rest helps. Letting wings sit for a few minutes after baking allows the surface to set and prevents steam from softening the skin, especially if you plan to sauce them.
Can I make baked chicken wings ahead of time?
Yes. You can bake them earlier, then reheat in a hot oven just before serving. This helps restore texture better than microwaving and keeps the wings from becoming soggy.
What’s the best rack position for baking chicken wings?
The middle or upper-middle oven rack works best. This position provides balanced heat without over-browning the surface too quickly or slowing down cooking underneath.