
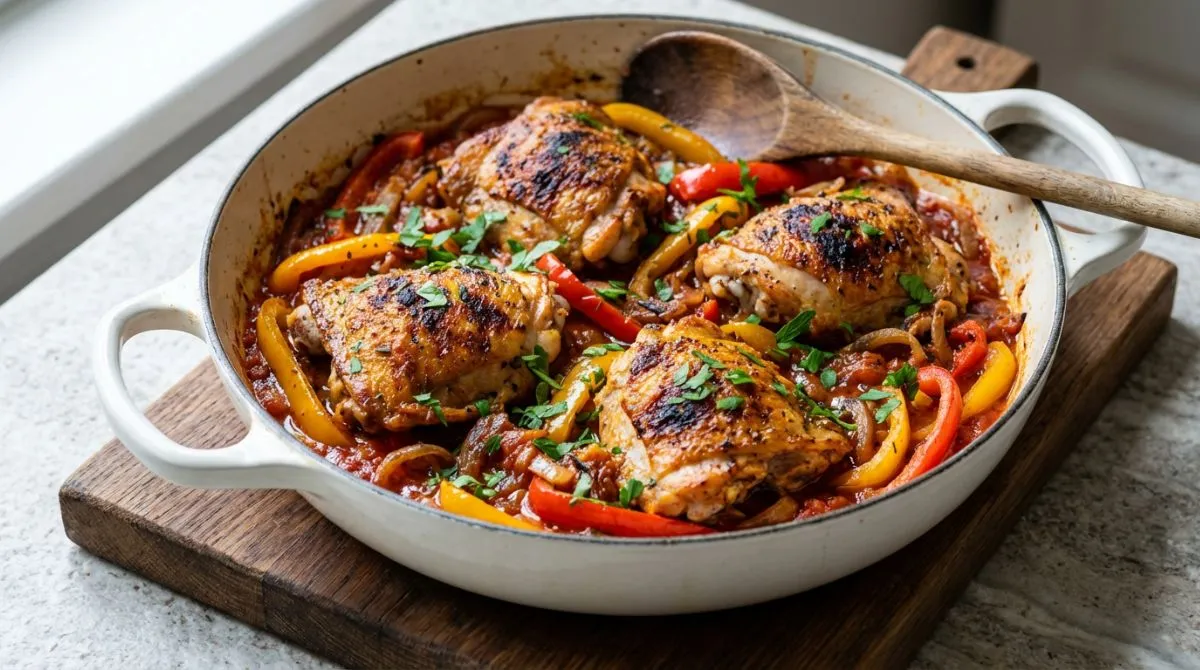
Easy Chicken and Peppers Recipe (One Pan Roman Style)
There is something profoundly comforting about the smell of onions and garlic sizzling in olive oil. It’s the scent of home, of tradition, and of a meal that promises to be as nourishing to the soul as it is to the body. This Chicken and Peppers recipe—or Pollo con Peperoni as it is known in the bustling trattorias of Rome—is the epitome of that comfort.
It is a dish that defies the modern obsession with complexity. It doesn’t ask for fancy gadgets or hard-to-find ingredients. Instead, it relies on the magic that happens when simple, high-quality ingredients are allowed to get to know each other in a single pot. Juicy chicken thighs, sweet bell peppers, and tender onions braised slowly in a rich white wine and tomato sauce until the meat is falling off the bone and the vegetables have melted into a luscious, savory jam.
If you are looking for a chicken and peppers and onions dish that requires minimal cleanup but delivers maximum flavor, you have arrived at the right place. This authentic Roman-style recipe is ready in under an hour, yet it tastes like it has been simmering all Sunday afternoon.
Table of Contents
Why You’ll Love This Italian Chicken and Peppers
In a world of endless dinner options, this Italian Chicken and Peppers recipe stands out for three simple reasons:
- The Ultimate One Pan Chicken and Peppers: We all love a good meal, but nobody loves a sink full of dishes. This recipe is a true one-pan wonder. From searing the chicken thighs to simmering the sauce, everything happens in a single skillet. Less cleaning means more time enjoying your meal.
- Unmatched Flavor Depth: Unlike quick stir-frys, this dish relies on a slow braise. The white wine deglazes the pan, lifting those caramelized bits (fond) of chicken and peppers, creating a sauce that is rich, complex, and deeply savory.
- Perfect Texture Balance: By using bone-in thighs and sturdy bell peppers, you achieve the perfect contrast: crispy, golden chicken skin on top, and meltingly tender vegetables underneath. It is a textural masterpiece.
The Science Behind the Dish: Why It Works
Cooking is chemistry, and understanding the science behind this chicken and peppers recipe will help you master it.
The Maillard Reaction
When we sear the chicken thighs at the beginning, we aren’t just “sealing in juices” (a common culinary myth). We are creating the Maillard reaction—a chemical reaction between amino acids and reducing sugars that gives browned food its distinctive flavor. This is why we insist on drying the chicken skin thoroughly before it hits the hot pan. Moisture is the enemy of the Maillard reaction.
Collagen Breakdown
We choose chicken thighs for this recipe because they are rich in collagen. As the chicken braises slowly in the liquid, this collagen breaks down into gelatin. This gelatin gives the sauce a rich, silky mouthfeel that you simply cannot achieve with lean chicken breasts. It coats the bell peppers and onions, tying the whole dish together.
Acid Balance
The white wine and tomatoes provide essential acidity. This acid does two things: it balances the richness of the chicken fat, and it helps to tenderize the meat fibers. In this chicken and peppers and onions dish, the acidity cuts through the savory notes, making each bite refreshing rather than heavy.
Ingredients for Chicken and Peppers and Onions
To make this delicious Italian chicken and peppers, you’ll need just a handful of pantry staples. The quality of these ingredients matters, as there are so few of them to hide behind.
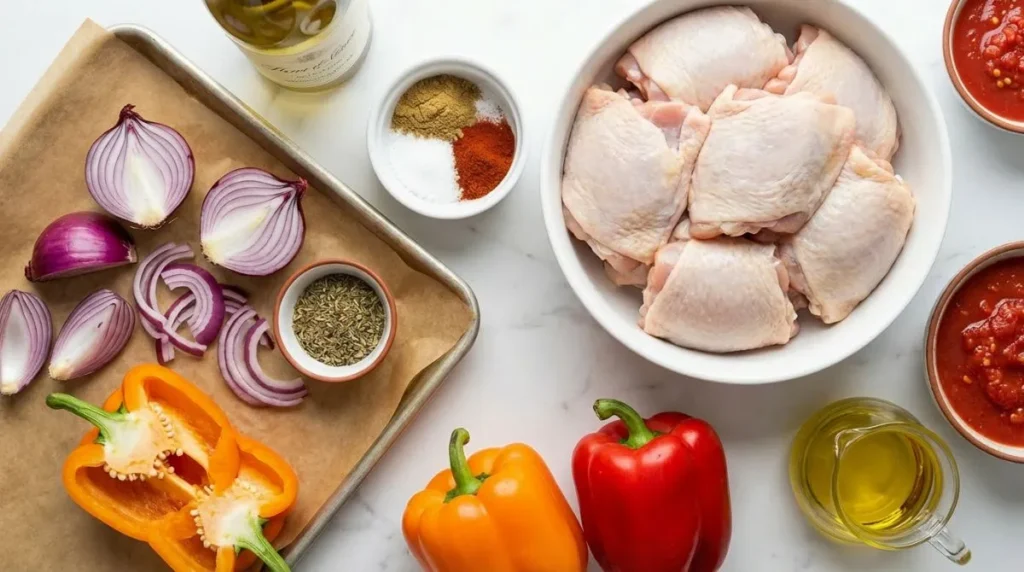
The Protein: Chicken Thighs
You can use bone-in, skin-on thighs for more flavor, or boneless, skinless thighs for a quicker cook time. Chicken thighs are preferred over breasts because they remain juicy even after simmering. The dark meat has enough fat to withstand the braising time without drying out.
- Why Bone-In? The bone acts as an insulator, ensuring the meat cooks more gently. It also releases marrow and flavor into the sauce.
- Why Skin-On? The skin renders fat (schmaltz) into the pan, which we then use to sauté the vegetables. This infuses the entire dish with chicken flavor.
The Vegetables: Bell Peppers & Onions
- Bell Peppers: Use a mix of red, yellow, and green bell peppers. The red and yellow add sweetness, while the green adds a nice savory bite. This trio of bell peppers not only looks beautiful but provides a complex flavor profile.
- Onions: A large yellow or red onion, sliced into strips. The chicken and peppers and onions combination is the holy trinity of flavor in this dish. The onions should be cooked until they are almost melting into the sauce.
The Braising Liquid
- Tomatoes: Canned San Marzano plum tomatoes are best. Grown in the volcanic soil of Mount Vesuvius, they are sweeter and less acidic than regular tomatoes. You’ll crush them by hand for a rustic texture.
- White Wine: A dry white wine like Pinot Grigio, Sauvignon Blanc, or an un-oaked Chardonnay works best to deglaze the pan. The alcohol evaporates during cooking, leaving behind only the complex flavor notes.
The Aromatics
- Garlic: Freshly sliced garlic cloves are essential. We slice them rather than mince them to prevent burning during the sauté step.
- Olive Oil: Use a good quality extra virgin olive oil.
- Fresh Basil: Added at the very end. Heat destroys the delicate flavor compounds in basil, so it must be a finishing touch.
Ingredient Substitutions Guide
We understand that you might not always have every ingredient on hand. Here is a comprehensive guide to swapping ingredients without sacrificing the soul of the dish.
| Ingredient | Best Substitute | Notes & Adjustments |
| White Wine | Chicken Broth + Lemon Juice | Use 1/2 cup broth + 1 tbsp lemon juice. This mimics the acidity and volume of wine. Apple cider vinegar (diluted) also works in a pinch. |
| Chicken Thighs | Chicken Breasts | Warning: Breasts dry out fast. If using breasts, sear them, remove them, make the sauce fully, and only return the breasts to the pan for the last 10-12 minutes of cooking. |
| San Marzano Tomatoes | Regular Canned Plum Tomatoes | Regular tomatoes can be more acidic. Taste your sauce; if it’s too tart, add a pinch of sugar or a finely grated carrot to balance it. |
| Fresh Basil | Dried Oregano or Parsley | Dried herbs are more potent and need time to hydrate. Add dried oregano during the simmering stage, not at the end. |
| Fresh Garlic | Garlic Powder | Use 1/2 teaspoon of powder for every clove. Add it with the tomatoes, not the oil, to avoid burning. |
| Bell Peppers | Cubanelle or Poblano Peppers | For a slightly different flavor profile. Poblanos add a mild heat and earthiness that works surprisingly well. |
Best Pan for Chicken and Peppers (Skillet vs Dutch Oven)
Choosing the right cookware is half the battle.
- Cast Iron Skillet: This is the gold standard for this recipe. Cast iron retains heat incredibly well, which is crucial for getting that deep, dark sear on the chicken skin. It also radiates heat evenly, helping the peppers soften uniformly.
- Enameled Dutch Oven: An excellent second choice. The high sides reduce splatter, and the heavy lid is perfect for the simmering stage. It’s also great for serving directly at the table.
- Stainless Steel Pan: Good for developing fond (the browned bits), but you need to be careful with heat control to prevent burning.
How to Make Chicken and Peppers (Step-by-Step)
Follow these detailed steps to master this Roman classic. We’ve broken it down to ensure your success.
Step 1: Prep and Season
Start by taking your chicken thighs out of the fridge 20 minutes before cooking. Cold meat hits a hot pan and lowers the temperature instantly, leading to steaming rather than searing.
Pat the chicken thoroughly dry with paper towels. Moisture creates steam, and steam prevents browning. We want a sear, not a steam bath.
Season liberally with Kosher salt and freshly cracked black pepper on both sides. Don’t be shy with the salt; it needs to penetrate the meat.
Step 2: The Perfect Sear
Heat 2 tablespoons of olive oil in your large skillet over medium-high heat. Wait until the oil is shimmering and just starting to smoke.
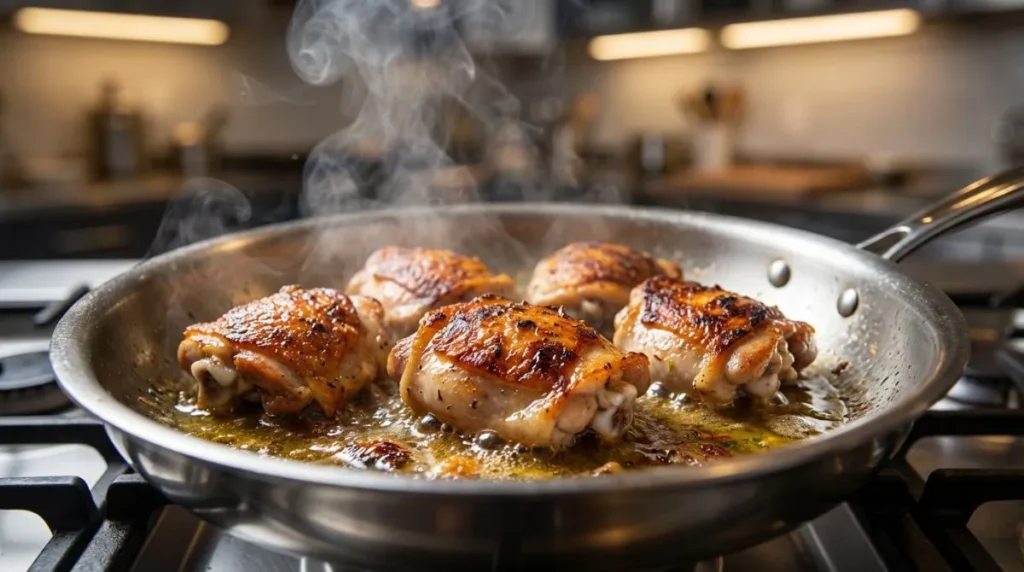
Place the chicken thighs skin-side down in the pan. You should hear a loud, aggressive sizzle. If you don’t, the pan isn’t hot enough.
Crucial Tip: Do not touch the chicken! Let it cook undisturbed for 5-7 minutes. It will release from the pan naturally when the skin is crisp and golden. If it sticks, it’s not ready.
Flip and cook for 2-3 minutes on the other side, then remove to a plate. The chicken won’t be fully cooked yet, and that’s fine.
Step 3: Sauté the Aromatics
Lower the heat to medium. You should have beautiful golden fat (schmaltz) rendered in the pan. If there’s too much, drain some; if too little, add a splash more olive oil.
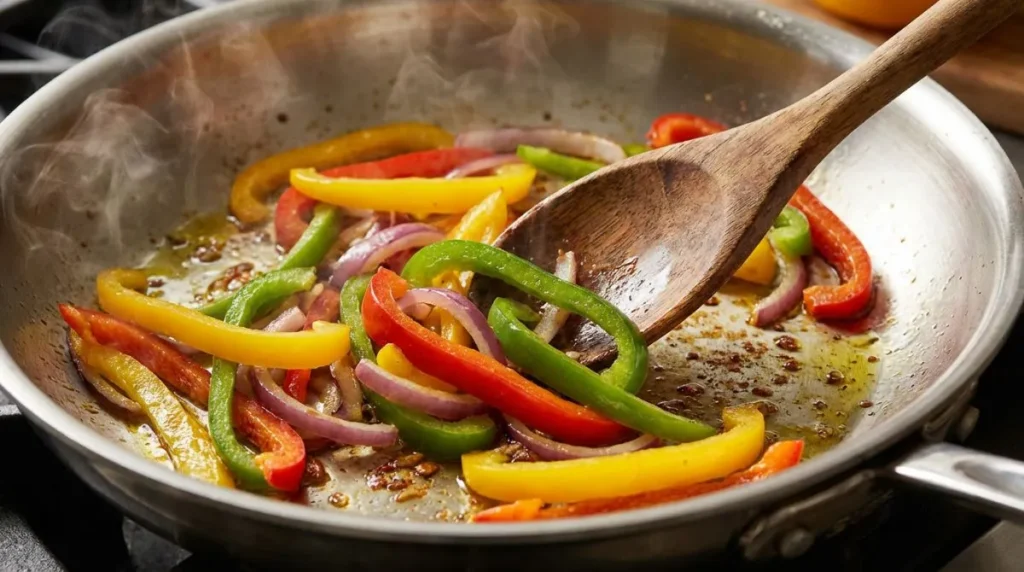
Add the sliced bell peppers and onions. Toss them in the hot fat. Season with a pinch of salt—this draws out moisture and helps them soften.
Sauté for 8-10 minutes. We aren’t just warming them up; we want them to soften significantly and pick up some color.
Add the sliced garlic in the last minute of cooking. Garlic burns bitter in seconds, so we never add it at the start with the onions.
Step 4: Deglaze and Build the Sauce
Pour in the white wine. It will hiss and bubble furiously. Use a wooden spoon to scrape up all the brown bits (fond) from the bottom of the pan. This is pure flavor gold. Let the wine reduce by half (about 2-3 minutes) to cook off the raw alcohol taste.
Add the hand-crushed tomatoes and their juices. Stir to combine. Bring the mixture to a gentle simmer.
Step 5: The Simmer
Nestle the chicken thighs back into the pan, skin-side up. Try to keep the crispy skin above the liquid line so it doesn’t get soggy.
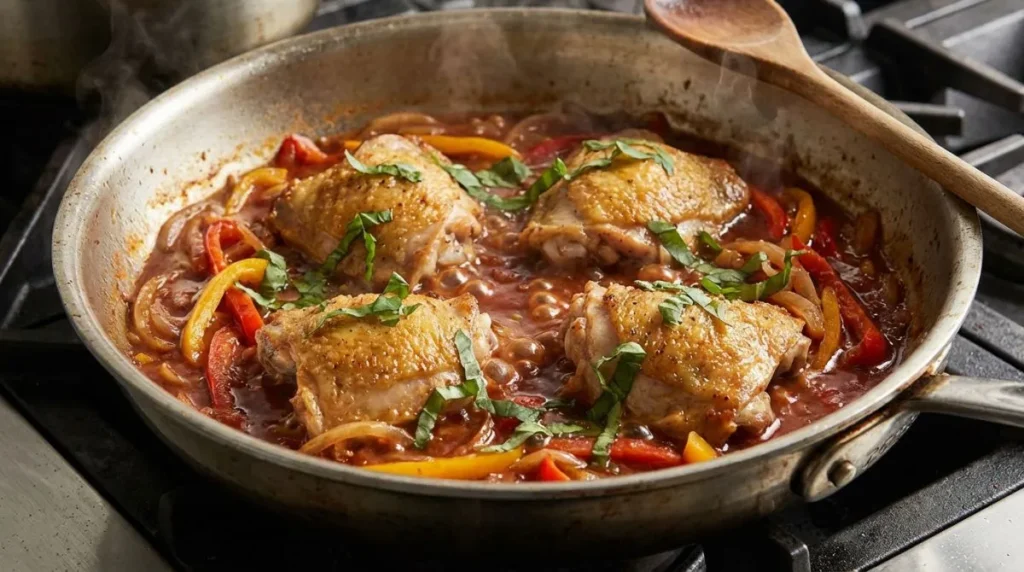
Pour in any juices that accumulated on the plate where the chicken was resting—that’s liquid flavor!
Reduce heat to low, cover the pan partially (leave a small gap for steam to escape), and simmer for 30-40 minutes.
How to tell it’s done: The chicken should be tender (internal temp 175°F/80°C for thighs), and the peppers should be meltingly soft.
Step 6: Finishing Touches
If the sauce looks too thin, remove the chicken and boil the sauce over high heat for 2-3 minutes to thicken it.
Turn off the heat. Stir in the fresh basil leaves. Taste the sauce and adjust salt and pepper if needed. Serve immediately.
Chef’s Tips for Perfect Chicken and Peppers Every Time
To ensure your chicken and peppers turns out restaurant-quality, follow these expert tips:
- Always Use Chicken Thighs: For the most authentic Roman style flavor and texture, bone-in, skin-on chicken thighs are superior. They withstand the braising time without drying out. If you love cooking with juicy chicken thighs, you might also enjoy our popular Chicken Adobo recipe.
- Slice Peppers Uniformly: Cut your bell peppers into even strips (about 1 inch wide). This ensures they cook at the same rate and melt perfectly into the sauce without disappearing completely.
- Don’t Rush the Sear: Take the time to get a deep golden-brown crust on the chicken skin. This “fond” (browned bits) at the bottom of the pan is the secret to a rich, complex sauce.
- Deglaze with Purpose: When adding the white wine, scrape the bottom of the pan vigorously. This lifts all that caramelized flavor into the sauce.
- Let the Flavors Marry: Like many Italian stews, this dish tastes even better the next day. If you have time, make it ahead and reheat it gently—the flavors will be deeper and more cohesive.
3 Common Mistakes to Avoid When Making Chicken and Peppers
Even with a simple chicken and peppers recipe, small missteps can lead to lackluster results. Here is how to avoid them:
1. Overcrowding the Pan (The Enemy of Crispiness)
The Mistake: Adding all the chicken pieces at once to speed up the process.
The Science: When you pack the pan too tightly, the temperature of the pan drops drastically. Instead of searing (which requires high heat to trigger the Maillard reaction for flavor and color), the chicken begins to steam in its own juices. Steamed chicken is pale, flabby, and lacks that rich, savory depth we want.
The Fix: Sear the chicken thighs in batches. Give each piece at least an inch of space. It takes a few extra minutes, but the golden-brown crust is the foundation of the entire dish’s flavor profile.
2. Undercooking the Peppers and Onions
The Mistake: Rushing the vegetable cooking stage.
The Science: Bell peppers and onions contain natural sugars and water. If you cook them quickly on high heat, they might burn on the outside while remaining raw and crunchy inside. For this Roman-style dish, we want the vegetables to break down slightly, releasing their sugars to balance the acidity of the tomatoes and wine.
The Fix: Be patient. Sauté the chicken and peppers and onions base over medium heat until they are truly soft and the onions are translucent, not just browned. This “sweating” process is what creates the sweet, jammy consistency of the sauce.
3. Using the Wrong Wine (or “Cooking Wine”)
The Mistake: Using a bottle labeled “cooking wine” from the supermarket aisle.
The Science: “Cooking wines” are often loaded with salt and preservatives that can make your sauce taste metallic or overly salty as it reduces. Since the wine concentrates as it cooks, any off-flavors will become stronger.
The Fix: Use a dry white wine that you would actually enjoy drinking, such as Pinot Grigio or Sauvignon Blanc. The alcohol evaporates during cooking, leaving behind only the delicate acidity and fruit notes that cut through the richness of the chicken fat. If you don’t drink alcohol, use a high-quality chicken bone broth with a squeeze of lemon juice to mimic that essential acidity.
Detailed Side Dish Recipes
While you can serve this one pan chicken and peppers with just a loaf of bread, elevating your side dishes turns this into a feast.
Creamy Polenta (The Classic Pairing)
Polenta is the traditional Roman accompaniment for chicken and peppers.
- Bring 4 cups of water (or chicken broth) to a boil.
- Slowly whisk in 1 cup of cornmeal.
- Reduce heat to low and cook, stirring often, for 30-40 minutes.
- Stir in 2 tablespoons of butter and 1/2 cup of Parmesan cheese.
- Serve the chicken and peppers right on top, letting the sauce pool in the creamy polenta.
The Perfect “Scarpetta” Bread
“Fare la scarpetta” means “make the little shoe”—using bread to mop up the sauce. For this chicken and peppers recipe, you want a rustic Italian loaf with a hard crust and a soft, airy interior. Slice it thick, brush with olive oil, and grill it for a minute to add a smoky crunch that contrasts with the tender bell peppers.
Variations for This One Pan Chicken and Peppers Recipe
This recipe is versatile. Here are a few ways to tweak it while keeping the one pan chicken and peppers spirit alive.
Spicy Calabrian Style
If you like heat, add 1-2 teaspoons of crushed Calabrian chili paste or red pepper flakes when you sauté the onions. This transforms the dish into a spicy chicken and peppers and onions delight that wakes up the palate.
With Mushrooms (Cacciatore Style)
To make this more “hunter style” (Cacciatore), add 8 ounces of sliced cremini mushrooms along with the bell peppers. The mushrooms add an earthy depth that pairs beautifully with the chicken thighs.
The Potato Addition
Want to make it even heartier? Add 1 pound of baby potatoes (halved) to the pan when you add the tomatoes. They will cook in the sauce and absorb all the flavors, making this a true one pan chicken and peppers meal with no need for extra sides.
What to Serve with Italian Chicken and Peppers
This dish is saucy, so your side dishes should be vehicles for soaking up that liquid gold.
1. Crusty Bread (The “Scarpetta”)
In Italy, fare la scarpetta (making the little shoe) means using a piece of bread to mop up the last of the sauce on your plate. A loaf of rustic sourdough or Ciabatta is non-negotiable here. Slice it thick, maybe toast it with a rub of garlic and olive oil.
2. Creamy Polenta
Polenta is the classic pairing in Northern Italy, but it works beautifully here too.
- Quick Recipe: Boil 4 cups of water/milk mix. Whisk in 1 cup of cornmeal. Simmer for 30 minutes, stirring often. Finish with a knob of butter and a handful of Parmesan cheese. The creamy texture contrasts perfectly with the chunky sauce.
3. Pasta
Serve the chicken and sauce over a bed of pasta. Short shapes work best to catch the sauce.
- Best Shapes: Penne, Rigatoni, or Fusilli.
- Tip: Toss the pasta with a little butter before topping with the chicken mixture to prevent sticking.
4. Low Carb Options
If you are watching your carbs, this dish is already naturally compliant.
- Cauliflower Rice: Sautéed simply with olive oil.
- Zucchini Noodles: Toss them in the hot sauce right before serving so they don’t get mushy.
Storing and Reheating Leftovers
This is one of those magical dishes that tastes even better the next day, allowing the flavors to meld further.
Storing in the Fridge
Let the dish cool completely to room temperature. Transfer to an airtight container. It will keep well for 3-4 days.
- Pro Tip: Store the chicken submerged in the sauce to keep it moist.
Freezing Instructions
Yes, you can freeze this! It freezes beautifully for up to 3 months.
- Cool completely.
- Place in a freezer-safe container or heavy-duty freezer bag.
- Thaw overnight in the refrigerator before reheating.
Reheating for Best Results
- Microwave: Good for a quick lunch. Cover with a damp paper towel to prevent splattering.
- Stovetop (Preferred): Place leftovers in a skillet over medium-low heat. Add a splash of water or broth to loosen the sauce. Cover and heat until the chicken is warmed through (about 10-15 minutes). This method preserves the texture of the peppers best.
- Oven: Place in a baking dish, cover with foil, and bake at 350°F (175°C) for 20 minutes.
Chicken and Peppers Recipe FAQ
Q: Can I use chicken breasts instead of thighs?
A: Yes, you can, but we highly recommend chicken thighs for this chicken and peppers recipe. Thighs have more fat and connective tissue, which keeps them moist during the long simmer. If you must use breasts, sear them quickly and remove them, then add them back only for the last 5-10 minutes of cooking to prevent them from drying out.
Q: Do I need to peel the peppers?
A: No, peeling is not necessary for this rustic chicken and peppers recipe. The skins soften beautifully during the braise. However, if you find pepper skins difficult to digest, you can roast and peel them beforehand, adding them to the pan later in the cooking process.
Q: Is this recipe gluten-free?
A: Yes! As long as you double-check that your canned tomatoes and broth (if using) are certified gluten-free, this Italian chicken and peppers dish is naturally gluten-free. Serve it over polenta or rice instead of pasta or bread to keep the entire meal gluten-free.
Q: Can I make this ahead of time?
A: Absolutely. In fact, like many stews and braises, this chicken and peppers recipe tastes even better the next day. The flavors of the chicken thighs, peppers, and onions have more time to meld together. Just reheat it gently on the stove before serving.
Q: Can I use red wine instead of white?
A: Traditionally, Pollo alla Romana uses white wine for a lighter, brighter flavor profile. Red wine will give you a much richer, heavier sauce (more like Coq au Vin). While it will still be edible, it won’t be the authentic chicken and peppers recipe we are aiming for here. Stick to a dry Pinot Grigio or Sauvignon Blanc for the best results.
Final Thoughts
Mastering this Easy Chicken and Peppers Recipe is more than just learning a new dinner dish; it is about embracing the Italian philosophy of cooking. It is about patience, quality ingredients, and the joy of feeding people you love. Whether you serve it for a casual weeknight dinner or a Sunday family feast, this chicken and peppers recipe is sure to become a cherished favorite.
Pro Tip for the Ultimate Experience:
If you have the time, let the finished dish rest in the pan, off the heat, for about 10-15 minutes before serving. This allows the juices in the chicken thighs to redistribute and the sauce to thicken slightly as it cools. Serve it with a final drizzle of your best extra virgin olive oil and a sprinkle of flaky sea salt to make the flavors truly pop.
We hope you enjoy making (and eating!) this classic Roman dish. If you try this chicken and peppers recipe, please leave a comment below and let us know how it turned out. Buon appetito!
Recipe Card
Easy Chicken and Peppers (One Pan Roman Style)
- Prep Time: 15 mins
- Cook Time: 45 mins
- Total Time: 1 hr
- Servings: 4
- Cuisine: Italian (Roman)
- Course: Main Course
Description:
An authentic, one-pan Chicken and Peppers recipe featuring tender chicken thighs, sweet bell peppers, and onions braised in a white wine tomato sauce.
Ingredients:
- 4-6 Chicken thighs (bone-in, skin-on preferred)
- 3 Bell peppers (1 Red, 1 Yellow, 1 Green), sliced into 1-inch strips
- 1 large Yellow onion, sliced
- 4 cloves Garlic, thinly sliced
- 1/2 cup Dry white wine (Pinot Grigio or Sauvignon Blanc)
- 1 can (28 oz) San Marzano plum tomatoes, hand-crushed
- 3 tbsp Extra virgin olive oil
- Salt and freshly cracked black pepper, to taste
- 1/4 cup Fresh basil leaves, torn
- Optional: 1/2 tsp Red pepper flakes for heat
Instructions:
- Prep Chicken: Pat chicken thighs completely dry with paper towels. Season generously with salt and pepper on all sides.
- Sear: Heat olive oil in a large skillet or Dutch oven over medium-high heat. Place chicken skin-side down. Cook undisturbed for 5-7 minutes until skin is deep golden brown and crispy. Flip and cook for 2 minutes. Remove to a plate.
- Sauté Veggies: Reduce heat to medium. Add sliced onions and bell peppers to the pan drippings. Sauté for 6-8 minutes until softened. Add garlic and red pepper flakes (if using) and cook for 1 minute until fragrant.
- Deglaze: Pour in the white wine. Scrape the bottom of the pan with a wooden spoon to release the browned bits. Simmer for 2-3 minutes until reduced by half.
- Simmer: Add the crushed tomatoes and their juices. Stir to combine. Return the chicken to the pan, nestling it into the sauce (try to keep the skin exposed). Pour in any resting juices from the plate.
- Cook: Cover partially and simmer on low heat for 30-35 minutes, or until chicken is tender (165°F) and peppers are soft.
- Serve: Taste sauce and adjust salt/pepper. Stir in fresh basil. Serve hot with crusty bread.
Nutrition (per serving):
- Calories: ~480 kcal
- Protein: 28g
- Carbs: 14g
- Fat: 32g
- Fiber: 4g