
Chicken Liver Pate Recipe
If you are looking for a chicken liver pate recipe that actually turns out smooth and creamy, you are in the right place. Making pate at home might sound a little intimidating, but it is much cheaper than buying it at a deli and surprisingly simple to pull off.
My first few attempts years ago were completely dry and grainy. It took some trial and error, but I finally figured out how to master an easy chicken liver pate recipe that gives you that perfect, melt-in-your-mouth texture without any bitter aftertaste—and it all comes down to one simple secret ingredient. Grab a glass of wine and some toasted baguette slices; once you see how easy this is, you will be making it for every get-together.
Table of Contents
Why This is the Best Chicken Liver Pate Recipe
- No bitter aftertaste: I will show you exactly how to trim the meat so you don’t get that weird metallic bite that ruins a lot of homemade pates. It makes a huge difference.
- Actually smooth and creamy: No grainy texture here. Adding the butter slowly and using just a splash of heavy cream gives it that perfect, melt-in-your-mouth feel.
- Super simple to make: Seriously, if you know how to cook onions in a pan and turn on a blender, you can pull off this easy chicken liver pate recipe without breaking a sweat.
- Great for making ahead: I actually prefer making this a day or two before I have friends over. Sitting in the fridge overnight makes the flavors blend together beautifully.
5 Pro Tips for the Easy Chicken Liver Pate Recipe
Before we get to the stove, let me share a few secrets I’ve learned the hard way. If you want your chicken liver pate recipe to turn out flawlessly smooth every single time, keep these five rules in mind:
1. Trim the Hidden Bitterness Away
Even if you buy high-quality livers, you must inspect them closely before cooking. Take a sharp knife and trim away any white connective tissues, fat, or tiny green spots (which are remnants of the gallbladder). Leaving these intact is the secret culprit behind that bitter, metallic aftertaste that ruins many homemade pates. Taking an extra two minutes to clean them properly guarantees a sweet, mellow flavor.
2. Rinse and Pat Dry (Don’t Skip This!)
This is a game-changer. Always rinse your livers under cold water and thoroughly pat them dry with paper towels before cooking. If they go into the pan wet, they will end up steaming in their own juices instead of getting that beautiful, flavorful sear in the butter.
3. The 160°F Rule: Do Not Overcook
Overcooking is the number one reason pate turns out dry and grainy. You want to sauté the livers just until they are browned on the outside but still slightly pink inside. If you have a meat thermometer, aim for an internal temperature of 160°F and immediately take them off the heat. They will continue to cook in the covered pan (carryover cooking) and safely reach 165°F without drying out — the minimum safe temperature recommended by the USDA poultry safety guidelines
4. Control the Creaminess Gradually
When it is time to puree the mixture, whether you are using a food processor or a handheld immersion blender, add your heavy cream one tablespoon at a time. This gives you complete control over the consistency. If it looks a bit thick, just drizzle in a little more cream until it reaches that perfect, silky-smooth texture.
5. Seal the Surface to Prevent a Crust
Air is the enemy of a good pate. When exposed to air in the fridge, the top layer will oxidize and turn an unappetizing dark gray. To prevent this, you have two choices: either press a piece of plastic wrap directly onto the surface of the spread, or pour a thin layer of melted butter over the top to seal it completely. (I usually stick to the plastic wrap method for a slightly lighter option!).
Ingredients & Easy Substitutions
When you look at a traditional French pate, you will often see duck or goose liver on the ingredient list. But let’s be honest—fresh chicken livers are much easier to find at the local grocery store and way more budget-friendly. What makes this chicken liver pate recipe so great is its flexibility. You only need a few high-quality basics, and I have included plenty of easy swaps below.
The Core Ingredients
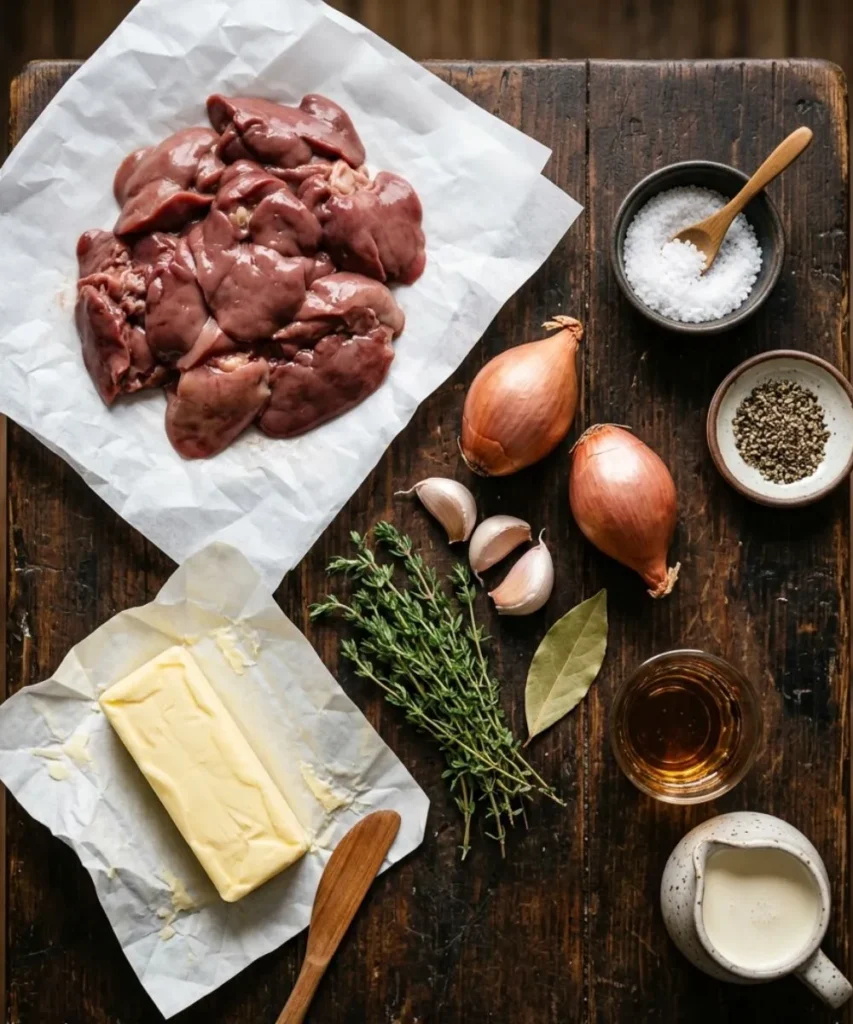
- Chicken Livers: You need about 1 pound (half a kilo). I always try to grab organic chicken livers when I can find them for the best flavor, but regular ones work fine too. Just make sure they are well-trimmed.
- Unsalted Butter: I prefer grass-fed unsalted butter so I can control the amount of sea salt myself. Make sure it is softened at room temperature so it blends easily.
- Aromatics (Shallots & Garlic): Shallots give a mild, sweet flavor that pairs perfectly with the meat. If you don’t have them, a sweet Vidalia onion is the best substitute. For the garlic, fresh cloves are great, but if you are in a hurry, 2 teaspoons of jarred minced garlic or garlic paste will do the trick.
- Seasoning & Herbs: You need sea salt, black pepper, a bay leaf, and fresh thyme leaves. If you don’t have fresh thyme, you can easily substitute 1 teaspoon of dried thyme for the tablespoon of fresh.
The Secret to a Silky Texture
- Heavy Cream: A splash of heavy cream is my personal secret for getting that ultra-smooth, restaurant-quality texture.
- Cognac or Brandy: A little Cognac deglazes the pan and adds a rich depth. Regular brandy or even dry Sherry are excellent alternatives if you want that classic flavor.
Dairy-Free & Alcohol-Free Options
I want everyone to enjoy this chicken liver pate recipe, so here is how to adapt it to your needs:
- Need it dairy-free? Swap the heavy cream for full-fat coconut cream. For the butter, you can use ghee, rendered chicken fat (schmaltz), duck fat, or even extra virgin olive oil. (Using duck fat gives it an incredibly authentic French taste!).
- Prefer no alcohol? Skip the liquor entirely and use water or a rich chicken broth to deglaze your skillet. It still tastes amazing.
Essential Equipment You’ll Need
You don’t need a professional kitchen to pull this off. Gather these basic tools before we start cooking:
- A Large Skillet or Sauté Pan: For sautéing the aromatics and gently cooking the meat.
- A Food Processor or Immersion Blender: This is crucial for achieving that silky-smooth texture. A standard blender works too, but a food processor makes the job much easier.
- Meat Thermometer: Highly recommended to ensure you hit that perfect 160°F internal temperature without overcooking the livers.
- Ramekins or Small Glass Jars: You will need two or three small containers to store and chill the pate so it sets properly.
How to Make This Creamy Chicken Liver Pate Recipe (Step-by-Step)
Grab your heavy sauté pan and let’s get cooking. I promise you, the process is much faster than you might think.
Step 1: Prep and clean the livers
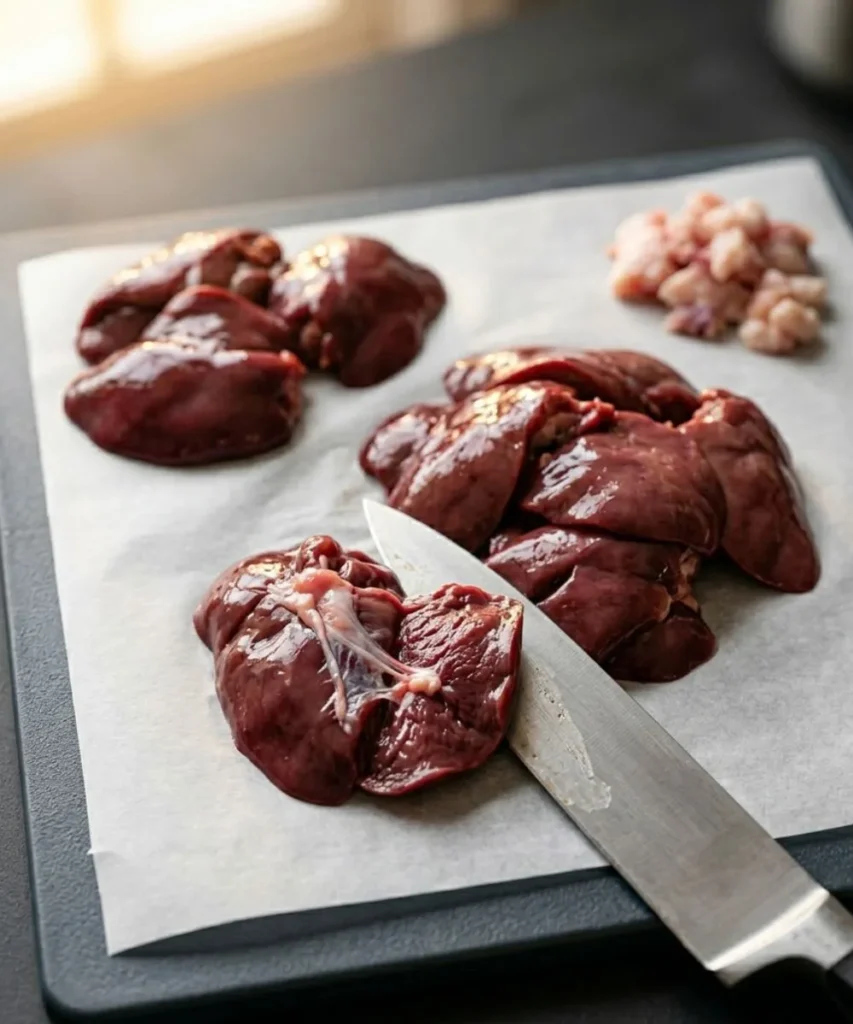
Start by giving your livers a quick rinse under cold water, then pat them completely dry with paper towels. Take a sharp knife and cut away any white connective tissue or green spots. Taking an extra minute to do this guarantees a smooth puree without any bitter taste.
[Insert Step 1 Image: Raw trimmed chicken livers on a cutting board]
Step 2: Sauté the shallots first
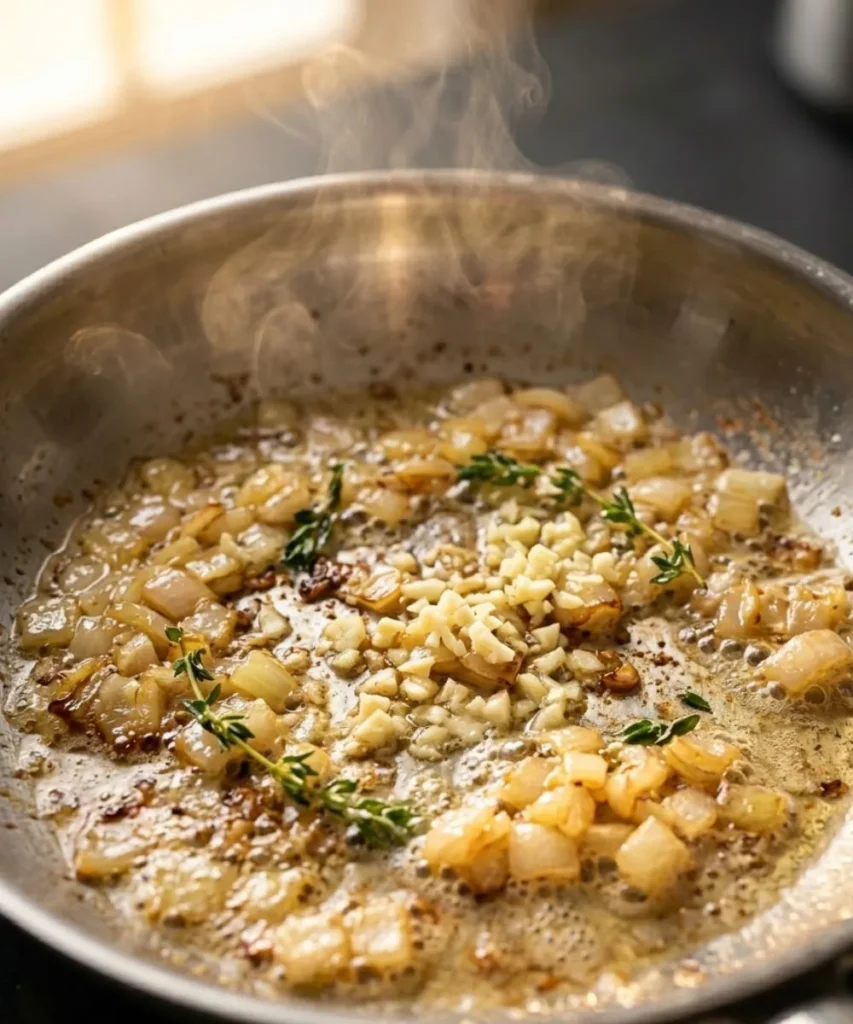
Place a large skillet over medium heat and melt a tablespoon of butter. Toss in your roughly-minced shallots and let them cook for about 3 to 4 minutes until soft. Here is a chef’s trick: wait to add your minced garlic until the very last minute. If you put the garlic in too early, it can burn and turn bitter. Once the garlic hits the pan, wait until that amazing aroma fills your kitchen, then move to the next step.
Step 3: Cook the livers and deglaze
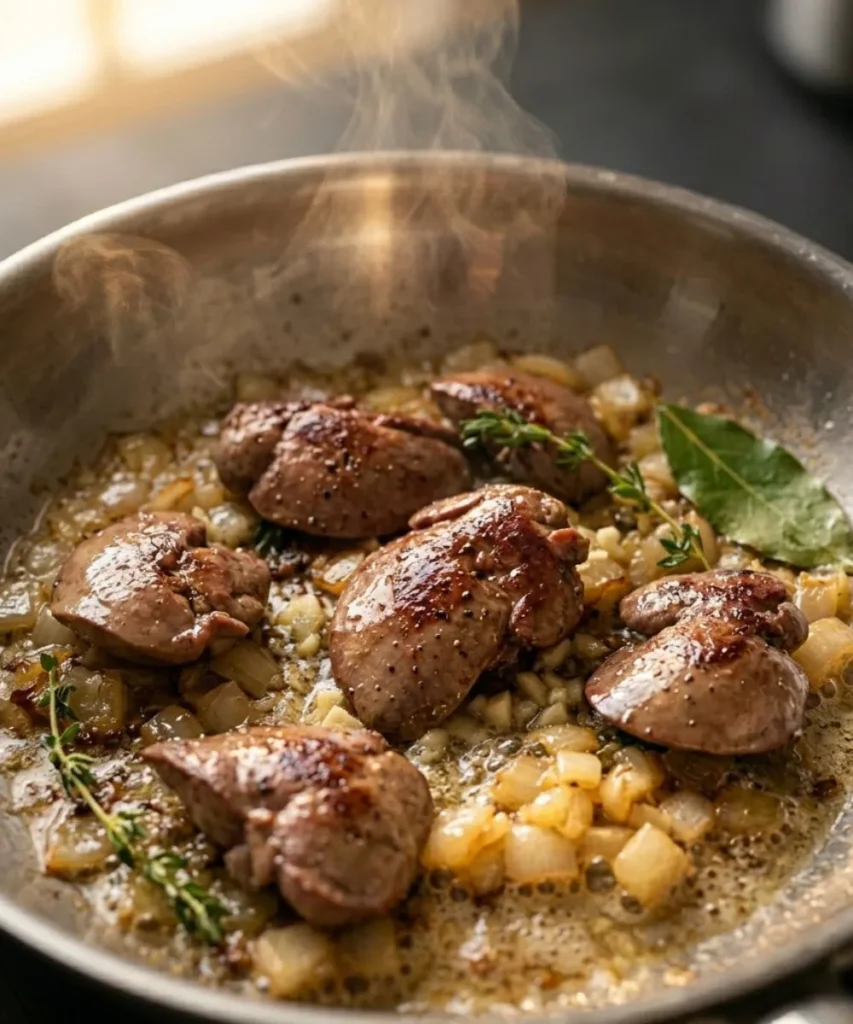
Add the dried livers to the pan along with the fresh thyme, bay leaf, salt, and pepper. Cook them for about 4 to 6 minutes. You want them light brown on the outside but still barely pink inside. Now, pour in the Cognac. Let it bubble and cook off for a minute or two. This burns away the harsh alcohol but leaves a deep, rich flavor behind.
(Note: If you prefer the alternative method of simmering the livers in water instead of butter, make sure to drain off the liquid completely before blending).
[Insert Step 3 Image: Cooked livers in the skillet, slightly pink inside]
Step 4: Puree and taste
Discard the bay leaf. Transfer everything from the pan into a food processor, a good blender, or use an immersion blender right in a deep bowl. Turn the machine on and process on high. While it is running, drop in your softened butter and pour in the heavy cream. Process for about 1 to 2 minutes until it is completely silky-smooth. Stop and taste it here! If it needs a little more sea salt or black pepper, now is the time to add it.
Step 5: Cover, chill, and garnish
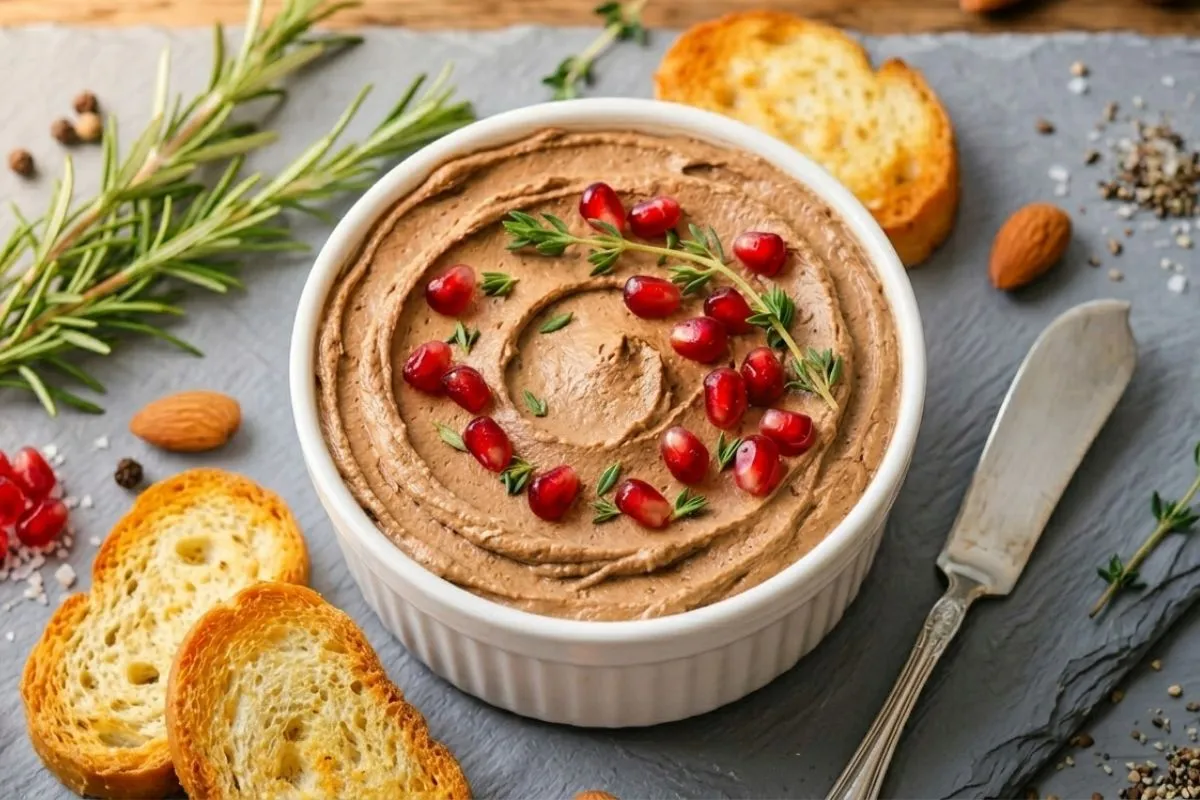
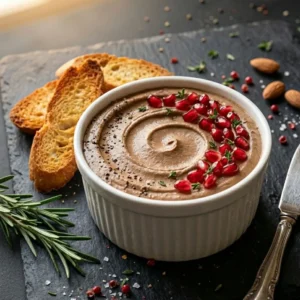
Scoop the warm pate into ramekins or a nice serving bowl. To stop the air from turning the top layer dark gray, press a piece of plastic wrap flush against the top of the pate. I like to secure it tightly with rubber bands around the ramekins. Refrigerate for at least 4 hours until firm. When you are ready to serve, the pate might look a bit plain, so garnish it with some fresh thyme leaves and a sprinkle of bright red pomegranate seeds for a beautiful pop of color!
[Insert Step 5 Image: Ramekins filled with pate, garnished with thyme and pomegranate seeds]
Troubleshooting Common Pate Problems
Let’s be real, even experienced home cooks run into minor hiccups in the kitchen. If your chicken liver pate recipe didn’t turn out exactly as you hoped on the first try, do not panic! I have made all these mistakes myself. Here is a quick guide to fixing the most common issues:
| The Problem | The Cause | The Easy Fix |
|---|---|---|
| Grainy or Dry Texture | The livers were overcooked, or the mixture just needs a little more fat. | Turn the food processor back on and drizzle in an extra 1 to 2 tablespoons of heavy cream or melted butter until it smooths out. |
| Dark Gray Crust on Top | Oxidation. The surface was exposed to the air while chilling in the fridge. | It is completely safe to eat (just scrape it off if it bothers you). Next time, make sure the plastic wrap touches the surface directly, or use a melted butter seal. |
| Overpowering Metallic Taste | The livers were not trimmed properly, or you cooked them too long. | Next time, take an extra minute to trim away all white connective tissues, and don’t forget to add that bay leaf to neutralize the strong flavor. |
Serving Suggestions & Pairings
You have done the work, the pate has chilled beautifully, and now it is time to enjoy the fruits of your labor. Because this spread is so rich and flavorful, you want to pair it with things that offer a nice textural crunch.
Best Breads and Crackers
Let’s be real, the easiest and most classic way to enjoy this is smeared generously over toasted baguette slices, crostini, or crusty sourdough bread. If you prefer a lighter crunch, simple sea salt crackers, almond flour crackers, or even flaxseed crisps work wonderfully. Planning a party? Place a ramekin of this pate right in the center of a large charcuterie board alongside some sweet fig jam, cornichons (pickles), and sharp mustard. The sweet and tangy flavors cut through the richness of the meat perfectly.
Wine Pairings
If you want to elevate your evening and serve this like a true French bistro, pour yourself a glass of wine. A fruity Zinfandel pairs exceptionally well with the earthy flavors of the pate. If you prefer white wine, a crisp, dry Sauvignon Blanc or a slightly sweet Riesling balances the savory notes beautifully.
Make-Ahead, Storage, and Freezing
One of the main reasons I love making this for holiday parties is that it is the ultimate make-ahead appetizer. In fact, it actually tastes better the next day because the flavors have time to deepen and meld together in the fridge.
How long does chicken liver pate last in the fridge?
If you store it properly in an airtight container (with the plastic wrap or butter seal touching the surface), your pate will stay fresh and delicious in the refrigerator for up to 5 days. I always try to make it at least 24 hours before my guests arrive.
Can you freeze this chicken liver pate recipe?
Yes, you absolutely can! This chicken liver pate recipe freezes beautifully. If you have leftovers or just want to meal-prep a double batch, place the sealed ramekins straight into the freezer. It will keep its rich flavor for up to 3 months.
When you are ready to eat it, do not rush the process. Let it thaw gently overnight in the refrigerator. If the texture looks slightly separated after thawing, just give it a quick stir before serving.
Frequently Asked Questions (FAQs)
How do I get rid of the strong liver smell and taste?
The classic chef’s secret is to soak the raw chicken livers in milk for 1 to 2 hours before cooking. The milk draws out the blood and impurities, significantly mellowing out that strong metallic flavor and leaving you with a much sweeter, milder taste. Just be sure to rinse and pat them completely dry before sautéing!
Can I use frozen chicken livers for pate?
Yes, absolutely. However, the trick is to let them thaw slowly in the refrigerator overnight. Frozen livers tend to hold onto a lot of extra water, so you must drain them and pat them exceptionally dry with paper towels. If they go into the pan wet, they will steam instead of sear, which can ruin the texture.
Why did my pate turn out grainy instead of smooth?
This is usually caused by one of two things: either the livers were overcooked (cooked until they were completely brown and dry inside), or you didn’t add enough fat. Pate needs a good amount of butter or cream to create a smooth emulsion. If it looks grainy in the food processor, drizzle in a little more melted butter or heavy cream until it smooths out.
Is it safe to eat chicken liver pate if it is pink inside?
Yes! In fact, you want the livers to be slightly pink in the center. As long as they reach a safe internal temperature of 160°F to 165°F, they are perfectly safe to eat. Cooking them until they are completely brown all the way through is the fastest way to end up with a dry, crumbly spread.
Is there a chicken liver pate recipe made with mayo?
Yes! While traditional French pate relies on butter and heavy cream, using mayonnaise is a very popular alternative, especially if you are looking for a dairy-free option or making a traditional Jewish-style chopped liver. You can substitute the butter and cream in this recipe with a few tablespoons of high-quality mayonnaise to achieve a wonderfully creamy texture with a slightly tangy flavor.
Final Thoughts
There you have it! You have officially mastered the art of French cooking right in your own kitchen. I hope this guide has taken away any intimidation you felt about cooking livers. Once you taste how rich, creamy, and decadent this homemade version is, you will proudly serve it at every gathering.
If you try this chicken liver pate recipe, please let me know how it turned out in the comments below, and don’t forget to leave a 5-star rating on the recipe card! Happy cooking!
Creamy French Chicken Liver Pate
Ingredients
- 1 lb 500g chicken livers (well-trimmed)
- ½ cup 1 stick unsalted butter (softened at room temperature, divided)
- 2 medium shallots roughly minced
- 2 cloves garlic minced
- 1 tablespoon fresh thyme leaves or 1 tsp dried thyme
- 1 bay leaf
- 2 tablespoons Cognac or brandy / dry Sherry
- 2 tablespoons heavy cream
- 1 teaspoon sea salt adjust to taste
- ½ teaspoon black pepper
- Optional garnish: Fresh thyme sprigs and pomegranate seeds
Instructions
- Prep the livers: Rinse the chicken livers under cold water and pat them completely dry with paper towels. Cut away any white connective tissues or green spots.
- Sauté the aromatics: Melt 1 tablespoon of the butter in a large skillet over medium heat. Add the minced shallots and cook for about 3 to 4 minutes until soft. Add the garlic and cook for 1 more minute until you can smell the aroma.
- Cook the meat: Add the dried livers, fresh thyme, bay leaf, sea salt, and black pepper to the pan. Cook for 4 to 6 minutes, stirring occasionally. You want the livers to be light brown on the outside but still slightly pink in the center.
- Deglaze: Pour the Cognac into the skillet. Let it bubble and cook off for about 1 to 2 minutes. Turn off the heat and throw away the bay leaf.
- Blend: Transfer everything from the warm skillet into a food processor. Turn it on high. While it is running, drop in the rest of your softened butter (a little at a time) and pour in the heavy cream. Blend for 1 to 2 minutes until it is completely smooth. Taste it and add a pinch more salt or pepper if you think it needs it.
- Chill and set: Scoop the pate into small ramekins or a glass jar. To stop the top from turning gray, press a piece of plastic wrap directly onto the surface of the pate. Put them in the fridge for at least 4 hours (or overnight) to firm up.
- Serve: Garnish with a few pomegranate seeds and fresh thyme. Serve cold with crackers or toasted bread.
Notes
- Storage: Keep the pate in an airtight container in the fridge for up to 5 days. Make sure the plastic wrap is always touching the surface.
- Freezing: You can freeze this for up to 3 months. Let it thaw slowly overnight in the fridge, and give it a quick stir before serving.
- Dairy-Free Option: Swap the heavy cream for coconut cream, and use ghee, duck fat, or extra virgin olive oil instead of butter.